Horror on the Orient Express by Down With People

INTRODUCTION
Original SA post
INTRODUCTION
Horror on the Orient Express, first published in 1991 for CoC 4th edition, is a classic award-winning big box campaign that's considered one of the classics of the game alongside Masks of Nyarlathotep. Aboard the famous Simplon Orient Express, investigators go on a massive tear across Europe in search of the pieces of the Sedefkar Simulacrum, fighting cultists and monsters every step of the way. The original box set has become something of a rare collector's item, but it was brought back by Kickstarter in 2014 for 7th edition with several totally new scenarios added. It's considered by many to be one of the best RPG campaigns ever written.
Is it? Well…
Even back in the 90s, HotE was criticised for being (unsurpisingly) extremely railroady. The new edition has included a bunch of advice to accommodate the investigators fucking with the carefully laid-out story, but it's not enough. The scenarios are full of setpieces that make for great horror literature but as gaming essentially require the players to sit there and listen to you talk at them; some of the worst parts of the campaign have awful things happening around them that they're given absolutely no power to change. On top of that, it's an extremely deadly campaign, with something like a 70% investigator attrition rate if you don't pull your punches.
That aside, it's still a fantastically written campaign with scenes that you and your players will probably remember for the rest of your lives. Get ready for, in no particular order: brutal cult-on-cult violence, magic train sets, vampires, the Baba Yaga, blackshirts, olms, dragons, animal chimerae, clockworks, a night at the opera, a journey through the Dreamlands, the ghost of Johann Winckelman and truly horrific amounts of skin.
The books supplement the black-and-white art of the first edition with historical photographs. It's great.
What's in the box?
The HotE PDF set will run you like $60 and then uh, exponentially more if you actually wanted the hardcovers in a box (which doesn't in fact seem to be available at the moment?). But for your money you're getting a lot of product here. The scenarios themselves are spread across three books, with another three books giving you a campaign guide, handouts and a set of NPCs you can have appearing on the train. There's also maps of Europe showing the route of the Express (and air routes if your players are smartasses, but more on that later), maps of the major stops for both the keeper and players, maps of the individual train cars, an Orient Express travel companion and a little Sedefkar Simulacrum prop for the players so they can keep track of the pieces. Like I said, a lot of product.
For this update, I'll be glossing over the campaign guide. A lot of it is pretty dry historical information – if you're really curious about the nitty-gritty of 1920s train travel, you can do your own research.
The Simplon Orient Express
The campaign guide opens up with a brief but informative history of the SOE, from its genesis by Georges Nagelmackers to its gradual decline in the late 70s. In the 20s where the main campaign takes place, the Express is the way to travel Europe. The name of the Express is synonymous with luxury and its passengers are the rock stars of European society – socialites, businessmen and even royalty are the kind of people investigators will be rubbing shoulders aboard the train. The Express line stretches from Paris to Constantinople with stops in pretty much every major city along the way. These places are where most of the action actually happens, with the Express serving as a kind of base of operations for the investigators.
There's a full guide to the operations of the train, including full descriptions of the train staff and their roles, details for every cab and carriage and a full list of the Express' stops and checkpoints. There's more than enough information here for the keeper to field any question the players might throw at them, including more esoteric details like the thickness of the carriage walls or the contents of the emergency equipment boxes. Particularly relevant to investigators is a discussion on travelling armed – handguns and shotguns are easily acquired and will pass through most customs with only small fees, but knives and other concealable melee weapons are considered low-class criminal weapons. And sorry to say, but the classic tommy-gun is an expensive import that's more trouble than it's worth.

There's also a surprisingly in-depth section on international air travel in 1923. There were plenty of trained pilots left over after the war, along with the aircraft and other pieces of infrastructure necessary to make commercial flights a reality. War planes like the Farman Goliath were converted to accommodate passengers, complete with in-flight refreshments. However, planes were also noisy, uncomfortable, under-heated and often required emergency landings. This is to say nothing of the potential disasters that could (and did) occur from trying to navigate the totally uncontrolled airspace.
Why's this section here? It's possible at one point or another that the players will bring up the possibility of flying to their destination, especially by the end of the campaign. The book's very forthcoming with all this period-relevant information, but doesn't actually give you much to work with if the players are dead-set on flying. The book suggests a few kinks you can throw in if you wanna try and get players back on the track, but I don't like this approach. My advice? Sit the players down and say, 'Listen, all the cool stuff is on the train, there's nothing I can do for you if you don't get on the train, the campaign has Orient Express in the title so please, pretty please, get on the fucking train.'

The numbers between locations are the miles.
The Campaign Itself
HOTE is made up of 19 scenarios, 8 of which are optional and can be left out if so desired. Out of the optional scenarios, four of them happen in the same time-frame as the rest of the campaign and have logical places you can slot them in. Two of those take place entirely in the Dreamlands. The other four take place in a variety of alternate time periods from 330 AD to 2013. The 2013 scenario is meant to be a kind of coda to the rest of the campaign, but certain things the investigators do can trigger the others, like uncovering a certain journal.
For this review, I'll be covering every 1923 scenario in chronological order, saving the alternate time period ones for the end.
The investigators start in London then travel through France, Italy, Croatia, Serbia, Bulgaria and finally Constantinople, then back again. They are running a tight schedule and will have at most a few days in each city, but the game also recommends playing a little loose with the train schedules so that there's always an Orient Express train available when they need it (for the record, in the winter that the game takes place in there should only be three trains a week if you wanted full historical accuracy).
The Sedefkar Simulacrum
Over the course of the campaign, the investigators are trying to collect the various pieces of a Mythos statue called the Sedefkar Simulacrum. It's extremely ancient, probably pre-dating humanity, but much like the One Ring it wants to return to the area that's now becoming modern Turkey. It was unearthed in Byzantium and came into the hands of a crazy motherfucker named Sedefkar, who was the first to unlock its power and commune with the god he called the Skinless One (who is an avatar of our old buddy Nyarlathotep). He also wrote the Sedefkar Scrolls, a mad set of grimoires that taught him all of the wisdom he had learned from his god.
It's changed hands many times since the fall of Byzantium and has found many would-be owners who craved its power. All of them want it and will do whatever it takes to get it.
The Investigator Survival Guide
HOTE is absolutely brutal on investigators to the point that I've heard of one dude actually framing the sheet for a character who made it all the way to the end alive and sane. Between the constant physical danger and regular sanity-shattering horrors you'll be lucky if you finish with the same investigator you started with.In addition, there's multiple encounters that could end up a TPK if the players roll bad and the GM is particularly merciless. There's opportunities in a couple of the scenarios to pick up powerful magic artefacts, but while they're good I don't think they're game changers – plus both of them have hefty drawbacks.
One thing I did when I was setting up a game and which the book also recommends doing is to make a character with a backup in mind, some friend or relative who's in communication with the team and will be willing to pick up the slack if things go bad. There's also not one but two very capable NPCs shadowing the investigators for pretty much the entire adventure, either of whom could come through in a pinch to save the team's bacon. The book even suggests using rules from the pulpier Achtung! Cthulhu to make the PCs stronger.
For this adventure, all the CoC classics like Library Use and Charm are vital for survival, along with some combat skills for the latter scenarios when things get hairy. In addition, a good team will have a strong mix of languages – French is the lingua franca of the Express, but without a translator for each stop along the way investigations will become very difficult.
The book finishes with a couple of essays. The first, A Continent of Horrors, goes through every country in Europe and lists inspirational material and CoC books that use that country as a setting. Celluloid Train Horrors discusses the history of railways in horror fiction. Finally, there's a page of random newspaper headlines that the keeper can drop into the campaign like tavern rumours.
So that's the campaign book! Next update, we'll get right into the campaign proper.
DANCERS IN AN EVENING FOG – PART ONE
Original SA post DANCERS IN AN EVENING FOG – PART 1Wherein the investigators visit the seat of empire, answer the call of an old friend in need, and a lengthy journey becomes desirable.
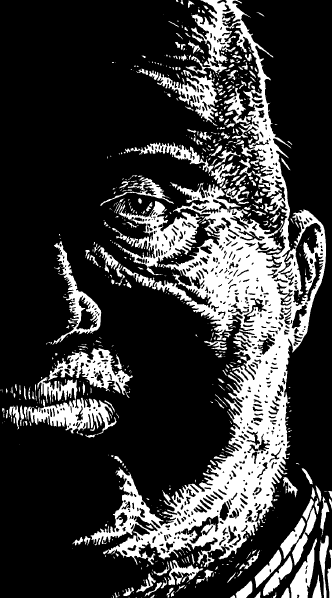
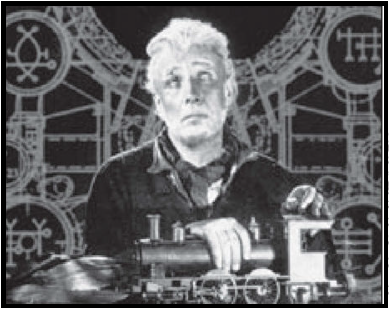
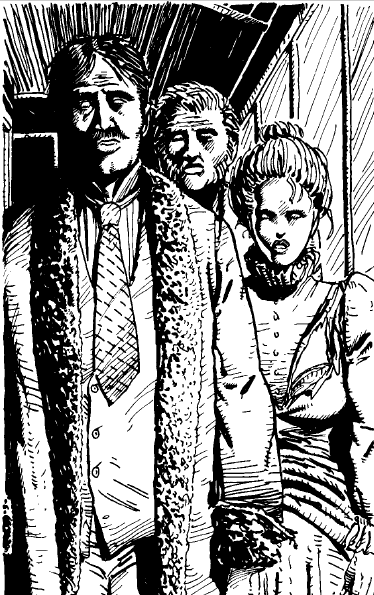
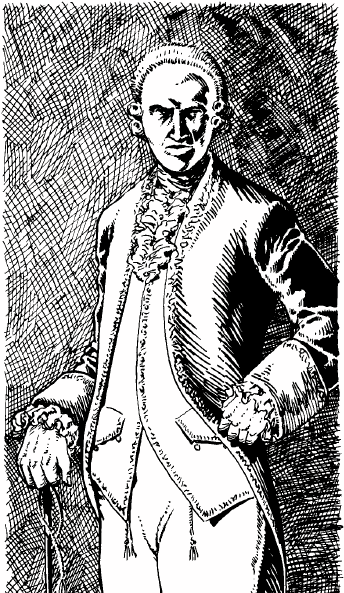
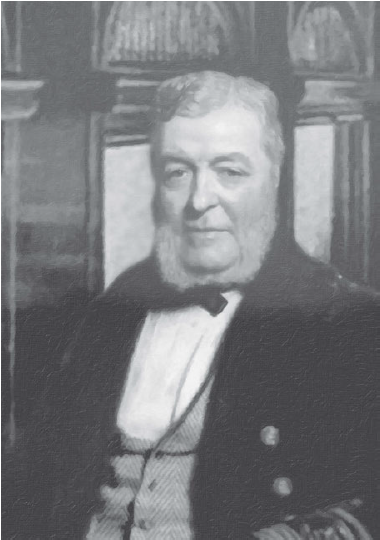
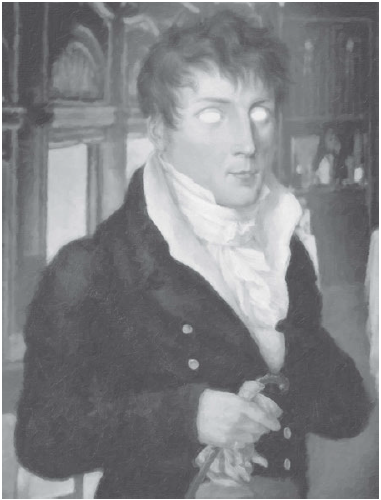
This adventure starts with the investigators in London, either brought there by a previous adventure or invited there by their old buddy old pal Professor Julius Arthur Smith. Smith is a well-travelled scholar and parapsychologist with half a dozen Science skills and a Bon Mot skill at 88. He's a member of the Oriental Club and his only friend in the world (aside from the investigators, perhaps) is his manservant Beddows. The book makes it clear he's a cool and likeable guy and if you play him right, it shouldn't be too hard to make the players love him.
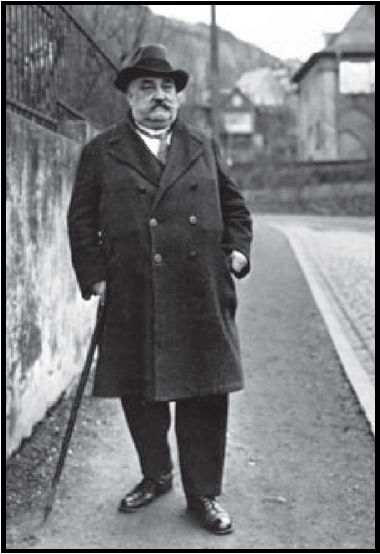
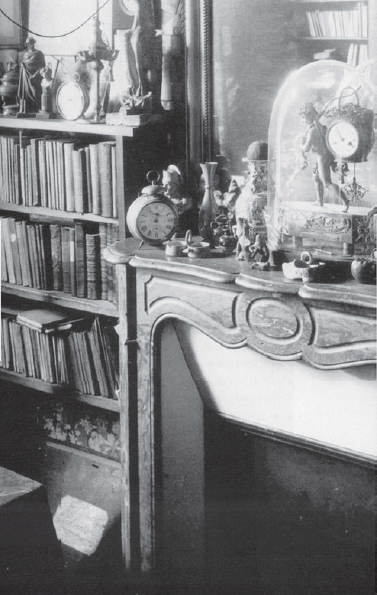
The Professor.
Smith is speaking at the Challenger Trust Banquet-Lecture, an annual event where the trustees invite fringe scientists to give talks on their studies. They wanna hear crazy theories backed up by actual research and evidence, and the good Professor Smith happens to be a kind of Victorian Penn Jilette. He gives a pretty humorous lecture about some of the charlatans he's debunked in his time, but ends up discussing some of the real supernatural phenomena he's encountered – what he calls 'hauntings' but are essentially ghosts. The book details some of the evidence he includes in his slideshow, followed by Smith's conclusion that hauntings might hold the key to unlocking travel through other dimensions. Left to his own devices and given enough time, it's possible Smith will discover the Create Gate spell that makes extradimensional doorways.
This is the first instance of a recurring problem with the books, where they give you mountains of text – in this case, excerpts from Smith's lecture – and seems to expect you to just read it out aloud to your players while they sit there and listen. I really don't see a way to make a lecture, even one about the supernatural, interesting to listen to. In addition, Smith's lecture is partially a red herring. Ghosts won't be coming up for quite a while.
After the lecture, the investigators can roll Spot Hidden while talking to Smith to notice that they're being watched. A dark man with 'a moustache bushy enough to be classified as 'foreign'' (really?) is observing their conversation, and he immediately leaves when he's discovered. This is actually the first appearance of Mehmet Makryat, one of the major antagonists of the campaign.
The investigators have a couple of days to spend at their leisure before the plot kicks into gear.
Oh shit!
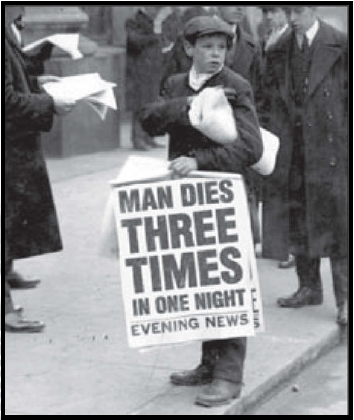
The front page headline on Saturday morning reports Makryat's death in triplicate. Three identical men are found dead in the Chelsea Arms Hotel, each one stabbed through the art and carrying papers identifying them as Mehmet Makryat, a Turkish antique dealer and world traveller. The 'real' Makryat owns a shop in Islington, but is nowhere to be found.
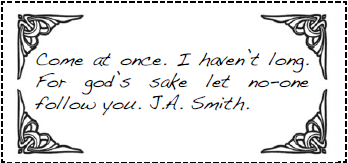
The other headline of interest to the investigators reports the disappearance of Professor Smith and Beddows after their house is burned to the ground. Well, the book tells you to make them roll Spot Hidden to notice that, but wouldn't the disappearance of their dear friend attract their attention? I'd just give them the clue off the bat. That said, even if the investigators hit the ground running they're not going to turn up anything (aside from the journal that triggers the Blood Red Fez scenario, but more on that later) until the end of the day, when a cabbie delivers an envelope sealed with Smith's signet ring. It contain's Smith's calling card with an address in Cheapside and the following message:
The Burned Man
The address (in a disreputable part of town that a gentleman like Smith shouldn't be anywhere near!) belongs to a shady bedsit. When the investigators get there, Beddows ushers them in. His hands have bandages on them and he's visibly nervous. The curtains are drawn shut inside the room, but the figure of Professor Smith can be dimly made out on the bed. He's suffered severe burns – SAN 0/1D3 for an investigator who examines too closely, our first roll of the campaign! There's also a side table covered in various medications that a Medicine roll will reveal to be the kind of salves, solutions and analgesics that should be administered to a severe burn victim.
Smith tries to sit up when the investigators enter. He greets them in a wheezing voice and bids them to listen to what he says while Beddows takes notes. As he speaks, his voice becomes less and less audible, and it's pretty clear he won't be able to talk for long.
According to Smith, he's been on the search for the Sedefkar Simulacrum, which he describes as an evil occult artefact and a source of great magical power. It was broken into pieces and scattered across Europe in the 18th century, so Smith planned to gather the pieces and finally destroy them. The reason he gave the lecture was to try and find people who could help him, but he only managed to attract his enemies. Turkish madmen attacked their home in the night and tried to burn them alive, but Beddows managed to save them both. The Turks doubtless want the statue for evil deeds, and Smith begs them to recover it before they can.
His notes were destroyed in the fire or stolen by the Turks, but he has a pretty good idea of where the pieces are:
- The Simulacrum was owned by a Comte Fenalik who lost it after the French Revolution. It was dismembered in Paris, so a piece might still be there.
- Napoleon's soldiers carried a piece into Venice.
- At the same time, another piece wound up in Trieste. Smith recommends looking up Johann Winckelmann at the museum there.
- There might be a piece in the Kingdom of Serbs, Croats and Slovenes. He recommends speaking to Dr. Todorovic at the National Museum in Belgrade.
- One part was lost near Sofia during the Bulgarian War, but was probably buried somewhere there as a valuable.
- The final piece was actually in circulation during the Great War and sold to someone in Milan, but Smith doesn't know who.
The only way to destroy the Simulacrum for good is to bring the pieces back to its home: a place called the Shunned Mosque in Constantinople. He knows there's a ritual to destroy them in the Sedefkar Scrolls, but Smith has been unable to consult them. His voice nearly gone, he begs the investigators to help him in this task. 'Go, go quickly,' he whispers. 'God help you'.
Afterwards, Beddows hands them a valise containing 1000 pounds sterling, otherwise known as an absolute fuckload of money and more than enough to sponsor the entire expedition. He recommends taking the Orient Express as Smith was originally planning to, sadly noting that his master is accustomed to comfort. Beddows knows nothing about the Simulacrum, but if asked he'll mention that he plans to move Smith to a more secure location soon, and that he'll send updates via telegraph. Otherwise, he doesn't have much to say. If the investigators return to the bedsit later, all sign of Smith and Beddows will be gone.
There's a very good reason for that.
Next time: the truth about Mehmet Makryat.
DANCERS IN AN EVENING FOG – PART TWO
Original SA postHostile V posted:
So does Horient express have to start in London or can you start it from some other point? Either way it's gonna be good to hear about it, I had a very misinformed mental picture of what it could've been about (namely just Murder on the Orient Express being derailed by cultists and like a Byakhee and shit).
Like RocknRollaAyatollah said, you could start somewhere other than London but you'd need to rewrite part of the campaign. You definitely couldn't start anywhere after Paris without significant rewrites. There's some alternative ways to start the campaign that I'll cover, but they also start things off in London.
DANCERS IN AN EVENING FOG – PART 2
The Truth
Mehmet Makryat is a scary-ass cultist from a scary-ass cult called the Brotherhood of Skin. We'll learn more about them as the campaign runs on, but suffice to say for now that they want the Sedefkar Simulacrum and they are a scary-ass cult. Mehmet's daddy Selim is actually the head of the cult, and once clashed with Professor Smith thirty-odd years ago. Makryat had been living in London and keeping tabs on Smith for some time before he struck on his plan to use the investigators to retrieve the Simulacrum.
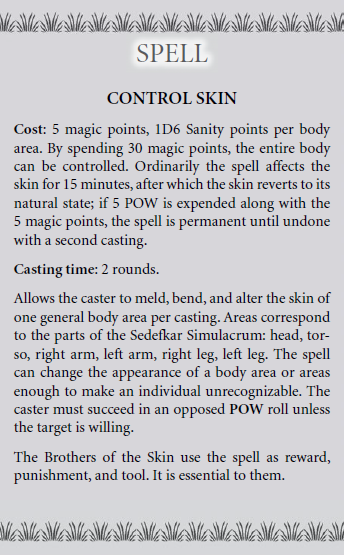
The night of the attack, Makryat summoned a dimensional shambler to kidnap Professor Smith and haul his ass over to Constantinople. With this hostage, he was easily able to conscript Beddows into helping him torch Smith's house. Meanwhile, he summoned the three false Makryats – actually Brothers of the Skin and his subordinates – before murdering them to keep his movements secret from the rest of the cult in Constantinople. Mehmet had already made them identical doppelgangers of himself via Control Skin, a nasty and versatile spell that Makryat later used on himself for his Professor Smith disguise. The spell on its own isn't enough to make a thirty-something fit Turk look like a sixty-something fat white man, hence the set-up Makryat used for the meeting with the investigators.
One thing about the set-up that's kind of weird is why Makryat felt the need to kill his juniors in such an ostentatious fashion. Obviously, the MAN DIES THREE TIMES IN ONE NIGHT thing is a cool hook but if Makryat's supposed to be so smart he should have found a better way to dispose of the bodies. He could have gotten rid of their passports at the very least. But I digress. It's possible that the investigators are curious enough to launch a separate investigation into Makryat.
On Mehmet's Trail
By the time the investigators go to the Chelsea Arms, the bodies have been removed and they'll have to deal with the pigs in Scotland Yard. If they can somehow schmooze their way into getting more information about the case, they learn that each pseudo-Makryat had an identical telegram sent from Paris bidding them to meet in London (signed 'M'). Another detail that the cops didn't tell the press is that each corpse had been partially skinned; one the torso, one the arms and one the legs. The cops also searched Makryat's shop, the Crescent Treasury, but found nothing.
The investigators might also think to visit the Turkish embassy. The clerk can be persuaded to hand over Makryat's address and DOB, but will get pissed if they press too closely on the passports, asserting that they must be forgeries and are therefore a British problem. The speculation that the evil Turks are somehow scheming with duplicate passports probably isn't helping international relations much. However, befriending the clerk will get him to admit that all files relating to Mehmet Makryat have disappeared from the embassy records.
Makryat's shop in Islington isn't hard to find. His neighbours haven't seen hide nor hair of him, but more importantly do not recognise the Makryats from the crime scene photographs as the Makryat they know, who was a taciturn old man. The Crescent Treasury is closed, but breaking in after-hours reveals an unremarkable showroom with a simple living space upstairs. With a Spot Hidden roll, the investigators will notice that a) the only books are ledgers and b) there's no luggage or much in the way of clothing either, as if Makryat's just cleared out and abandoned the shop.
One entry in one of the ledgers notes something odd: a model train set. The rest of Makryat's records are full of goods imported from the Middle East or purchased in London auctions with not a single other toy or train-related item. This is a plot hook for The Doom Train scenario that I'll be covering in the next update.
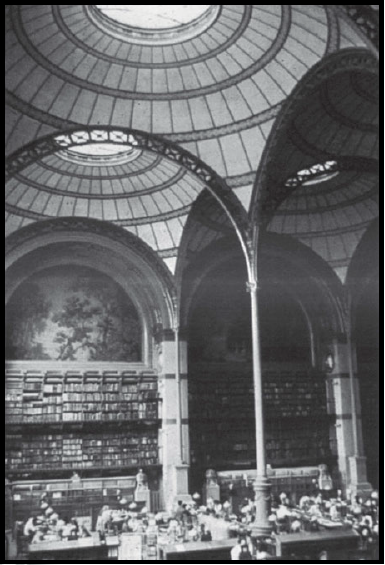
London Researches
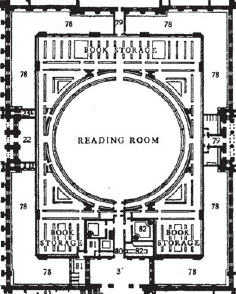
The book notes that the investigators may want to do some research before they set out. The best place for that is the Reading Room in the British Museum Library – that is, if the investigators can level the kind of academic guanxi they'd need to access it. Some Library Use rolls won't turn up much about either the Simulacrum or the Scrolls, but it'll point them in the right direction.
After a day or so of research, the investigators will notice someone slumped over his books, 'hat still rudely on his head', apparently sleeping. At some point during their visit, he topples over; underneath the clothes is a totally flayed corpse (SAN 1/1D6). Written in Turkish on human skin and attached to the corpse is a note that reads:
THE SKINLESS ONE WILL NOT BE DENIED
Panic ensues. Police are eventually able to identify the body as belonging to one Richard Wentworth, but no one can figure out how someone was able to sneak him in there.
Wentworth was killed and subsequently flayed by none other than Makryat, who did it purely to fuck with the investigators. He chose Wentworth as his victim because he was one of Smith's students. What a joker!
Unless the investigators follow up on the train set, there's nothing else for them in London. Paris is a short boat ride away.
Mehmet's Movements
Makryat needs the investigators alive and on their way to Constantinople. After they leave London, he shadows them for the rest of their journey at a distance, occasionally slipping a whole city behind them but always staying on track. In this, Mehmet serves a couple of different roles for the campaign. First, he can act as a kind of sweeper, picking up any Simulacrum parts that the investigators might have missed. Second, he will intervene if he feels the investigators are in serious danger. Stat-wise, he's a combat monster with sick knife skills, a fat stack of spells and absolutely no SAN whatsoever. He can summon several Mythos entities and do whatever fucked up things he wants with the Control Skin spell.
This does beg the question: why does Makryat need the investigators at all? Even if he wants to stay as safe as possible, he knows roughly where the pieces are and anyone who gets within arms' reach of him is totally fucked. The campaign guide states that he wants to keep his actions secret from his father's agents but uh, isn't all the other shit he's doing going to raise an eyebrow back in Constantinople?
Anyway, he'll keep up the ruse of being Professor Smith and send telegrams posing as Beddows speaking for Smith. These will generally be words of encouragement and maybe bits of information he thinks will help the investigators. Any pieces of the Simulacrum he finds will be sent ahead to Constantinople.
Oh, and he'll kill Beddows. Sadly, that won't be the last the PCs see of him.
Every
 application you can think of for this spell, the Brotherhood beat you to it.
Alternatively…
The book presents an alternative plot for a shorter, more straight-forward campaign. In this version, the Burned Man really is Professor Smith and everything he's saying is true. Makryat doesn't have any involvement until the end of the campaign, which otherwise plays out as usual until the climax. There'll be more on that when we eventually get to Constantinople.
Next time: the Doom Train!
THE DOOM TRAIN – PART ONE
Original SA postKavak posted:
What about theapplications?
That'll be covered in my fanfiction. But for now:
THE DOOM TRAIN – PART 1
Wherein persistence in investigation prompts our heroes to climb aboard a very different train.
This is an optional scenario that, sadly, the investigators are probably going to miss. It's a red herring that has nothing to do with the main campaign and it can only be 'activated' by searching Makryat's ledgers and following up on the model train lead. If your investigators really liked Smith, his parting words might have riled them up enough that they go straight to Paris, no questions asked. The book notes that two of the playtest groups just breezed right past the plot hooks and if yours do the same you should let them. But it's a fun little adventure and it would be a shame for them to miss it.
This dude who ran the campaign also did a review on his blog, and his extremely good idea for the scenario? Run it before the rest of the campaign as a prequel. There's ways to tie the adventure into Smith's research, perhaps prompting him meeting with the investigators and maybe even allowing them to take part in the Challenger Trust event as speakers.
Background
In 1897, mad occultist Randolph Alexis was pursued by his enemies on a train. He tried to create a Gate to escape but miscast, instead teleporting the entire front half of the train into another dimension. Twenty years later, Randolph's son Albert had been reading his father's grimoires and came to the conclusion that he was probably still alive somewhere. He altered a toy train set to be a scale model of the original train, but also charged with magic power. Using it activated a second Gate, but instead of bring back Randolph it brought the whole train through, sweeping Albert up with it.
Much later, Alexis' widow began selling off her late son's belongings. Makryat saw the train set and immediately saw its potential, purchasing it along with some of Alexis' old books. When he had learned enough, he sold it to train enthusiast Henry Stanley, who unknowingly summoned the Doom Train one more time.
Man Disappears in Cloud of Smoke
This headline appears the day after Makryat's murder/Smith's disappearance. Henry Stanley, goony bachelor and upstanding member of the Train Spotter's Association, vanished from his bed-sitting room literally in a puff of smoke. The article also links the model train purchase to Makryat's shop and raises the question of a connection, just to give the investigators that extra little kick up the arse. In addition, the entry in Makryat's ledger mentions 'the estate of Randolph Alexis'. A successful Occult recalls the name as belonging to a notorious occultist who was big in the Hermetic Order of the Golden Dawn, while a Library Use roll reveals that he died in a train derailment.
If the investigators check out Stanley's bedsit, they'll find landlady Mrs. Atkins an enthusiastic source of info, especially if they can pay for it. She's been charging visitors sixpence apiece to see 'the Death Room'. She'll eagerly recount her side of the story: Stanley came home for tea with his new train set, went upstairs at 7, disappeared at 8. Atkins heard a cry and a rumbling, and when she opened the door it was full of smoke and empty of Stanley. The window was locked and bolted from the inside. Investigators who pony up 6p find the kind of sad-ass room you'd imagine a 40+ single trainspotter to live in. Interestingly, there's dark sooty streaks across the ceiling running from north-west to south-east, and a Spot Hidden roll reveals black parallel smudges in the carpet that happen to be the same width apart as train tracks.
The pigs have already confiscated the train set. If the investigators can schmooze past the dutyman and talk to the sergeant, he'll state that there were absolutely no signs of violent struggle in the room and that he's sure Stanley faked his own disappearance. The train set was the electric kind and the only thing that could have caused a fire in the room, but they found no faults in it whatsoever. Still, they've handed it over Arthur Butter, president of the Train Spotter's Association, to get an expert opinion.
Trainspotting
Butter is easy to find, running the Association out of his home in Camberwell. Goony interests aside, he's a friendly guy and genuinely upset about the possible death of Stanley. He's keeping the train set in his cellar; he ran one circuit for the cops but its relation to Stanley means he takes no pleasure in it. Besides that, he thinks it's in poor taste that someone made a scale model of an actual train that killed dozens back in '97. He'll hand it over with a successful Credit Rating roll but he'll let the investigators have a go at it in the cellar if it fails. If they happen to mention that they're going to be boarding the SOE, he'll totally geek out and not only hand them the train set but also enthusiastically invite them to that evening's Association dinner. 'There'll be lots of things to learn about trains,' he threatens.
If the investigators go, the Association goonmeet is actually a pretty chill time with a hearty six-course meal followed by brandy and cigars. Obviously, the attendees almost exclusively talk about train minutiae, but this is a good place for the investigators to pick up some travel advice. If you're planning to run the Dreamlands Express scenario, which you are, one of the attendees mentions the transcendental, life-changing experience of riding the Express.

The Train Set
As Butter's mentioned, the model train is an authentic replica of a real 1890s train with massive engine, coal tender and two coaches. The craftsmanship of the model demonstrates an extremely high attention to detail, and a thorough examination of any of the cars reveals strange symbols scratched on the undercarriage. The track is mounted on a hardwood board and maps out a twisted figure-eight. There's no scenery, but there are several ramps. A handkerchief monogrammed R.A. is pinned to the underside of the board.
Running the train once does nothing, nor does changing the order of the coaches or the order of the train. Instead, the train must complete an arbitrary number of circuits before anything happens – either 1d50 or the keeper's choice. When it hits that number, the investigator who turned on the train (the 'summoner') loses 3 MAG as the Doom Train comes through.
By the way, if the investigators destroy the set instead? Every investigator who participated in the destruction of the set has terrible nightmares of the people they trapped in another dimension. These nightmares cause the dreamer to lose 1 SAN and come every night until they succumb to madness or build a new train set. Don't break the set.
Next time: Midnight train going anywhere!
THE DOOM TRAIN – PART TWO
Original SA postTHE DOOM TRAIN – PART 2
All Aboard
If summoned outside, the entire Doom Train appears; otherwise, it's limited by the boundaries of the room the investigators are in. It slides along a shimmering track that manifests in front of it, phasing through any solid objects in the way. It comes to a stop when the first passenger car slides into view. Witnessing the arrival of the train? That's 1/1D6 SAN.
The door bursts open and a gang of passengers in 1890s fashion glide off the train as if exiting onto a platform. They bombard the investigators with questions – 'What's the delay? Where's the conductor? When will we reach Liverpool?' - but ignore any answer. Instead, they swarm the investigator who summoned the train and spirit him back with them to the first carriage. While that's happening, the other investigators will hear screaming coming from the second carriage, where they will see Henry Stanley's screaming face pressed up against the window.
They have seconds to make a decision before the train leaves again. There's time for them to hop on the first carriage if they want to, but not if they futz around. If they hesitate, the train leaves and take the summoner with them. Anyone who stays behind for whatever reason can just re-summon the train by using the Gate ritual again.
Everyone on the train loses 3 MAG as the train leaves the universe, and then 3 SAN when they realise the train has left the universe with them on it.
The First Carriage
The investigator who was whisked aboard by the passengers suddenly finds themselves wearing a nineteenth-century clothes. The blank expressions of the passengers now darken and they become more insistent in their questioning. As the train pulls out, their skin pales and their eyes roll back in their heads. They smell of old, dead wood. They sigh expectantly and reach out to grab the investigator. That's SAN 1/1D6.
The dead passengers are slow and stupid, but also tireless and almost indestructible; hacking them to bits would stop them but that's not a viable option when there's a dozen of them. They try to seize the investigator, and if they're successful they'll try to press their clammy dead lips against the investigator's and suck the soul right out of their body. That's instant death, and it'll turn the victim into a new dead passenger. The dead passenger who hoovered up the soul doesn't become alive again or anything, but they become a lot stronger and hungrier. When the other investigators charge in, the dead will sigh happily and split off to go for them too.
There's a couple problems with the way this encounter is set up mechanically. First of all, this is really early in the campaign to be bringing instant death to the table, and a couple of unlucky rolls could kill someone before the adventure has really begun. Also, it looks like they haven't properly updated this encounter for 7th edition; the book says that the investigator should get to Dodge twice per round due to the slowness of the dead, but that's already the way dodging works. Only two dead passengers can attempt a grab at a time, but by RAW they'll be getting bonus dice for outnumbering the investigators. This one fight in the carriage could kill multiple investigators.
The Total Party Kill blog suggests a few ways to fix this. Don't give the dead passengers bonus dice, do give the investigators bonus dice both for dodging and for any Brawl manoeuvres made against the dead. Also, rather than having the Kiss be instant death, let it slowly drain Magic at the rate of maybe 1d8 points per round. I would also, honestly, just fudge the rolls heavily; roll them where the players can't see and make a lot of concerned faces. You wanna scare them, not kill them.
Anyway, the fight ends when the curtained door to the second carriage slams open and a man calls for the investigators. There'll be one more round of pushing and shoving to make a break for it, then they're safe. When the door slams shut, the passengers scratch and paw at the door but can't get through. The door's covered in occult symbols, principle among them an inverted ankh.
Their saviour is a wild-looking dude in a ragged 1890s suit. 'Welcome to the 9:15 AM to Liverpool,' he says, 'Although we are currently running, um, rather late. My name is Randolph Alexis.'
The Second Carriage
Alexis' wards prevent the dead passengers from breaking into the second carriage, so he's holed up in here in for the past 20+ years. There used to be others who were still surviving, but over time they all degenerated until it was just Alexis. He probably would have succumbed too had Albert not opened the Gate. Now Alexis has a plan to break out.
The second carriage is dusty and mostly empty. This was once the first-class carriage and as such has multiple compartments for passengers, but all except three are deserted. Investigators who look out the window see a foggy grey expanse with blue-black tracklines burnt into it from the passage of the Doom Train. The locomotive lurches forward at regular intervals, each movement adding another segment to the world-line. It is the only feature in the void and it goes as far as the eye can see, curling around itself like a great serpent.
Stanley is having a mental breakdown in one compartment. His SAN has taken a bash but he's otherwise unharmed. Another compartment has a stack of tattered clothes and gnawed bones - as Alexis says, a man's gotta eat. Curious investigators who succeed on a Spot Hidden roll will note the gold fob watch among the bones engraved with the letters A.A. Stanley's very lucky that the investigators came when they did.
I Want To Get Off Eternal Damnation
The last compartment holds Alexis' plan to get back home. He's made a model train track much like Albert did, only fashioned out of bones and guts (SAN 0/1D3). The figure-eight it follows is identical to the one Albert set up, but for some reason it's just not working. If the investigators don't remember, a Mechanical Repair or Science roll recalls that Albert's set had ramps and elevations. Alexis quickly makes the necessary adjustments with more scavenged bones and organs. All it needs is a train – Alexis happily proffers a human heart, arteries dangling off it.
A Psychology roll at this point will tell the investigators that Alexis is insano like drano, if they haven't already figured that out.
To activate the Gate, the investigators must push the heart around the track for 1D50 revolutions. Complicating this is the dead passengers, who abruptly barge in towards the end, hungering for fresh souls. They climb over the carriage roofs and smash through the side windows. One passenger loses his footing and goes flying out into the void, beginning a new world-line of flailing arms and legs. The heart has 1D10 circuits left to complete and must not be allowed to stop. Whoever's pushing the heart has to make successful Dexterity rolls to keep going while the other investigators fight off the passengers – roll the dreaded 00 and you've broken the track, requiring 1d50 rounds of repairs.
When the last circuit is completed, every investigator loses another 3 MAG as the train suddenly clicks into place on a train track. They're back on Earth and can see dreary British countryside out the windows. The dead passengers stop their assault, gibbering and convulsing and eventually dying. The strangely youthful Alexis suddenly ages twenty-odd years in seconds. The Doom Train continues its outbound route from London as if nothing happened.
Oh, and there's a struggling coal train right in front of it. Collision is imminent.
There's seconds to act. An investigator who runs out, scrambles over the tender, swings into the engine cabin and knows which lever to pull can make a Luck roll to try and stop the train. Otherwise, everyone has to Jump. A successful roll means 1D3 HP damage, a failure 1D6. Riding the train out to the bitter end means 4D6 damage and likely death in the ensuing explosion.
This kind of collision is going to attract attention. Probably best for the investigators to lie low for a few days in a local inn before catching a (regular, non-Doom) train back to London.
Conclusion
Investigators gain 1D6 SAN for rescuing Stanley, who survives the crash. The poor bastard's gonna need some time in a sanatorium, but he'll be out in a few weeks, at which point he'll sell everything train-related and take up stamp collection. It's also possible that the investigators have learned enough that they can put together the Doom Gate spell. This creates a special keyed Gate into a pocket dimension of the caster's design. The investigators might find this extremely useful in later parts of the campaign.
Oh, and Randolph Alexis survives too. That crazy motherfucker goes home to lord his survival over his shocked wife. If you keep running the game after the campaign, he's a source of future plothooks.
Next time: Paris!
LES FLEURS DU MAL – PART ONE
Original SA postLES FLEURS DU MAL – PART 1
Wherein the investigators learn some of the strange history of the Sedefkar Simulacrum, and uncover their first segment of it, if they persevere.
Background
Comte Fenalik has a long backstory and a relationship with the Simulacrum going back centuries. Here's what you need to know: he's an ancient vampire and he once possessed the Simulacrum and the Sedefkar Scrolls. 134 years ago, he was imprisoned in Charenton Asylum for some of the unbelievably nasty shit he was doing in his spare time, where he subsequently lost control of his monstrous side. He was herded down into the basement, bricked up and forgotten by the world as he slipped into a coma.
He was unearthed by orderly and piece of shit rapist Martin Guimart, who unintentionally woke him up when he tried to steal the rings off his fingers. Guimart lost a hand for his troubles and was discovered along with the awakened Fenalik by another orderly. Fenalik, who raved forgotten histories in ancient languages, was subjected to a brutal series of electroshock treatments by asylum director Dr. Delplace. Frustrated by the lack of effect, Delplace cranked the voltage up to dangerous levels, ironically bringing Fenalik to his senses and causing his own death.
Lost in modern Paris, Fenalik seeks the Simulacrum.
Gay Paree
The investigators are in Paris! The book notes that at this point in the adventure, they should probably feel pretty comfy and lack much sense of urgency. The scenario assumes they'll end up spending more than a week faffing about between Paris and Poissy, and I'd definitely encourage that; let them take a look at the Travel Companion and really get into deciding between luxury hotels. Paris is all about atmosphere and unless the investigators really swing for the fences they're not gonna find themselves in any significant mental or physical danger. Have fun with it.
Their best resource in Paris for the investigators is the Bibliotheque Nationale. If they were using the library in the British Museum, then proof of this along with a letter from the embassy is enough to get them in – after a three-day wait for authorisation. Time for some sightseeing! The book recommends dropping a sketch of Fenalik at the Louvre and has some great little foreshadowing for the Dreamlands Express if they check out the Catacombs, but more on that later.
After they get into the library, it's time to hit the books. This presents a new set of problems: anything related to Comte Fenalik is hidden away in pre-Revolutionary documents, and many resources from that time were lost in the chaos of the Revolution or deliberately destroyed. Then anything they find will take time to translate from French. Their best option is to hire an assistant who knows how to navigate the library. The book presents Remi Vangeim, a confident and intelligent student of the humanities. He'll work for 20 francs a day and will work well for 50 francs a day, but as far as I can tell from my research this should be chump change for the investigators, so there's not really a reason to stiff him. Vangeim knows the value of his work and it's best to treat him decently. In addition, many students are taking part in demonstrations against the Ruhr Occupation; hitting the streets with Vangeim is a great way to cement his loyalty. I'd recommend tossing the investigators a bonus die on the Library Use rolls if they get good with Vangeim.
The book suggests researching Fenalik and the Simulacrum will probably take a week of research and daily Library Use rolls. There's a bunch of handouts for the players here, and if they're the kind to get really hyped up about this kind of non-action shit they should be sufficiently intrigued. On the other hand, if your group is less inclined to give a shit they're gonna hate this section – and there's no other way to advance the scenario.
Looking up the Milan and Venice connections doesn't turn up anything tangible but can drop some hints on where to look when they get to those cities. Looking up the Simulacrum will turn up references to The Devil's Simulare, an illuminated manuscript that can be found in Venice and unlocks the later Dark Crusader scenario. There's a lot of information on Fenalik, portraying him as a generally evil bastard who get up to all kinds of Bathory-type shenanigans. The two main leads for the investigators are the Charenton Asylum and his villa in the town of Poissy.
Going Crazy
The Maison Nationale de Sante of Charenton is not an easy nut to crack. Deplace's successor Dr. Leroux has been quick to bury the mysterious details surrounding his death, and as such will not respond any direct enquiries about it. Nor will any of the staff; as far as they're concerned, Deplace's death was a tragic accident and that's all there is to it. They're willing to share their records with the investigators, especially if there's a doctor in the party. A Library Use and French roll will reveal that Charenton did admit a Comte Fenalik, but there are no other mentions of him thereafter. The book suggests giving them a Know roll to assume that he died at a time before they cared to keep accurate records but uh, why would you make the players roll just so you can lie to them?
If they arrange to meet with Leroux, the waiting room has crates full of Leplace's old stuff. Spot Hidden reveals that one of the lids has enticingly been left open and Delplace's journal sits on top. Hawkeyed secretary Madame Rogniat won't allow any of Delplace's shit to be touched let alone taken, but investigators who can distract her or beat her Spot Hidden with Sleight Of Hand can snatch the journal. They'll find notes from Delplace describing the discovery of Fenalik and his subsequent electroshock experimentations. It seems Delplace believed that Fenalik's Latin and Greek outbursts were tied to racial memory, and he just needed a bit of a zap to start making sense.
There's also Paul Mandrin, the orderly who discovered Guimart. A Psychology roll discerns him from the other staff as someone who would be willing to talk to the investigators. Agreeing to pay his cab fare and a bottle of good Bordeaux at a local cafe is all it takes for him to spill the beans. Mandrin knows that Delplace was obsessed with a patient he had been keeping in his private wing, and Delplace's last words to Mandrin was a bonkers rant about racial memory. He believes that Delplace was killed by a fault with the electroshock machine, but no-one knows for sure since Leroux was so quick to get rid of the bodies. It's possible that the patient he was working on was killed at the same time.

Extremely Bad Ideas
The investigators might decide the best way to find out more about the asylum is to go undercover. Getting committed is as easy as dressing up as a vagrant and punching a cop – the pigs happily dump any such troublemakers at the asylum. In one of its public wards, the hapless investigator/s can expect a wide range of abuses from the orderlies and other inmates. They must subsequently succeed on one SAN roll per day or lose 1 point. This continues until they get bailed out, busted out or they go truly insane. Getting a reference from a doctor is a better idea and yields better treatment, including a private ward and what amounts to spa treatment as long as they can pay for it.
Late at night, Fenalik appears. He coalesces out of mist and hovers above an investigator, brushing their face with cold dead hands. He interrogates them in Latin, then in French, a barrage of questions asking who they are, what are they doing here, why, why, why. If they can answer he'll eventually fade away, but if they don't understand he'll grow frustrated and throw them across the room, inflicting 2D6 damage before vanishing. That'll be 1/1D4 SAN. He may appear the next night, or perhaps appear to another investigator if more than one gets committed.
Next time: my Poissy pops severely and yours don't
LES FLEURS DU MAL – PART TWO
Original SA postLES FLEURS DU MAL – PART 2
Chez Lorien
Poissy is a charming little town a short distance out from Paris, still bustling with activity even in the heart of winter. There's a slight complication in looking for Fenalik's manor: it was burnt to the ground the same night they raided it. To find out where it used to stand, they're going to need to access the records kept in Poissy town hall. In typical French fashion, the public officials there will act snooty towards investigators who can't speak French, so it pays to have a translator present to Fast Talk or Charm them. It only takes a half-day of research to find plans for the old villa which show an extensive cellar below the property. They can also find out the current owner of the land is a doctor by the name of Christian Lorien.
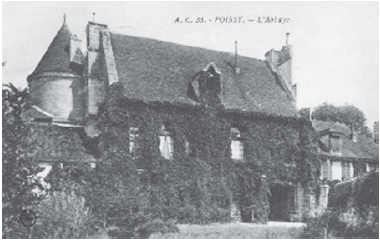
The Loriens live in a house surrounded by a crumbling 18th century brick wall. Climbing rose bushes grow from the wall and in spring would make a beautiful sight, but in winter take on the gnarled appearance of barbed wire. That ominous note aside, the Loriens are lovely people who welcome the investigators into their home. Christian's wife is Veronique and the two of them have a three-year-old daughter named Quitterie. While Christian makes coffee for the investigators, Quitterie gloms onto an investigator, sits on their knee and demands to be entertained. A Spot Hidden reveals an ugly scar crawling up Christian's left arm. He explains he was cut by a thorn while pruning the rose bushes; the cut got infected despite his best efforts and left him sick for weeks.
Honesty is the best policy. If the investigators are straight-up with Christian he'll be happy to help them. The mention of Sedefkar jogs his memory and he goes upstairs to talk to Veronique. If asked about her, he explains that she's resting in bed due to arthritis flare-up that requires a mild sedative (which just so happens to be in her left arm, if the investigators ask). Christian returns with a letter the Loriens received six months ago to which he never got around to replying. It was posted from Switzerland and is signed by an Edgar Wellington, who is also apparently looking for the Simulacrum and is asking the Loriens for any information they might have. Most interestingly, he claims to possess an old scroll that describes the Simulacrum – more on that when we get to Lausanne.
While discussing the letter, Quitterie jostles an investigator and causes them to spill their coffee on her. She screams in agony while Christian takes her to apply a salve. She is left with a long burn on her left arm.
If the investigators need to stay in Poissy overnight, Christian happily invites them to stay for dinner and even crash at their house if the group is small enough. Veronique makes an appearance at dinner, allowing the investigators to see that her arm is indeed stiff and twisted with arthritis. If the investigators share the villa plans with the Loriens, they get quite excited by the prospect of a lost cellar beneath their property and will help the investigators as much as they can (not much, considering Christian's work and Veronique's arthritis). The conversation is interrupted by Quitterie screaming upstairs. She runs down crying, claiming that she saw a boogie man in the window. It takes some time for her parents to comfort her.
Quitterie really did see a boogie man in the window. Regardless of whether he met them in the asylum or not, Fenalik has tracked down the investigators and followed them to his old home. He's currently weighing up the pros and cons of cruising in and murdering everyone, which he could do effortlessly.

It means 'Flowers of Evil.'
Finding the entrance to the old cellar will take some doing. The stone staircase is still intact but buried under several feet of soil and charred brick, requiring a whole day of digging to get to the steel door at the 18th stair. It's totally fucked, rusted into its frame and barricaded behind collapses brickwork, thus requiring a Hard Strength roll to open or failing that, more digging. Better start asking the investigators if they remembered to bring a torch. Behind the door is a long hall, still standing quite strong in spite of the roots pushing through the joints in the stone work. As the investigators squeeze past, a Spot Hidden roll lets them notice each exposed root ends in a five-way juncture, like an arm ending in a hand.
The investigators have discovered Fenalik's old torture dungeon. There are cells emptying off the hall to either side, each one holding the skeletons of former occupants. In the larger chambers, old torture implements and cages lie abandoned. In one room, a chaise lounge has been set up in front of a rack, allowing the Comte to recline as he watched his victims suffer. That's 0/1D3 SAN.
At the end of the hall, the investigators can see a faint glow. In this room, roses in a fantastic array of colours grow from thick vines. The vines have an oily sheen and their long thorns drip with a black ichor. They grow through and around more skeletons, binding them to the wall and twisting them so they suffer even in death. Flowers bloom from the empty sockets. At the base of this mass and wrapped in vines is the Left Arm of the Simulacrum, glowing eerily. That's 1/1D4 SAN to see but honestly, that seems kinda harsh under the circumstances, especially since this actually sounds kinda pretty and real-ass torture implements barely pinged.
The Left Arm needs to be cut from the vines. The book suggests making the investigators roll to avoid cutting themselves and getting a mild infection but uh, why? As soon as they free the Arm, the roses die in seconds. If it's around sundown, a thin mist is gathering in the cellar – it swirls about when they take the Arm, momentarily blinding them before it dissipates into the open air. This is Fenalik, and he's made his decision.
LEFT ARM GET
The investigators receive 1D4 SAN for finding the Arm. The Loriens are understandably not pleased to hear that they're living above some pervert's old dungeon, but they'll recover. In fact, as Veronique comforts Christian, the arthritis in her arm already seems to be receding. Officials will be notified and Fenalik's victims receive a proper burial.
Ah yes, Fenalik. The Comte will now be following the investigators, considerably closer than Makryat. He's decided to let them find the rest of the Simulacrum for him, then kill them when they're finished. This makes a lot more sense than Makryat's plan: they understand the modern world and can move freely about, while Fenalik does not and cannot. Also like Makryat, he can save the investigators if they get into too much trouble and do it with uncompromising brutality – as he'll later demonstrate, Fenalik can walk barehanded into a fight with dozens of armed men and win. But he also needs to eat, and the book recommends a range of weird events as he pursues the investigators, including:
- Hearing heavy footsteps behind them as they walk the streets at night. No-one's there if they turn around.
- Running into a sleepwalker standing on the rattling platform that runs between carriages, chanting, 'You called me, I come.' Wakened, the embarrassed sleeper quickly returns to his bed.
- Do the investigators have a pet? It's fucking gone.
- The investigators find the Simulacrum pieces they've collected tucked into their bed. Each piece has been lovingly polished and laid out in its proper position.
The Baleful Influence
That brings us to the Simulacrum itself. The Left Arm, like the other pieces, appears to be ceramic. It's smooth and cool to the touch. Inspected closely, each part seems to have a repeating pattern of whatever part it is imprinted on the surface, i.e. arms on the Arm, heads on the Head. The parts are pretty heavy, but their weight also has a tendency to fluctuate. As the thing starts to come together, it starts to uncomfortably remind the investigators of themselves. The completed Simulacrum is human-sized but only weighs about 40 kilos.
The Simulacrum is portable but extremely awkward to carry around. Transporting the damn thing is a source of plot hooks in and of itself. It's too valuable to leave in the cargo, too obviously exotic to leave out in the open, too strange to pass off as a normal statue. It will attract uncomfortable attention from any customs agents who set eyes on it. Naturally, it gets harder to hide the more pieces the investigators have.
It also has a nasty supernatural effect in its Baleful Influence. Whoever picked up the Left Arm first will start to have a range of aches and pains plaguing their own left arm. Each piece applies a similar effect on whoever discovers it. You can see how much trouble the Arm alone caused for the Loriens.
The Simulacrum is also totally indestructible. Try to destroy it at your own risk; that bullet you shot at the Torso is just as likely to ricochet and hit you in the dick.
First Night on the Orient Express
After uncovering a forgotten dungeon, the investigators are probably looking forward to enjoying the luxuries of the Express. It's fucking fantastic – they're treated like royalty from the get-go. What's more, opera singer Catarina Cavallaro and her entourage are boarding the Express the same night. The soprano is beautiful, charming and happily invites the investigators to join her. She befriends them in an instant, and if she finds out they're also headed to Milan, she promises to show them the city and book rooms for them in the same hotel as her. She ends the night with an impromptu performance of the Ritorna Vincitor aria from Aida, the opera she will be starring in in Milan.
The luxury of the Orient Express restores 1 SAN per night to each investigator. I would honestly step that up a bit considering the kinda shit they'll be going through. Contented, each investigator falls into a deep, deep sleep.
They awake in Ulthar.
Next time: the Dreamlands Express!
THE DREAMLANDS EXPRESS – PART ONE
Original SA postThe Doom Gate costs 10 POW to set up, 6 magic points and 3-10 Sanity depending on how nasty the pocket dimension you're creating is. Ayatollah's right though; you're paying that SAN tax every time you crack open the Gate, so the costs are prohibitive. If you allow the other method - storing it in the Dreamlands - there's no cost of any kind involved. Speaking of which:
THE DREAMLANDS EXPRESS – PART ONE
In which the investigators board a train built of dreams and battle monsters born of their own nightmares.
Background
The Dreamlands Express is the creation of Henri Peeters, a former conductor who died saving passengers from a fire. In life, he noticed how careworn so many of the passengers were in spite of their luxurious surroundings, so he created the Dreamlands Express to soothe those weary souls. As well as being a convenient transport through much of the Dreamlands, the Express takes passengers all the way to the Gulf of Nodens, where they can cast whatever burdens them into the Abyss.
The Dreamlands Express is a fucking fantastic scenario, a mini-campaign all on its own. It's got absolutely nothing to do with the main campaign and you could easily excise it, but I couldn't imagine running HOTE without it. The scenario activates the first night aboard the Express, at which point you can run the whole thing in one go or break it up over successive nights.
The book is inconsistent about how to return to the Dreamlands on subsequent journeys; it first says that they need to be on the Orient Express, but other references say that any bed in the Waking World will do. One problem with the former setup is that you're going to be pressed for time trying to fit the whole scenario in. There's only a few overnight trips on the Express, one of which might be occupied by a separate Dreamlands scenario and another where the investigators, haha, will not be getting much sleep. Maybe try to cram a nap in somewhere.
The Dreamlands Express offers a couple new skills:
Dreaming starts at 1/5th of the investigator's POW. It lets them spend MAG to dream things into existence. The base cost to dream something is suggested to be 1/5th of the thing's SIZ, then increased to add more traits to the thing. A statue of SIZ 20 would cost 4 MAG, a golden statue would cost 8 MAG. It can also be used to restore hit points!
Dream Lore starts at ½ Cthulhu Mythos and increases in tandem with that skill at half the rate. Naturally, it allows the investigator to know things about the Dreamlands.
In addition, dreamers have the opportunity to construct a dream artefact embodying something that burdens them in the Waking World. They can free themselves of the burden by tossing it into the Gulf of Nodens at the end of the journey. The investigators can do this too, but the book doesn't offer a mechanical incentive for it. You could have it restore SAN, but kind of the theme of the scenario is that just throwing away your hopes, dreams and fears isn't a good thing to do, so...
Ulthar
As soon as the investigators close their eyes in the Waking World, they find themselves in the Dreamlands. They're walking the cobbled streets of an old town bathed in the golden light of either dawn or dusk. They're also surrounded by hundreds of cats; it's a Dexterity roll to avoid stepping on one. A successful Dream Lore roll will inform them both that they're in the Dreamlands and more specifically in Ulthar, where no man may kill a cat. Ahead they can see a lofty platform of exquisite ivory where fancifully dressed travellers bid them to hurry.
The cats pick up pace, bouncing up to one side of the platform that's cordoned off with red rope. A small sign hanging from it reads 'Cats Only'. 
Henri is here, waiting on the edge of the platform, dressed in an Orient Express uniform and wearing a white mask with a long bird beak. There are three other Waking World humans among the Dreamlands folk: 'Mac' Mackenzie, Monsieur Karakov and Madame Bruja. Further details on them below.
Henri Peeters is the ultimate conductor. He lives for the Express. He tirelessly works around the clock to run the train, seeing to his passengers' every need. His catch phrase is, 'Henri is here. How may I help you?' He'll happily answer any questions the dreamers have and just generally prove himself to be an extremely cool and excellent guy. His mask and gloves hide his horrific burns, but if befriended he's willing to show them to a curious dreamer. The eyes in his ruined face show an unmistakeable kindness.
He's also something of a badass. Creating the Dreamlands Express required an epic journey that saw him forging iron bonds with the very gods of the Dreamlands, and not just the bitch-ass gods of the Earth Dreamlands either. He controls the train through will alone.
Mac Mackenzie is a diplomatic courier and a veteran of the Boer Wars. He was too old to fight in the Great War but engaged in many clandestine diplomatic operations in France on behalf of the empire. He is weary of politics and yearns to be a poet; as such, he intends to travel to Sona-Nyl to learn the art. He needs all the help he can get. He also knows Karakov in the Waking World, and warns the dreamers against him.
His dream artefact is a bulging leather briefcase handcuffed to his wrist. It's full of dry treatises and letters, all devoid of meaning. One day he plans to cast it into the Gulf and free himself forever, but not on this trip.
Monsieur Karakov is a shrewd arms dealer. In the Waking World, the Great War has made him insanely wealthy, and his enemies say he made 1 pound off every soldier killed. He would say his enemies sell shoddy products. If challenged on the morality of his trade, he tries to play it off, but the truth is he is wracked with remorse over his actions. However, he's extremely good at lying to himself and it will take many Persuade, Psychoanalysis and Psychology rolls to come to terms with it.
His dream artefact is a heavy travelling trunk that represents his conscience. Getting rid of it is the only way he can think to save himself. It smells of mustard gas and emits squeaking and scratching noises. If the dreamers want to crack it open it'll take some doing, and their reward for their troubles will be an endless wave of corpse-fat trench rats. Better hope the cats are still on the train when that happens.
Karakov is also dying, something that he has almost forgotten in the Dreamlands. He can constantly hear what he thinks are the sounds of drums and cannons, and dreamers who lose SAN here will hear them too. However, a Medicine roll will help the dreamer identify the echoing booms as the sound of a diseased heart fighting a losing battle.
Madame Bruja is a stern old woman. She holds a heart-shaped valise that she never lets out of her sight. When she talks to the dreamers she mutters dark hints about whatever's haunting her that are half to herself, saying things like 'I will not let him have it,' or 'I will not lose her twice.' She is extremely disapproving and judgemental of any men but is much kinder to women. The dreamers will have to do research in the Waking World if they want to know her story.
Her dream artefact is – well, you'll find out later.
All Aboard?
The train arrives.
It's preceded by a heavy, regular thump that shakes the earth. Multiple funnels of steam jet out and wash over the platform. The beast that emerges is something unearthly and impossible, a combination of octopus, centipede and elephant, marching along on dozens of stumpy legs. Tentacles writhe around golden eyes and gnashing maws. It's joined by a dozen other such beasts forming a long train. A Sanity roll isn't necessary despite the unearthly appearance of the alien beasts, since they're clearly harmless and under control.
Henri invites the passengers aboard and hands the dreamers their free ticket. The ticket clearly explains what's happening and the conditions for riding aboard the train. Key among them is that while they have the ticket, they can use it to journey anywhere between Ulthar and Serranian, but beyond Serranian is the Gulf, and you can only ride to the Gulf once. After that, you can never return to the Dreamlands Express. This is part of the deal Henri had to make with Nodens.
Next time: Kitten! The disgusting biology of trainbeasts!
THE DREAMLANDS EXPRESS – PART TWO
Original SA postTHE DREAMLANDS EXPRESS – PART 2
Blackjack
Henri leads the dreamers to their compartments. He bids them welcome and encourages them to explore the rest of the train. They'll later have a visitor in the form of Blackjack the kitten; the rest of the cats stick to their private carriage but Blackjack is a precocious little scamp who's eager to make friends.

Later that night, a gong sounds, bidding the dreamers to attend that evening's banquet. The food is luxurious and beyond anything that can be consumed in reality: the banquet menu includes grilled elephant pad stuffed with truffles and sweatbreads accompanied by Zoog moon-tree wine. Mac and Karakov enjoy the feat to the fullest, Bruja eats sparingly. At one point, Blackjack tries to break into the kitchen but is turned away by Henri, who speaks the meowing language of Ulthar cats. He's happy to interpret Cat for any curious dreamers.
Anatomy of a Train
So for future updates, it'll probably help if I take a moment here to explain the set-up of the Dreamlands Express.
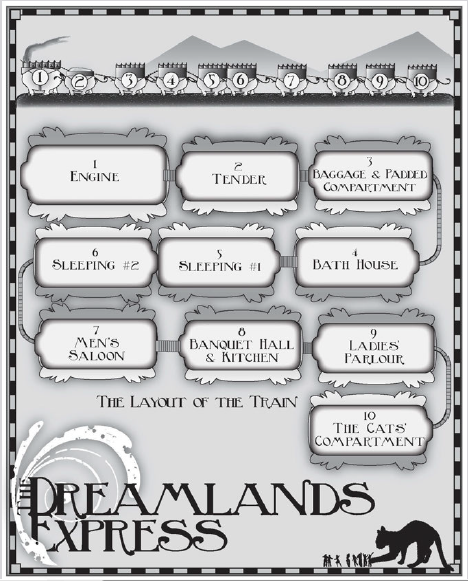
The number of beasts making up the Express fluctuates over the course of the journey, with beasts leaving and new beasts joining constantly. Assume 1D10+10 beasts at any one time. The beasts don't really have a front or back and move with equal ease whichever way they go. They can sprint up cliff faces and vault over rivers without disturbing any passengers. The carriages themselves are actually ivory pavilions perched on the backs of the trainbeasts, carpeted with thick rugs and linked together with rattling bridges. There's no danger of falling or losing belongings, as anyone or anything that falls from the train is snatched out of the air by a trainbeast tentacle. The beasts stay linked to each other by a network of tubes and tentacles that connect them with something to the tune of STR 330.
1. Engine: This beast always leads the train. It has a blazing maw like a furnace on its back that is constantly fed by two stokers, each masked and wearing tricorn hats. They never speak and never stop. They are in fact a pair of nightgaunts on loan from Nodens, their wings and tails obscured by Henri's Dreaming. Probably best not to interfere with their work. The fuel they cut from the Tender is broken down by the Engine and passed down to the rest of the beasts in ways the dreamers probably won't want to contemplate. There's no ceiling to the Engine pavilion and no rugs on the floor.
As mentioned, Henri controls the train by force of will, but it can be manually controlled through two orifices on top of its head. Shoving one arm in turns the Engine and thus the rest of the train left or right respectively, shoving both arms brings it to a stop.
2. Fuel Tender: This is actually a beast in and of itself, something like a massive blob of lard that slowly regenerates. It does not bleed or feel pain or indeed do anything except regenerate. In spite of that, it does get worn down and needs to be replaced at each station. Climbing over the Tender is the quickest way to the Engine but also the most dangerous; the stokers don't stop hacking meat from the thing and they aren't particularly fussed about what they feed to the Engine.
3. Baggage Van/Padded Compartment: The Baggage Van holds all luggage, including Karkov's dream artefact and the abandoned hopes and dreams of former passengers. This is also where non-perishable food is stored. Below the Baggage Van is the Padded Compartment, a hollow slimy chamber inside the beast for those passengers that can't abide sunlight.
4. Bath House: A vast communal bath house with constantly running water. All Dreamlands folk are comfortable bathing nude with others, but for the shy and modest there are alcoves leading to curtained private baths. There's a male and female bath but the symbols representing each are cryptic and will probably cause misunderstandings. The female bath has a separate tap for asses milk, the male bath the most sinister rubber ducky the dreamers will ever see.
5-6. Sleeping Compartments: Sleeping Compartment beasts can grow shorter or longer as required. Each carriage has six compartments; assuming that there's four dreamers, they share the middle compartments with Madame Bruja on one end and Mironim-Mer on the other (more on him next update). The walls between compartments can be completely pulled aside, converting the whole carriage into an airy hall.
7. Men's Saloon: Thagweed hookahs and a tempting selection of liquors stand at the ready. Great joints of roasted meet and slabs of bread are laid out on a sideboard along with every condiment in this universe and the next.
8. Banquet Hall/Kitchen: A long table runs down the centre of this room, set with silver cutlery and gold tablecloths. The menu is ever-changing and contains the best of Dreamlands produce, but Henri will happily prepare whatever the dreamer desires. The Kitchen is an adjoining area kept behind a self-closing teak door; the clamour of a busy kitchen can be heard day or night but should the dreamers enter they will find it deserted. Henri will be gently saddened if he finds them intruding. 'The Omelette aux ouefs de Shantak will be ruined!'
9. Ladies' Parlour: A picturesque garden with what is probably a better liquor selection than the Men's Saloon. Tea, cakes and unusual six-pointed sandwiches are available here at any hour.
10. Cat Compartment: This is where the Ulthar cats can normally be found. Anything a cat could want can be found here; one imagines endless cardboard boxes. Cat-loving players will doubtless want to come here first, but the cats take in dreamers only on a case-by-case basis. If Henri is asked about the compartment, he'll humorously deflect questions about its purpose with some real Lovecraft quotes on felines. The truth is that one of the conditions of building the Ulthar station was that the cats ride free forever. Henri's fine with that; he likes cats and it is fucking small potatoes compared to some of the things he had to do to build the Express.
Henri isn't the only staff aboard the train. He believes that service should be impeccable and invisible, and to that end has two special forms of menial servant to help him. The first are the tentacles of the trainbeasts themselves; these do pretty much all the cleaning and rearranging of rooms when the passengers aren't looking. Henri can also call on them to remove or restrain difficult passengers. The other menials are the strange invisible things that cook and wait on passengers when Henri isn't around. It's not clear what they are exactly, and the book suggests the dreamers might become obsessed with trying to figure that out.
Next time: Dreamlands politics!
THE DREAMLANDS EXPRESS – PART THREE
Original SA postTHE DREAMLANDS EXPRESS – PART 3
A quick update because I realised I probably should have rolled this one into the last one!
Dylath-Leen
Dylath-Leen is a major Dreamlands trade centre and wretched hive of scum and villainy. It's run by a despotic prince who only sends his secret police to investigate crimes involving important people. The Express pulls up at midnight and particularly foolhardy dreamers might want to explore it. Fortunately for them, the Prince's Eyes of Dylath-Leen are tailing them the whole time, as being wealthy human dreamers makes them VIPs for the prince. While stationed in Dylath-Leen, a number of new passengers board the train.
The first is Mironim-Mer, a Sarrubian wine trader who will be familiar to anyone who's read H.P. Lovecraft's Dreamlands. The lemon sails of the Sarrubians have stopped appearing on the Nameless Lake, but Mironim-Mer has a secret stash of their treasured wine that he uses to pay his way on the train. He's courteous and gentle but prone to giving cryptic answers to blunt questions.
Later, the Sarnathian delegation boards the train, followed by the loathsome Beings of Ib at the dead of night. If you've read The Doom That Came To Sarnath you should know their deal. The Sarnathians are basically high elves and lovers of beauty and high culture, while the Beings of Ib are considered to be a grotesque throwback that shouldn't have survived into the modern era. The Sarnathians were expansionists and disgusted by the Beings, eventually killing them all, destroying their city and stealing their religious icon for themselves. Supposedly, one of their priests scrawled a single word on the empty altar – 'DOOM' – but the Sarnathians categorically deny this.
It turns out the surviving Beings returned to their Waking World where time flows differently. The genocide the Sarnathians committed happened just a week ago in their memory, but it happened a thousand years ago as far as anyone else can tell. The Beings are understandably pissed and are seeking reparations. They have sent an appeal to wise King Kuranes who has summoned delegations from both parties to meet him in Sona-Nyl.
When the Sarnathians come aboard, they are wary and reserved around the dreamers. They've never seen a group of humans before and they fear that this is the beginning of an Earthling invasion into the Dreamlands. Eventually, their leader Theophed will touch base with the most beautiful or intelligent dreamer to recruit them into his Mean Girls-esque diplomacy clique. As for the Beings, they board in the darkest time of the night and are quickly ushered by Henri into the Padded Compartment. The Beings are far more revolting than you can imagine, requiring Constitution rolls to be around for any length of time. They can't talk and instead have a small blue furry toad creature called the Squeaker that speaks for them when given a damp squeeze. They keep to themselves and throw strange parties in their compartment – there's nothing preventing the dreamers from joining them aside from the threat of losing their lunch.
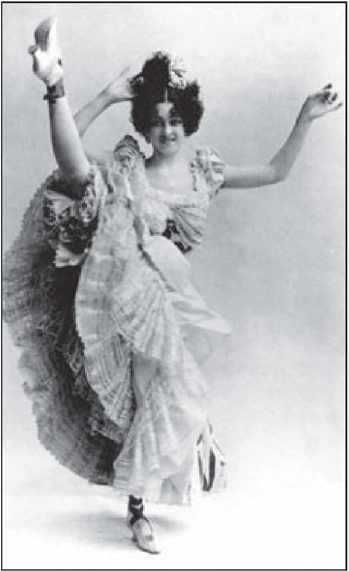
The last passenger to board is Zsusza, who arrives just as the Express is leaving. She make a running jump for the train and catches hold of a swinging tentacle; she is grateful to any dreamer who helps her aboard. Zsusza happens to be one of the greatest and most beloved dancers in the Dreamlands. She danced for the Prince of Dylath-Leen but refused to marry him. Since then, she's been pursued by the turbaned men of the Black Galleys and the Eyes have made no attempt to stop them. She's fun-loving and free-spirited and of course an excellent dancer.
Sadly, Zsusza in the Waking World is not so fortunate. She's considered a third-rate entertainer and receives middling reviews at best. She has turned to booze and drugs to increase the amount of time she spends asleep. Her unscrupulous manager has booked her for the winter season in Constantinople – that she gets to ride the Orient Express is the only part of the trip she's enjoying. Her dream artefact is a small dancing statuette that embodies her dreams of being a dancer. Once she casts it away, she plans to sober up.
The book suggests this as a natural point to end the first night's dreaming. When the investigators go to sleep here, they return to their beds in the Waking World. Sorry! I promise we'll come back to the Dreamlands Express in a later update.
Next time: Lausanne! Against Nature!
NOCTURNE – PART ONE
Original SA postTerrible Opinions posted:
They also have a very very angry protector deity who destroyed Sarnath the location.
Will destroy Sarnath. At this point in time the Sarnathians still have 9000 years to avoid that fate.
NOCTURNE – PART 1
Shadowed by death, our heroes travel in comfort to Lausanne, and there meet several interesting characters, acquire a scroll, and have a very bad dream.
Background
Nocturne introduces a new antagonist: Duc Jean des Esseintes, who French literature enthusiasts will recognise from Huysman's Against Nature. This means that yes, Horrient is just a very long Against Nature fanfiction.
The Duke is the latest in a long line of boorish French aristocrats. In his youth, he became a recluse who rejected society and the world at large to retreat into a world of his own aesthetics. Nocturne posits that this eventually led him to study the occult, and from there get heavily into the Mythos. He joined up with the Brotherhood of Skin and became good buddies with Selim Makryat. He has used the magic of skin to totally remake himself into an immortal monster; believe me when I say there ain't a fucking thing sacred when the Duke gets naked. His studies eventually led him to discovering the Cthaat Aquadingen, a grimoire of dream magic, but he scorned the Dreamlands and stuck to exploring the dream reflections of cities – something like the Shadow or the Umbra from World of Darkness.
During the Great War, these kinds of explorations became too dangerous, so he laid low and got rich from his munitions portfolio. After the war, he was a ninety-year-old with the face of a forty-year-old and a dozen suspicious murders clinging to him like flies – the Duke fled France and got himself set up in Lausanne. In Lausanne's dreamscape he's become a violent despot called the Jigsaw Prince, and the damage he's done to the soul of Lausanne has made the townsfolk gloomy and despondent.
The Wellingtons
In Lausanne, the investigators are probably going to want to follow up on the letter the Loriens received from Edgar Wellington. Edgar's a sad-ass motherfucker and his is a common post-War story, he suffered terrible trauma and returned to a country where all of his friends were dead and no-one understood him. Living at home in England was impossible, so he packed up and moved with his brother to Switzerland to open a taxidermy shop. He's developed an addiction to morphine to cope with the trauma and his habit has nearly driven the brothers bankrupt.
Edgar's younger brother William Wellington is in far worse condition; the war has crippled him and left him both mute and unable to move his eyes, forcing him to turn his whole head like a panning camera when he wants to look at you. His head's lumpy and misshaped with the metal plates that are holding it together. The war all but destroyed him: he goes through the motions of life mechanically and without any real drive. The two brothers rely on each other and don't really have anyone else.
The Duke has befriended the Wellingtons and introduced Edgar to the occult, as well as supplying him with a potion that helps him sleep far easier than the morphine. Edgar has the Scroll of the Head, the first of the Sedefkar Scrolls, and thinks he can use it to scam easy money from the Duke. He doesn't realise the depth of the Duke's depravity.

Tea-Time
The SOE pulls into Lausanne first thing in the morning, far too early for the investigators to do much more than book into a hotel and recover from last night's festivities. After that, it's assumed that they'll want to follow up on the Wellington lead and they'll do it in a civil law-abiding fashion – if your investigators would rather break into the Wellington home in the dark of the night and murder the brothers in their sleep they probably uh, are not playing the right game.
It's not hard to find the Wellington taxidermy. Inside, a blazing fire keeps the room uncomfortably hot, while vases overflowing with flowers only barely hide the smell of dead animal and formaldehyde. The investigators might have had the foresight to write ahead to Edgar, otherwise he comes out and greets them as customers. If they did contact him, he's excited to see them and invites them upstairs for tea. He'll be especially happy to see them if they're British or they look rich.
Before they can discuss get down to business, William lumbers in and helps himself to tea. Edgar explains the cause of his silence while William stares at the last investigator who spoke. He's actually in a good mood and feeling pretty social, but investigators might find his mannerisms unnerving.
If they ask about the scroll, Edgar tells them he hasn't been able to uncover much. He acquired the Scroll of the Head in the war from a French soldier who traded it for rations and cigarettes (actually a descendant of a soldier who raided Fenalik's manor). The scroll is a confusing mix of of Turkish and Arabic and as such he's had trouble getting a translation. He knows the scroll discusses the Sedefkar Simulacrum, and the last owner of the Simulacrum was a Comte Fenalik; here his research has hit a dead end. He'll be willing to part with the scroll for a flat 250 pounds, a ludicrously high price. A Psychology roll at any point will reveal that Edgar knows more than he's letting on.
At that point the doorbell rings, and Edgar heads downstairs. William tries to engage the investigators in small talk, scribbling inane pleasantries on a notebook he keeps around for just such an occasion.
Edgar returns with the Duc de Esseintes in tow, who he introduces to the investigators. The Duke has the outwards appearance of a fat and jolly middle-aged Frenchman with impeccable fashion sense. Edgar mentions that the Duke is also interested in buying the scroll, though he feigns indifference. Edgar says that the scroll is in a bank vault at the moment, but he would be happy to bring it to the 7:30 Club, the Duke and Edgar's little occult discussion group. With that he adjourns the meeting, and asks the Duke to show the investigators around Lausanne. He's happy to oblige.
The Truth
Edgar is lying to everyone. He does have a full English translation of the Scroll of the Head, and he's not hiding it in a bank vault. He has little interest in actually selling the scroll to the investigators, but he needs a second buyer to drive up the price so he can gouge the Duke for more money. He doesn't plan to let go of the scroll at all – he's constructing an artful forgery to give to the Duke. The plan at the moment is to defraud everyone and skip town with the real scroll, leaving the remittances from his family back home to support his brother.
The Duke doesn't plan to pay for something he could take by force.
Next time: getting Duked down!
NOCTURNE – PART TWO
Original SA postNOCTURNE – PART 2
Always Bet On Duke
If the investigators agree to go with the Duke, they'll find him easy company and an excellent guide. He's a cheerful sophisticate and very knowledgeable about Lausanne. The whole time, he'll be watching the investigators and trying to take their measure. A Psychology roll will reveal only that the Duke is a more complex man than he makes himself appear to be. After a pleasant meal at a cafe the Duke will announce that he has a business appointment to attend and he will see them later at the 7:30 Club. The investigators will have the whole afternoon ahead of them.
If they go back to Wellington, the shop is closed and the door locked. There's too many people on the street at this time of day to make a B&E a good idea. If they watch the shop, Edgar can eventually be seen leaving and returning with a parcel under his arm. These are tools he needs to make his fake scroll. He won't re-emerge from the shop after this.
They might decide to hit up the local library. There's a neat surprise here for investigators who are looking for Mythos books, as a Library Use roll gives them a copy of Unausprechlichen Kulten, their first grimoire!
 Sadly, they're not really going to have the time to learn any of the spells contained. If they happen to look through newspaper back-issues, they discover that the suicide rate in Lausanne has skyrocketed since 1918, going from almost zero before 1914 to one a month.
They might also be sufficiently suspicious of the Duke to follow him home. He lives in an imposing two-story town house in the centre of the city that can only be entered through the extremely sturdy front door. That's an Extreme Strength roll or a Hard Mechanical Repair roll to get through with significant chance of being noticed by passers-by. The inside of the house is virtually empty, dusty with almost no furniture. Tracks in the dust lead to an upstairs room with a chaise lounge and a wool throw. There is only one door in the house, a heavy Renaissance affair that has the souls of suicide victims bound to it as a crude form of security. Touching the door costs 1D3/1D6 SAN and may inflict suicidal depression on the poor bastard tried to open it. If they do pass through the door, they enter Dream Lausanne – more on that later.
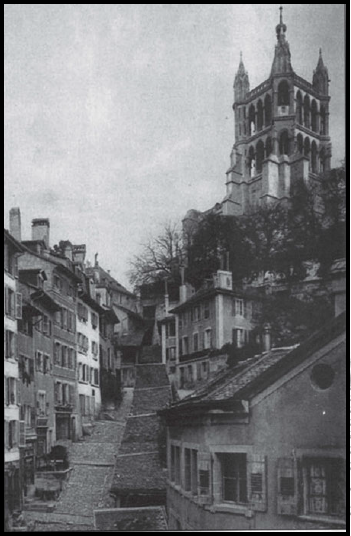
According To Max
When the investigators arrive at Le Chat Noir cafe for the club meeting, neither the Duke nor Edgar is present. It's half an hour before the third member of the club, Maximillian von Wurtheim, strolls in apologises on behalf of the other two, saying that both have been caught up by last-minute business and will be along as soon as possible. He is an excellent conversationalist when it comes to his favourite topic, himself. As soon as he is able to he launches into his heart-wrenching three-hour-long backstory, full of stolen ancestral fortunes and evil brothers. It's a good story if totally unbelievable.
Max is not a noble and his title is false. He's a con man who picked up noble patois working in fancy hotels. He's the Duke's creature, and he's been sent to distract the investigators – frankly, Max doesn't need much cause to try and scam some rich tourists. Max will insist they stay until closing time and will eventually stiff them on the bill. At midnight he bids them farewell and assures them that it'll all be worked out in the morning.
The book assumes that the investigators will want to check out the taxidermy after this encounter. They probably will, especially if they already suspected the Duke, but the book doesn't offer any alternatives if they don't.
Uh-oh
The lights are out in the taxidermy and the front door is hanging ajar – smart investigators will close it as they walk in. Downstairs, everything is fine. Upstairs, everything is fucked. There's been a huge fight and William lies dead on the kitchen table. His shirt has been ripped open and someone has sliced a patch of skin from his back. His face is frozen in horror. 1/1D6 SAN to witness this tableaux. Edgar lies dead in his bed (0/1 SAN). A medical examination reveals two fresh needle marks, one among many on his left arm and a single one on his right arm. He died of an overdose and considering the placement of the marks, it was probably murder.
There's some easy clues to be found when the investigators search the room. There's an empty morphine bottle and an empty syringe on the floor. There's a receipt on Edgar's desk for sealing wax and fine parchment. There's Edgar's diary, open on the floor. A mostly-full green bottle labelled 'Dream Lausanne'. There's also Edgar's fake scroll hidden under the bed, easily found by anyone who makes a Spot Hidden roll or who specifically looks under there.
At this point, if the front door was left open the cops are here. The investigators have just made themselves prime suspects in a double-murder; best to make a run for the back door and get on the first train leaving the station. They might choose to turn themselves in, in which case Max and the Duke make accusations against them in the morning. The charges aren't likely to stick – they should be able to get an alibi from the cafe staff at least – but it'll hold up the expedition for weeks. Alternatively, the investigators might have reported the crime to the police first; this costs them the first look at the crime scene, but they might be able to befriend the detective and gain access to the information.
What Happened
Edgar put the finishing touches on his fake scroll and had a nice dose of smack with a spoonful of the dream drug to send himself to sleep. William was working on a carcass downstairs when the Duke came to visit; naturally, he let him right through. The Duke found Edgar in his room and noticed the morphine and the dream drug. He flicked through the diary where Edgar reveals the location of the real scroll: hidden in Dream Lausanne. This was perfect for the Duke, who decided to kill Edgar and trap him in the dream world to be dealt with on his own terms. He administered a lethal dose of morphine to Edgar just as William came in to offer tea to his guest.
William went apeshit and attacked the Duke, but even his berserk rage was nothing against the Duke's supernatural strength. The Duke forced him into the kitchen, killed him with the kitchen knife and harvested a section of skin for his own macabre uses. Happy with his work, he went home to deal with Edgar on his turf.
Dream Drug
The scenario assumes the investigators are back aboard the train, but the next part of the scenario is easily altered if they happen to convene anywhere else. Edgar's diary clearly lays out that he's hidden the real scroll in Dream Lausanne and that the drug will give them access to it. That said, they might balk at the idea of taking random meds they found on a dead guy. You're gonna have to hope one of them is stupid enough to try it.
The drug can be administered in pretty much any way you can think of: drink it, snort it, rub it into your skin. If an investigator takes a sip, they will have enough time to comment on the awful taste before collapsing where they stand. A little First Aid reveals they're just sleeping, though they might get a nasty bump from falling flat on their face. There's nothing left for the other investigators to do but lie down, dose up and hope for the best.
Next time: court is in session!
NOCTURNE – PART THREE
Original SA post10. NOCTURNE – PART 3
We're Not In Kansas Anymore
The dreamers wake up in the dream-counterpart to their compartment aboard the Express. They're wearing whatever they had on in the Waking World – bad luck if they're in pyjamas. The lights are off and the blinds are shut; they can't be opened no matter what, and harsh white light shines around the edges. Leaving their compartment they will see that they're alone and that the doors to every other compartment are wide open – except for one. This door has been nailed shut and emits a strong smell of decay. This is Fenalik's cabin.
The train has been moving very slowly, but now it stops. Welcome to Dream Lausanne.
The investigators emerge in a blasted wasteland filled with a harsh light that has no source. About thirty-yards from the train is a door, free-standing without a frame. Going through here, they find themselves in a more primitive version of the Wellington taxidermy – for example, instead of electric lights, there's torches blazing in sconces. There's no technology permitted in Dream Lausanne except that which pre-dates 1400AD. The stuffed animals here are mouldering and reek of rotting meat. Particularly bad is the festering bear in the storeroom.
The front door hangs open and the bells are ringing.
In the streets, Dream Lausanne is a gothic nightmare version of the modern city. The streets are full of people in medieval dress, all of them marching up-hill to the cathedral and too focussed on this to speak to the investigators. It makes the most sense to follow them. On the way, there's several surreal encounters, none of them dangerous but each one foreshadowing future developments in the campaign. The imagery used here is fucking incredible, but this is another occasion where the scenario just seems to expect you to just read aloud to the players. Pray that they're intrigued enough that they don't notice their lack of agency in the situation. I'll be including the encounters in an addendum post.
Dream Lore and Dreaming do not help the dreamers here, though the former will tell them that they are definitely not in the Dreamlands.
The People Are Real.
The people gather in the town centre, amassing around a tall platform like a gallows. There's three figures on it. The first is an imposing bronze statue of Otho the Grandson, identical to its Waking World counterpart in the cathedral, right down to the missing hands. The second is Edgar Wellington, clapped in chains. The third is the Jigsaw Prince, resplendent in his royal regalia. He raises his hands for silence, then calls his kangaroo court into session as a representative of the people of Lausanne. The crowd goes wild at everything he says, but falls deathly silent when he asks if anyone will represent the accused criminal.
This is the ideal place for the dreamers to step in. If they volunteer, the shocked crowd parts to let them through. The Prince seems only mildly surprised but Psychology reveals that he is absolutely furious at their sudden interference.
He turns back to the crowd and asks for someone to offer themselves to justice. The front ranks go ballistic fighting for the Prince's attention; when he finally chooses someone the crowd falls upon them and beats them to death. There's some absolutely horrific noises and the crowd presents the Prince with the freshly shucked skin of the volunteer (2/1D6+1 SAN). He drapes the skin over the statue which suddenly comes alive, blinking glassy eyes and struggling to breathe.
Time for some courtroom drama! The Prince will graciously give the dreamers the opportunity to discuss matters with their client. They may question the impartiality of their judge – I would have the Prince point out that if he could just kill them and be done with it, they would already be dead. For his part, Edgar is terrified out of his mind and doesn't understand what's going on. He returned to Dream Lausanne to get the scroll when the Prince's men burst in and dragged him to court. Pathetically, he begs the dreamers to save him, as the Prince has promised to torture him whether or not he gives up the scroll.
That said, Edgar's also in total denial. He refuses to believe that he is dead in the Waking World. It's fine. It's a dream. You just wake up.
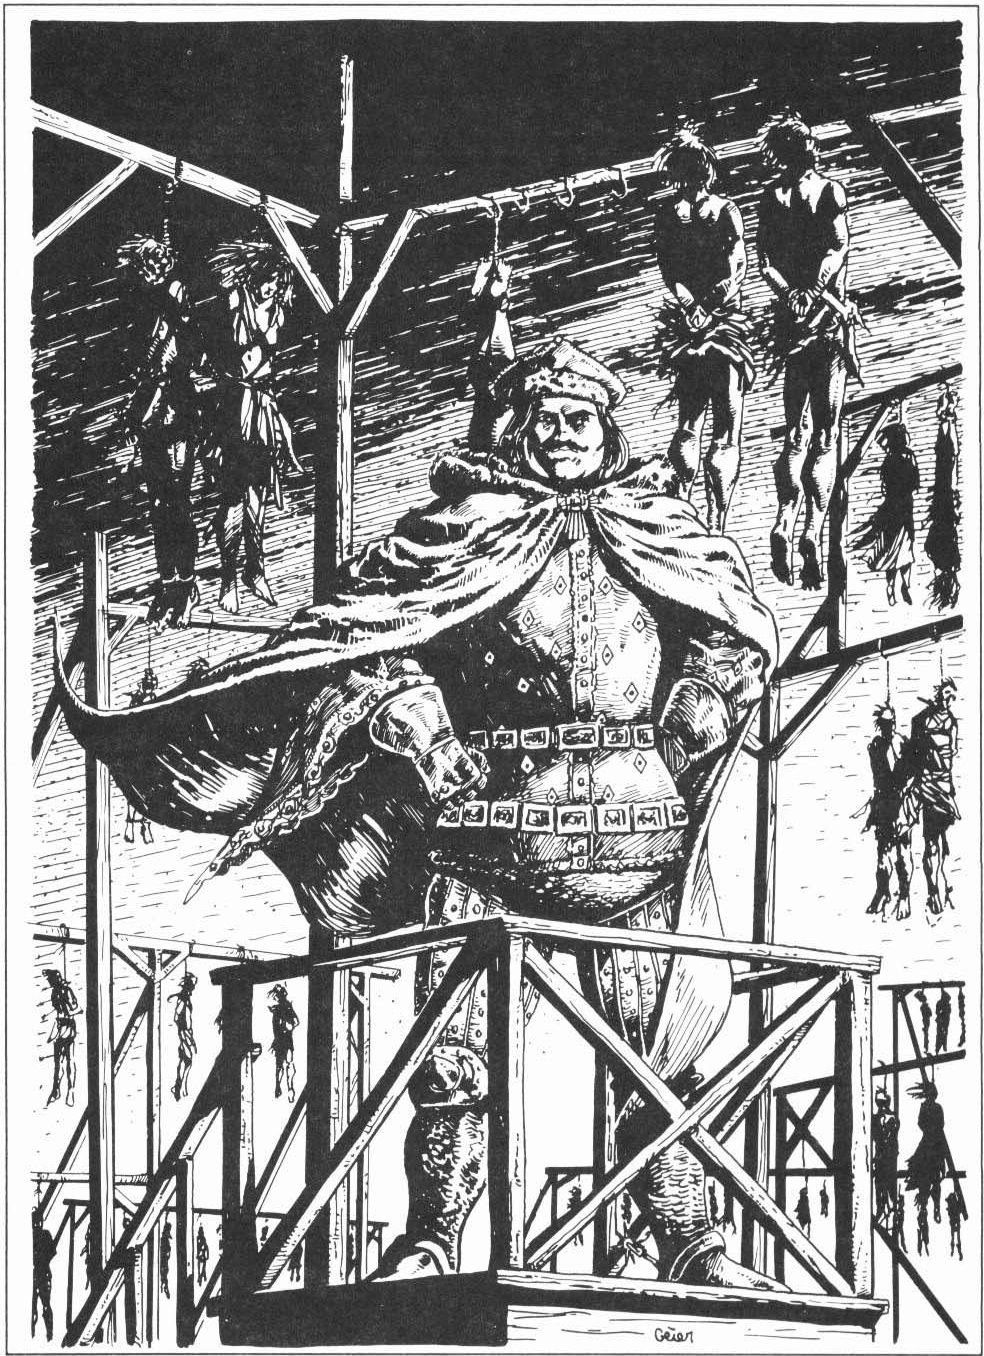
The Cases Are Real.
The Prince isn't lying. The judge really is impartial. The system here is that the dreamers will have to make three arguments refuting the Prince's three accusations, with the keeper taking the role of the judge. Rate each argument 1-4; 7 or more points will save Edgar. Law and other rolls pertaining to the Waking World will not help the dreamers here, since Dream Lausanne functions on its own crazy rules. However, a Persuade roll will bump each argument up 1 point.
The first charge is resisting arrest; if he were innocent, why resist? This should be the easiest to refute, since Edgar had no idea what was going on when the angry mob burst into his home to drag him into the streets.
The second charge is that he's a foreigner. Again, another dodgy charge, and the book recommends appeals against the follies of racism and the common worth of all humanity. Notably, accusing the Prince of being a foreigner falls flat; he has always been the Prince of Lausanne in the Dreamlands, and he does not recognise a Swiss state.
The third charge is a little trickier: possession of forbidden knowledge. By rights the scroll belongs to the Prince, and this little prick is hiding it. This is a naked attempt by the Prince to go directly for the scroll. Time to try invoking property rights and freedom of speech.
The book notes the keeper's in a tricky position since they really do have to try and be impartial in judging their arguments. It's important to not be too harsh when assigning scores. Better to be just harsh enough.
The Verdicts Are Final
If the Prince wins, the judge raises his maimed stump at him. The Prince cackles and dances around the platform before turning on Edgar. The investigators wake up and lose 1D6 SAN for failing to save Edgar and acquire the scroll. If the dreamers win, the Prince throws a temper tantrum. No one in the stunned and silent crowd stops them from leaving, but as they exit the square they can hear the Prince calling on the mob to find them and drag them back. Better start running.
The scroll is hidden in the shop. Edgar goes to the bear in the storeroom and sticks his arm into it up to his shoulder, then pulls a waterproof leather case out in an explosion of gore. At this point, the mob is hot on the dreamers' heels and already hammering on the door to the shop. Edgar hands the scroll over and follows them out the back door to the train, which is slowly starting to depart. They get onto the train just in the nick of time.
The dream starts to fade away and takes poor Edgar with it. 'I don't understand,' he implores. 'You just wake up. You just...wake...up…'. SAN 0/1D3 to watch him slowly realise he will never wake up again.
The dreamers are irresistibly drawn back to their compartment where they fall asleep. When they wake up, whoever had it is still clutching the Scroll of the Head.
Next time: lunchtime!
NOCTURNE – PART FOUR
Original SA postNOCTURNE – PART 4
The Perilous Lunch
The investigators wake up around midday, parched and famished. If they crack open the leather tube, they'll see they have both the original Scroll of the Head and Edgar's English translation. More on that later – the investigators are going to be way too hungry to concentrate on studying. The waiter in the dining car shows them to an empty table and takes their orders. While they wait for their entrees, the Duke comes in and sits at their table. He says very plainly that he's in a hurry and if they don't hand over the scroll they'll die.
Oh shit!
Fighting the Duke is not a good idea. Even if they brought their guns to the dining car, the Duke is extremely strong and almost invincible thanks to his fucked up skin magic. Melee attacks slide off him, gunshots do minimal damage unless they get him in the head. He's unlikely to be harmed by anything short of pinning him down and unloading shotguns into his face, and if he gets his hands on you you're fucked. Not to mention he doesn't even need to fight back here: if he plays innocent, the investigators are gonna get arrested and he will be at his leisure to figure out a way to get the scroll.
Flat out refusing the Duke? Also a bad idea. He has a nasty spell called Shrivelling that can slowly and painfully kill people without requiring him to touch them or take any visible action; he can and will use it on one of the investigators to make the others step in line. The book mentions that he could also get them arrested by teaming up with Max and blaming them for the deaths of the Wellingtons, but it's unlikely to lead to jail time for the investigators.
Stalling for time or fuck it, even running? That could work. The Duke's appearance here is through some kind of magic and he really is working on a time limit. He'll have to leave when the Express leaves Lausanne city limits.
The best solution is to give him the fake scroll, if the investigators have it. He actually doesn't know what the real deal looks like, and the fake scroll is convincing enough that he'll take it, no questions asked. Failing that, it might suck if they have to hand over the real scroll, but Edgar's translation is enough for them to glean some insight about the Simulacrum.
Whatever happens, he'll eventually have to take his leave. He takes a length of braided horsehair rope from his valise that's been woven into itself to form a loop several feet across. He raises it above his head and drops it down over himself; he disappears along with his chair. This happens so fast it goes unnoticed by all except the waiter, who nonchalantly asks the investigators what monsieur has done with the chair.
The investigators get 1D6 SAN if they held onto the scroll, 1D8 SAN if they somehow killed des Esseintes and an additional 1D4 SAN if they somehow are able to prevent the death of one or both Wellingtons. If they didn't kill him, this won't be the last the investigators will be hearing of the Jigsaw Prince.
Alternatively…
It's entirely possible that the investigators will bring the fake scroll with them into Dream Lausanne. If they present it to the Prince, he's overjoyed and immediately calls for a blood orgy to celebrate. This lets them escape with Edgar and the real scroll in tow. The Prince doesn't even look at the scroll until the following day when they're cleaning up the bodies; he sighs happily and unrolls the parchment to find it totally blank. By then, the investigators are long gone.
It's also possible that one of the dreamers will be crazy enough to look in the bear. That's a Hard Constitution roll. If so, they can just take the scroll and leave Edgar to his fate.

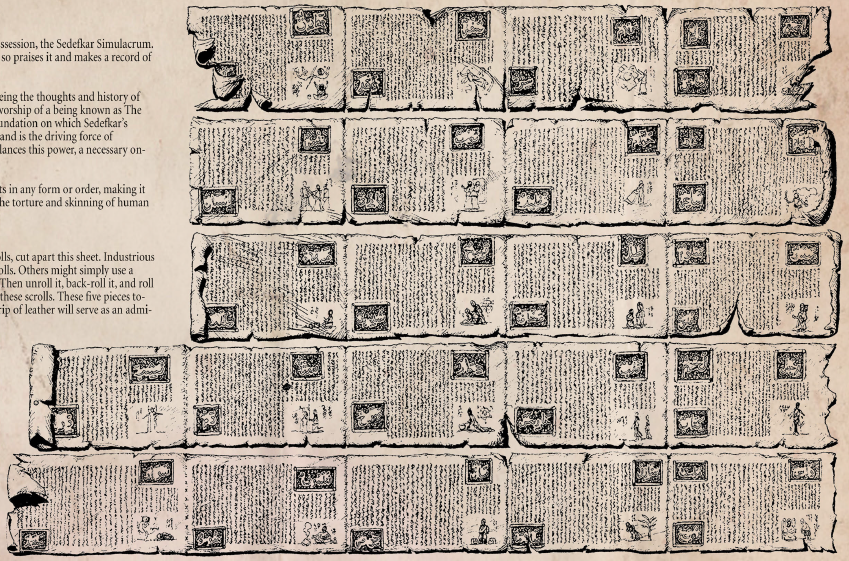
The Scroll of the Head
The Scroll of the Head is the first of the Sedefkar Scrolls. As the name might imply, there are additional scrolls for each part of the Simulacrum, each concerning a different subject. The Scroll of the Head is a history of the Simulacrum by its first human owner, Sedefkar the Osmanli. Sedefkar was fucking bonkers and as such the scroll is a rambling, insane document which is largely an extensive treatise on the art of torture and flaying. The historical events described are not really arranged in any order, making it extremely hard to follow. There are also no spells and definitely nothing like a ritual that destroys the Simulacrum. Sad! It must be in the other scrolls.
The scroll is written in Old Arabic but with Turkish letters, and running down the page vertically instead of right to left as was the style at the time. The scroll is printed on flayed human skin that's been cut into rectangular strips and stitched together. Someone familiar with old-timey writing might surmise that some kind of acid treatment was used to etch the letters, but Sedefkar actually seared the words into living victims using white-hot needles.
To make the handout for the Scroll of the Head, the book recommends printing the scroll out and cutting it into strips before rolling it tight around a pencil to give it the look of a scroll. Coffee stains will help give it that 'aged' look. Tie it up with a little strip of leather and it's ready to go!
As a grimoire, neither version takes particularly long to read and gives no benefit other than a little Mythos bump. The English translation gives a smaller bump but also asks for less sanity. You could drop in a spell or two if you want the players to feel good about putting in the effort. In addition, the player handout hints at how to unlock the true power of the Simulacrum…
A Sample Passage From The Scroll posted:
I have seen the powers which stalk the night and strike fear into the hearts of all those who worship the false god. I know Him and I worship Him. The Skinless One has spoken to me. He whispered secret words into my heart of hearts and I know what I now must do. I have seen It in visions and It is all that my Lord said It was. In my dreams I have seen Its perfection striding above the ruins of cities. Kings and countries have fallen before It. Even gods must fall before It. I recognized it the first time I beheld It as an object of power. Power that would bring the world to its knees. It glistened like the finest pearls. It woke when I flayed alive the wretch who sought to steal my treasure from me. That night He came to me for the first time and told me what to do. I meditated before Its glory. All praise to the One without Skin. I performed the seventeen devotions and opened It for the first time. Within the artifact was soft and smooth. As I ran my hand across Its inner surface it felt like the skin of a newborn babe. I offered four children as sacrifice to my Master. Then I used It for the first time. In His wisdom the Lord of Naked Flesh had made It to my height. In all modesty I believe It was made in my image. Blessed is the chosen of the Skinless One. I have been careful to keep It untarnished. The substance is the color of purity and should not be tainted by that which is unclean.
SPECIAL: Prophecies of Dream Lausanne!
quote:
A gaping fissure splits the middle of an empty street. From the fissure an icy wind blasts outward, moaning down the street. Players cannot go up the street as the wind is so strong.
quote:
A group of grotesquely-clothed people passes, masked and cowled, costumed as Death, an Angel, a medieval Soldier, a Lion, a Turk, an Assassin, and a Rustic Lass and Rustic Lad. They are flagellants who wind in procession through the chaos, weeping tears of blood from startling, expressionless, china-blue dolls’ eyes. They chant in Latin as they move, and the reek of incense and a distant cacophony of bells follows them. As the bells reach a crescendo, the Lion figure sprouts wings and flies away, closely pursued by the Soldier. Their bloody tears fall on the investigators from above and scald them.
quote:
One street is strewn with flowers and bulbs which give off clear, sweet smells. They are garlic plants. A Spot Hidden roll notes that no shadows exist in this street.
quote:
An old woman stirs a huge black cauldron, and offers the investigators dinner. If they look into the pot they find it full of skinned, writhing human limbs, slightly steaming: Sanity loss to see this 0/1 Sanity points.
quote:
A street magician displays an empty hat. He inserts first his right arm, then his left, then his right leg and finally his left leg into the hat. Each time he does this his limb is taken by the hat and vanishes. Finally, collapsing to the ground, laughing hysterically, the magician asks for someone from the audience to retrieve his limbs from the hat. No one volunteers; if an investigator does, nothing is inside.
quote:
At a strangely quiet intersection, the investigators witness a disturbing scene. A gigantic chessboard has been set into the cobblestones, and at either side of the board stands a motionless statue, one black, one white—the players. They are humanoid, yet featureless, and androgynous. On the board people occupy the positions of chess pieces. Each person carries a knife. These `pieces’ begin to move as if a normal chess game was taking place. As one piece takes another, the victor cuts the throat of the loser (Sanity loss is 0/1 Sanity points). Play speeds to inhuman quickness; soon the board is littered with corpses, the black player triumphing over the white. After the final move which grants the black player victory, the white player cracks noisily and falls to pieces, and the black player statue gratingly turns its head to regard the investigators.
quote:
In the middle of a deserted square, another statue stands. It is large (SIZ 100) and made of wire with what appears to be rags hanging from it. As they get closer they notice that the wire has been crazily woven into a human shape, and that the rags are scraps of flesh snagged on cruel barbs and hooks; lose 1/1D3 Sanity points to see this. From the head emerges the sweetest sound the investigators have ever heard. It is like an angel singing, a voice of perfect clarity. The sound brings tears to the eyes of the listeners, and they flee weeping from the square before their hearts can break.
If you're not familiar with the campaign I highly encourage you all to try and figure out the meaning of each event or point it out when it comes up.
Next time: urrrrgghghhhg
NOTE FOR NOTE – PART ONE
Original SA postNOTE FOR NOTE – PART 1
stupid shit-ass motherfucker
As I mentioned upthread, Horrient is very railroady and doesn't give players a lot of options. I think this kinda balances out when the scenario is like, good.
Note For Note is not a good scenario.
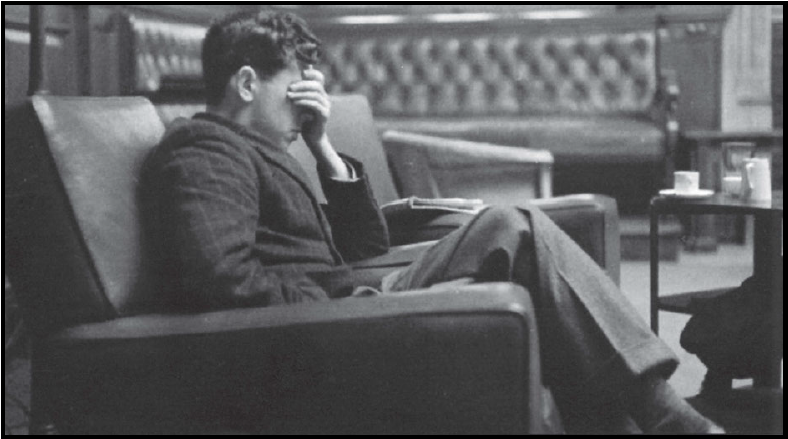
The Brotherhood of Skin has a strong foothold in Milan. The head of the local chapter is businessman Arturo Faccia, who was specifically recruited by Selim to draw in rich and influential members. Faccia is obsessed with the idea of locating the Simulacrum piece that was lost in the city, and as he grows older he's starting to lose it. He now believes as gospel truth an old superstition that singing an aria at the La Scala opera house grants one their heart's fondest desire.
To that end, Faccia recruited Flavio Conti to kidnap Caterina Cavollaro, who you'll remember as the young soprano who befriended the investigators on their first night on the Express. Conti was dying from tuberculosis, and it was a simple matter of switching his diseased lungs with those of unionist Ennio Spinola (using new spell Transfer Organ) to secure Conti's loyalty. Faccia then used Transfer Organ on himself to give himself Cavollaro's vocal cords, after which he warped her beyond recognition with Control Skin. He has tickets for the opening night of the Aida and plans to sing the aria along with Cavollaro's understudy, while Cavollaro herself has gone insane.
All of this happens before the investigators get to the city, by the way – there's no way to save Cavollaro. In fact, there's pretty much nothing the investigators can actually do to get at Faccia or the Simulacrum piece before the climax of the scenario.
Anyway.
Bash The Fash
This is the first of three scenarios set in Fascist Italy. Travelling in Italy at this time presents a bunch of new problems for investigators. For starters, firearms laws are far stricter than anything they've dealt with so far; carrying firearms of any kind on your person requires a licenza that is not available to non-residents (hope the party's designated bagman is Italian). Customs will have a reason to hassle the investigators about practically everything they own. In addition, Blackshirts can be seen on every street, taking notes and pushing people around. On the upside, the value of the lire has plummeted to the extent that each pound is worth over L100.
That said, Note For Note totally fails to utilise the time period in any way. The other two scenarios do a decent-to-good job of depicting life under Fascism, Note For Note pretty much lets investigators walk away with murder.
The citizens of Milan seem to all be suffering some kind of depression. This is more than just living under Mussolini – the Torso of the Simulacrum has been in the city for years and its Baleful Influence is affecting everyone. The shocking disappearance of Cavollaro is just one more blow to the hearts of the populace. She was last seen leaving the train station and getting into a black Alfa Romeo RL; the rumour going around is that she's run away with an old flame. Police are desperate to hear from anyone with more information about her disappearance.
This scenario immediately runs into problems because when the PCs get here they literally don't have any leads on the Simulacrum whatsoever. Literally none – the only thing they know is that someone probably sold it here, but they don't know to whom or where to even start looking. There are three main things to do in Milan: hunt Cavollaro, look into Spinola's death or go sightseeing. Fucking none of those things have anything to do with the Simulacrum, nor will they get the investigators any closer to that goal. Can I also just say this scenario is a nightmare to read? With the previous scenarios I've just been paraphrasing what the book says but for Milan I actually have to stop and reorganise the shit into an order that makes sense.
Let's start with sightseeing.

Say Your Prayers
As promised, Cavollaro has booked luxurious rooms for the investigators in central Milan. There's shelves full of books in the rooms, and a guide to the sights of Milan will inform them about the legend of singing an aria at La Scala. From there, the next place where anything actually happens is the Il Duomo cathedral, which is full of worshippers lighting votive candles and praying for the safe return of Cavollaro. A particularly devout priest insists on giving them a tour that ends with a tearful rant about the evil, corrupting influence of the La Scala. Go off I guess.
Among the locals are three elderly women, all in black and weeping. They're among those lighting candles for Cavollaro. They are in fact three costume designers from the La Scala; if the priest's rant is mentioned to them (in Italian, none of them speak English), they glance at each other and cross themselves. The book recommends giving the investigators a Know roll to notice the crazy coincidence that one crosses the torso. The thing is, why question them at all? If they were the only people with votives for Cavollaro I could understand why the investigators would be interested in them, but clearly they're not. The only reason they're special is because the writer knows they are.
As they're about to leave, they find an old man on his hands and knees, clearly looking for something. He is startled if they offer to help him, causing a jar to fall out of his pocket and shatter on the ground. It's full of dead butterflies and moths. The man hurries away while a chameleon emerges to avail itself of the insect feast. Trying to chase either of them leads the priests to try to restrain them, because honestly I would be pretty pissed off too if rich tourists were chasing lizards in my church. The chameleon quickly slips away.
On their first night in Milan, the investigators hear singing in the streets as they're going to bed. They recognise it immediately as the aria from the Aida, and it's Cavollaro's voice singing it. If they hit the streets they're not the only ones; other people and even police are searching for the source of the voice echoing through the alleys. A Listen roll guides them down a particular alley, at which point they're distracted by a scuttling sound. Spot Hidden reveals the same chameleon they saw earlier, regarding the investigators as if they were flies. It darts away if they go for it. After that encounter, the sounds of singing eventually stop.
The man is Faccia, and the chameleon is his pet. Chameleon saliva is a key component to the Transfer Organ spell – must have been frustrating for Sedefkar to try and figure that one out. Faccia is warming up for his big night at the opera. I actually like the creepy reoccurring chameleon as a piece of atmosphere. It might be the only good thing in the whole fucking scenario.
Next time: bullshit motherfucking fucker
NOTE FOR NOTE – PART TWO
Original SA postNOTE FOR NOTE – PART 2
man fuck this guy
The book assumes that the investigators liked Cavollaro enough that they'll be interested in taking up the investigation themselves. Heaven help you if they don't give a shit about her. Since they're staying at the same hotel as she was supposed to, it's easy to find her entourage. Her maid Ysabel flat out refuses to believe the rumour that she's hooking up with an ex, since performing at La Scala meant the world to her. The only reason she'd break schedule is if it was opera-related, like if she wanted to meet up with a patron. Today's newspaper just so happens to mention the return of opera patron Flavio Conti to high society following his miraculous recovery from tuberculosis.
If the investigators contact the pigs there's a protest going on in front of the station. Workers bear signs reading JUSTICE FOR ENNIO SPINOLA, whose body has yet to be returned to his family – the workers believe he was killed by fascists. As for Cavollaro, the cops haven't been able to find any sign of her and will actually welcome help from the investigators. While they're there, impressing or bribing the cops will let them meet up with the detective in charge of the Spinola case. He mentions an interesting discovery: going off the autopsy, Spinola was suffering heavily from tuberculosis, something that should be impossible considering that he was still working in a factory.
If the investigators want to look at the crime scene, angry workers (and probably the detective too) can show them the place. A little B&E takes the investigators to a warehouse where an open space has been prepared. In the middle is a stone slab covered in bloodstains – strangely, it looks like there were two bodies lying side by side. Spot Hidden reveals strange tracks in the blood, Natural World identifies them as chameleon prints. The owner of the warehouse is Conti Machine Parts. You can see where this is all going.
Take A Deep Breath
Conti's address is in the Milan directory. His apartment has an Alfa Romeo RL in the garage.
Conti is a thin, frail-looking man in his fifties. Tuberculosis was about to do him in, but with his new lungs he feels invigorated. He has the windows to his apartment open at all times for the sheer novelty of being able to breathe the air. But even as he revels in his new health, he's under a lot of stress. He wasn't expecting the fuss that Cavollaro's disappearance caused. In addition, he's become intimately acquainted with the supernatural in the past week and is kinda being forced to join a cult. While he tries to cope with initiation into the ways of skin, he hasn't left his apartment in days.
The book's vague on how they can actually meet Conti. The way it's written, I assume they'll be shown right to his study when they come knocking. His shirt is partially unbuttoned, a Spot Hidden roll gives glimpses of fresh scarring. Despite the vigorous energy he displays, a Psychology roll with a bonus die reveals that he's a bundle of nerves this close to a breakdown. On top of all this, Conti is packing heat; he greets any visitors at his desk with the drawer opened – he's got a loaded revolver in there. If the investigators press too closely, he panics and fires. Conti's extremely low on health and will probably die if the investigators shoot back. He dies staring at his blood in amazement: 'I cannot die...a Brother of the Skin...lives...forever…' Searching his body reveals the extent of the scarring around where the lungs should be; coming to the conclusion that an impossible transplant took place costs 0/1D4 SAN. Searching Conti's desk reveals an Orient Express timetable with the Milan arrival time circled. His most recent business contact is Faccia.
If they take him alive or prove his guilt to the cops, nothing can make Conti implicate Faccia. He knows what will happen if he does.
There is no mention of dealing with the possibility of the investigators being charged with Conti's murder. I thought Conti had some housekeepers or something, but I guess they just let the team walk away?
The scenario mentions in passing the possibility of tracking Faccia to his mansion. 'Keepers may wish to stage a showdown there', the book notes. The problem with this is that if you want to do that, you're on your own. There's a comprehensive multi-floor map for the La Scala in the book, but you're fucked if you want anything but a vague description of where Faccia might be. What's worse is that he's not even there, he's 'more likely' hiding in one of his warehouses for some fucking reason. You're going to have to create reams of new material if you want an encounter with Faccia before opera night.
Note For Note is so bad it railroads the gamemaster.
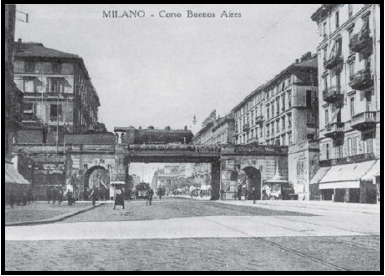
Opera Is A Dying Art Form For Stupid Old People
I'm gonna try and keep this short. In addition to the theatre's obvious connection with Cavollaro, there's vague hints dropped throughout the scenario that the Torso might be in the La Scala. It is.
Getting backstage is just a matter of Fast Talking the security, but the backstage area is chaotic. The cast and crew are distraught as anyone by Cavollaro's disappearance but are also rushing around trying to get the opera ready for the big night. Things get more surreal as they try to navigate their way through the costumes, props and scenery; eventually a Hard Luck roll is necessary to prevent them from getting lost. If they do, they must roll for SAN 0/1 'to resist the idea that their search has no significance or importance, that the theatre is reality, and that illusion is the goal to which all activity is directed.'
To which the only appropriate response is: it's just the fucking backstage area. Sanity is supposed to be a big deal in CoC, you can't just ding people just because they find themselves in a frustrating (but otherwise totally mundane) situation or you water down the whole concept. You gonna start making people lose Sanity when they stub their toe? This is a cute sequence but it's the work of someone who's high on their own supply; author Bernard Caleo clearly has a great passion for opera but I fucking don't and if you're going to write a Mythos-infused opera story you have to do a damn sight better than this shit. As is, I can't get past how wanky the writing is here. This whole scenario reads like someone's first draft.
This is the second time it's been published!
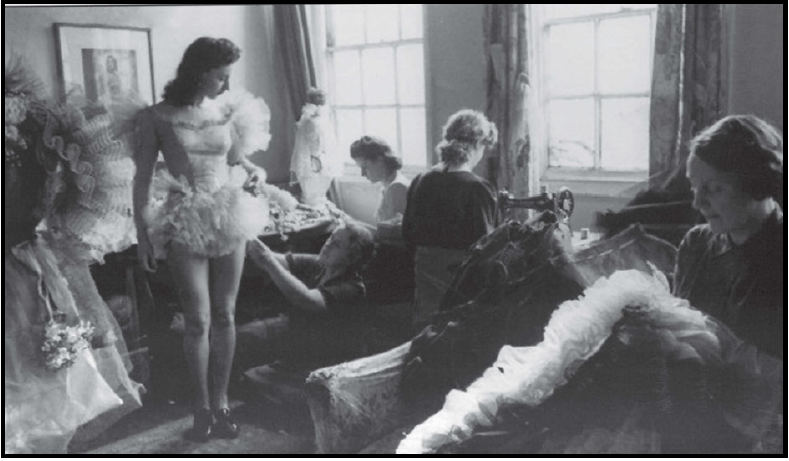
Anyway, maybe one way or another they find the music director who confirms that the theatre knows nothing about Cavollaro's performance. He'll grant limited permission to the investigators to stroll around hassling his staff. The secret to the Torso lies with the costume department, the same one that the old lady trio belong to. The department has long suffered the 'costumier's curse' and has been unable to keep any costume designer for longer than three months. It emerges that whoever purchased the Torso years ago didn't understand its true value and it has been used as a costume dummy ever since. The three old ladies say that the thing was creepy but costumes designed on it always fit perfectly. The problem is the department doesn't have the Torso right now; it's somewhere in the lower levels.
The book states very clearly that the Torso cannot be found before someone comes along and throws the investigators out. No location is listed, even for the keeper's benefit. The investigators are simply not allowed to have the Torso before opera night.
Next time: come on baby take me home
NOTE FOR NOTE – PART THREE
Original SA postKavak posted:
I think you could fix involving the investigators by having the maid ask them for help, but that doesn't fix the sheer volume of railroading. I really don't understand why there's absolutely no new material or suggestions for this scenario out of all of them. Was "Make Note for Note not suck" an unreached Kickstarter goal?
Loxbourne posted:
Never underestimate the power and obsessiveness of nerd nostalgia. An untouched Note for Note exactly as the backers remembered it might have been a selling point.
It's weird because there's other scenarios where they've actually made the effort to furnish the keeper with suggestions for how you can things up, but Note For Note just...continues to be Note For Note. I don't think it's a nostalgia thing because I've never seen someone express fondness for the Milan scenario, but then again I've had trouble finding discussion on Horrient in general.
NOTE FOR NOTE – PART 3
this was agonising to write
One last update and we're done with Milan forever. Following the scenario, the investigators spend three days in Milan and leave on the fourth. This schedule assumes that they take an interest in Cavollaro, Spinolo and sightseeing and do all of those things exactly as described. No provision is made for investigators who don't care about any of those things and instead focus all of their efforts on trying to find the Torso. In addition, at no point in any of their investigations does the Brotherhood of Skin make any substantial attempt to thwart them – the worst that can happen is Faccia's bodyguard follows them into La Scala's backstage and tries to fling prop spears at them. The Brothers will have to wait until Trieste to make a proper debut.
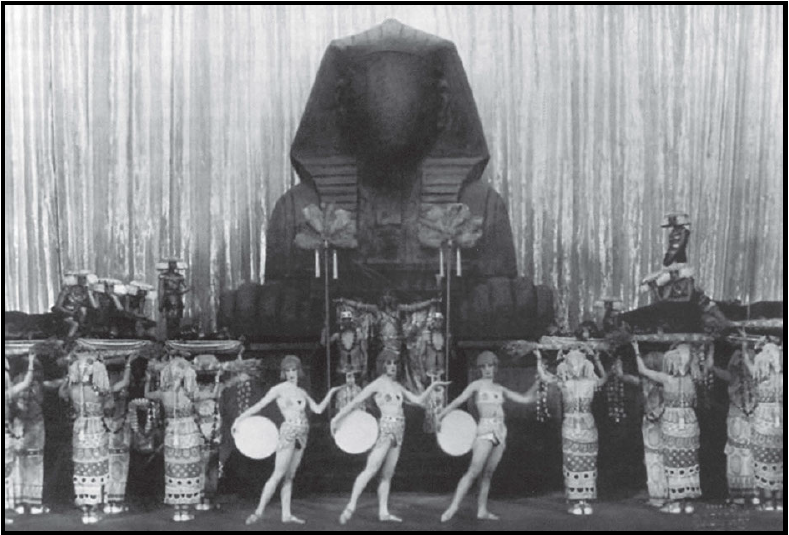
All of this is to have the big climax at the opera's opening night. Thanks to Cavollaro, the investigators have tickets and the scenario assumes they're interested in using them. If not, suck shit. Alternatively, one or more investigators might decide to sneak backstage and get in as extras – the tenor playing Radames immediately warms up to a male investigator in this role, seeing him as a 'man of action'.
 (Wait, could they not have done that on an earlier day?) Anyway, the investigators have front row seats that just so happen to be across the aisle from Faccia. Aida begins and plays out as it should up to the Ritorna Vincitor aria. At this point, the entire theatre seems to sing along with Cavollaro's understudy. Gradually, the investigators realise they can hear Cavollaro's voice singing. Listen pinpoints as coming from Faccia. Realising that he's singing with her voice costs 1/1D6 SAN.
Next to him is a woman old enough to be his mother, listening to the aria slack-jawed as if trying to remember something. Towards the end she starts to weep. Spot Hidden reveals that her and Faccia have similar scars around their necks. She also bears a resemblance to Cavollaro because of course, she is the amnesiac Cavollaro. Another 1/1D4 SAN for anyone who realises that.

With the aria finished, a new backdrop unfurls as Radames strides in with his priests, who then begin presenting him with his armour. A spotlight lands on the clothes dummy that's being used to hold the armour - the Torso. The investigators recognise it from its opalescent sheen, Faccia recognises it by pure conviction. There'll be significant commotion as both Faccia and the investigators try to get backstage first. This is even better if someone snuck on stage as an extra, since for them the Torso is right fucking there – they just have to hope no one notices them wheeling away a piece of opera property.
There's almost no support for what happens next. The investigators will probably get to the Torso first (the visit to the costume department reveals a faulty fire escape door they can enter through), but there'll be a slapfight when they run into the Brothers of Skin. There's six of them along with Faccia, sturdy boys but not much more than hired goons with billy clubs; if the investigators got chrome the Torso is theirs. Coupled with Faccia hysterically shrieking in Cavollaro's voice and the goons' total lack of comprehension of what's happening and this final encounter will probably degenerate into slapstick. In addition, Cavollaro shakes off the fog of amnesia and remembers what Faccia did to her. Her response is, somewhat understandably, to try and tear her voice back out through his throat.
I can't think of a worse way to introduce the group that's supposed to be the primary antagonist in your campaign.
As soon as they have the Torso and possibly Cavollaro secured, the investigators will probably want to call a cab and make their getaway. Faccia sends his Brothers after them, leaving himself unprotected. Fenalik kills him – he doesn't need more competition for the Simulacrum.
It's finally over
Investigators get 1D4 SAN for having the Torso ignominiously dumped into their laps by GM fiat. If they have Cavollaro, they can return her to Ysabel and her friends – she proves her identity to them by saying things only she would know. 1D4 SAN for that. If any of the investigators learn Control Skin, restoring Cavollaro's body nets 1D8 SAN, but this is unlikely to happen in the campaign unless you drop the spell somewhere earlier. It's insulting that the book would imply this is even a vaguely satisfying resolution; however you slice it, Cavollaro's life is over. The only thing the investigators could do was be there to witness it. Also, what was the point of aging Cavollaro exactly? Did Faccia really need to bring the woman he kidnapped to the place where she was most likely to be recognised? Fucking whatever.
Oh, and they've also got the Torso. Milan breathes easier with it gone.
That's this shitty fucking scenario done. It might be the worst scenario in the campaign and I couldn't imagine running it without uh, totally rewriting it. So let me open the floor here: do you guys want to move on to Venice, or should we pick up where we left off in the Dreamlands?
THE DREAMLANDS EXPRESS – PART FOUR
Original SA postTHE DREAMLANDS EXPRESS – PART 4
I Already Made A Eurythmics Joke I Think
On the picturesque journey from Dylath-Leen to Zar, the Sarnathians do what they do best: be huge dicks. They invite their chosen dreamer to partake in their outrageously funny pranks on the Beings of Ib. The prank is, you grab a Being of Ib and shove them onto a wall or into a corner somewhere where they'll stick. That's Constitution to handle a Being, then Strength to hoist it up. The Beings don't make any attempt to resist and won't be able to get themselves down. Kind-hearted investigators with a strong stomach may pull a pranked Being from the place where it was stuck, at which point it will be escorted back to the Padded Compartment by Henri. Handling a Being either way will require a bath immediately afterwards.
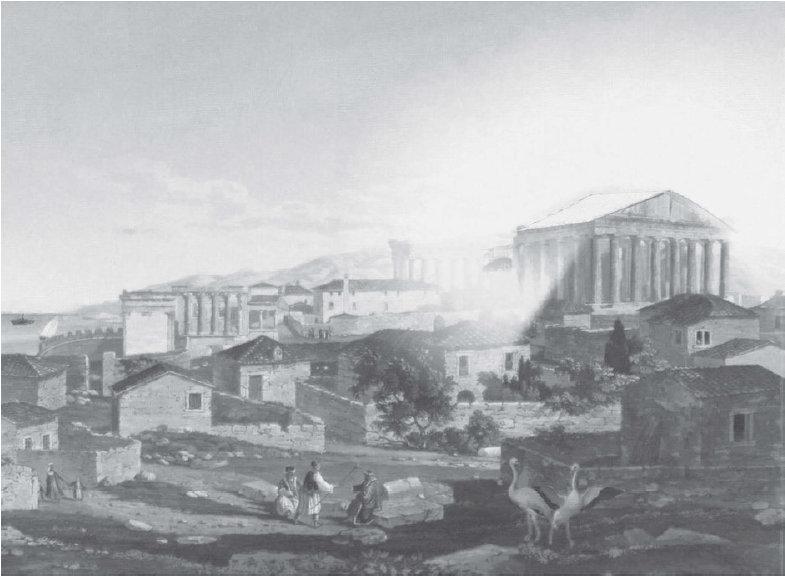
Zar is the Abode of Unformed Dreams. As a city, it looks something like a Grecian temple complex, but it's full of the half-dead and incomplete objects of dreams now discarded. Henri warns against venturing into Zar, as the only reason the Express stops here is to pick up lost dreamers. Anyone who does disembark and sees Zar's interior loses 1/1D4 SAN.
The Madman tries to board in Zar. He's emaciated and wearing tattered clothing, babbling incoherently about the horrors he's witnessed. He's torn his own eyes out, but he can still see. He's clutching a ticket and wants to board, but will attack Henri or any dreamer who tries to help him. As such, Henri is reluctant to let him on and will need a Persuade roll to convince him otherwise, at which point the Madman will be tied up and locked in the Baggage or Padded Compartment. The truth is he's just a dreamer having an awful nightmare. A dreamer who uses Psychoanalysis will be able to partially heal his damaged mind; slowly, a green soapstone carving of the Madman's own screaming face will coalesce in his hand, his dream artefact. 1D2 SAN for helping him.
Murder On The Dreamlands Express!!!
Things heat up on the way to Aphorat.
After lunch, Henri passes through the dreamers' carriage on an errand. Karakov hurries down the corridor, his hand wrapped in a blood-stained bandage; if asked, he will say he suffered a shock at lunch and cut his hand ('Can't you hear them? The guns are so loud.'). A Being of Ib is squeezed into a corner of the roof by a Sarnathian. A dreamer might help the Being, which will require a trip to the baths, which will require a fresh robe from the sandlewood trunk their compartment. When they open the trunk, they find the body of Blackjack.

Yeah, rip.

The kitten has been stabbed three times with a sharp object as long as his entire body. First Aid suggests that the blood stains are too small for these wounds, so he was probably killed somewhere else and moved here. Medicine suggests a probable time of death as 2:00PM – asking other passengers reveals no one had seen him since before lunch. Another roll of either skill suggests that the implement used was unlikely to be a knife, since the wounds are thicker and rounder than a normal blade.
The smartest thing to do is call Henri and notify him of the murder, as doing so will immediately clear them of any suspicion. Dumb investigators will try to hide the body somewhere else, extremely dumb investigators will try to throw it out the window – a tentacle catches it and it'll take a Luck roll for it to not immediately go to Henri. The cats react to the murder by retreating to their compartment and hissing at any visitors. When Henri finds out, he respectfully asks for the investigators' help in solving the murder. A Law or Dream Lore roll will inform the dreamers that a murdered cat on his train breaks his deal with Ulthar and he risks losing that station forever as a result.
Since there's no way off the train while it's moving and the tentacles catch any disposed items, the murderer and any evidence are still somewhere on the Express.
(It's possible that the investigators don't help the Being or otherwise interact with their trunks, in which case they get a Spot Hidden roll every time they walk into their compartment to notice the smear of blood on the trunk.)
((It's also possible that they don't make the discovery at all before Aphorat. The consequences are dire: Blackjack's mother Sophie eventually discovers the body, and the investigators must help Henri in the investigation as before – this time with a two hour time limit.))
Next time: CSI: Dreamlands!
THE DREAMLANDS EXPRESS – PART FIVE
Original SA postTHE DREAMLANDS EXPRESS – PART 5
There's no order of events presented here. The dreamers are free to pursue their investigation however they think is best. There's a very comprehensive section detailing all possible pieces of evidence and avenues of questioning that should satisfy your players. Here's what they can find.
The Dreamer's Compartment
Spot Hidden reveals claw marks outside the dreamer's window and indeed all windows on their carriage, as if someone or something has climbed along the outside of the train.
Cat Compartment
Most of the cats return here after the murder, but others stalk up and down the train with flat ears and twitching tails. A small posse follows the dreamers and will actually help them by smelling evidence and contributing their observations (via Henri interpreting for them). Sophie is far too upset to talk to the dreamers.
Karakov's Compartment
Karakov keeps a cutlass under his divan for protection. It's likely to be covered in blood when the dreamers find it. The cats confirm that it's not cat blood, but they also don't know what kind of blood it is.
If they haven't already, dreamers will notice Karakov's wounded hand, which he claims to have cut at lunch. However, Psychology reveals he's nervous about something, and both Henri and Mac say they did not see Karakov get cut. He changes his story if pressed, claiming that he was frightened by a noise in the dining car and ran back to his compartment to arm himself; he grabbed his cutlass by the blade instead of the handle. He insists that he heard cannon-fire, but of course no one else did.
Bruja's Compartment
Dreamers will hear weeping when they come to Madame Bruja's door – a surprise considering her perfect composure at all other times. She was alone in her compartment when the incident occurred, as is usual for her between mealtimes.
She blames her 'her enemy' for the murder, and states that even if he's not on the train he has probably sent an emissary; one of the other passengers is not who they claim to be. It's possible that the dreamers have by now discovered her story in the Waking World and will want to ask her about it, but more on that later.
Mironim-Mer's Compartment
Spot Hidden notices one of the rugs here is rumpled, but if he's allowed to be present during the search Mironim stands on the rug to hide this. Pulling it back reveals the hide of the trainbeast underneath has been cleaned recently. Another Spot Hidden finds an overlooked blood spot that the cats will confirm is cat blood, though Mironim claims it's the result of a shaving accident.
Mironim-Mer was in his compartment at the time of the incident. He confesses that the Sarnathians have been making him uncomfortable, trying to get access to his stash of wine and pressuring him about the return of the lemon sails. Something strange happens when the dreamers try to use Psychology: one of them becomes certain he is lying, the other that he is telling the truth.
Mac's Compartment
As mentioned, Mac refutes Karakov's first story. There's nothing interesting in his compartment, aside from the fact that he's messily stuffed some of the more exotic furnishings into the wardrobe.
Zsusza's Compartment
Zsusza's compartment is covered in red stains that turn out to be lipstick and rouge. Dresses are flung about everywhere. This is probably when the dreamers will first notice her dream artefact.
Zsusza's as upset as anyone else about the death of Blackjack. In addition, she will tell any sympathetic dreamer her plan to get rid of her dream in the Gulf if she hasn't already. Fast Talk or Persuade will convince her not to, as there is at least one other person who believes in her.
The Padded Compartment
The Padded Compartment walls are covered in rusty brown stains. You don't want to know. The cats can't come to a consensus about it, but they think it's probably beetroot.
Somewhat unsurprisingly, the Beings of Ib think the Sarnathians are the most likely culprit. The Sarnathians are child-murderers who once drove the Beings into a lake at spearpoint, did you know? The Being of Ib who was stuck outside the dreamer's compartment says that they didn't see anybody enter or leave aside from the dreamer.
If the Madman was allowed aboard, he's Henri's first suspect. His babbling is indecipherable, though he mentions a cat conspiracy at one point. Mechanical Repair confirms that the restraints on him are in good condition, so it's unlikely that he could have slipped away.
The Sarnathian Compartment
The Sarnathians refuse to let anyone but Henri and their chosen dreamer into the compartments, where they've taken advantage of the sliding walls to join theirs into one big room. They've arranged their divans in a circle so they can lounge around feeding each other grapes. There's nothing suspicious about their compartment (the book doesn't say if there's knitting needles, Bieeardo).
The Sarnathians blame the Beings. The Being are horrid. The Beings are nasty. They're so disgusting they would do anything to anyone. They're the only creatures on the train that have claws. And anyway, the Sarnathians never killed any children, it was probably the Beings who did it to themselves. And on, and on. The Beings do have claws, but they're more like thin needles than whatever wounded Blackjack.
So, I'll turn this over to you guys now. Let's have a vote. Who's the murderer?
THE DREAMLANDS EXPRESS – PART SIX
Original SA postTHE DREAMLANDS EXPRESS – PART 6
Big Reveal
Did you say Mironim-mer? Good job! As a Sarrubian, Mironim-mer actually looks nothing like a human and the glowy-eyed twink he's normally dressed up as is his dream artefact. His true form is decidedly more deadly and lets him scuttle around the outside of the carriages.
I should also issue a correction here: the blood-stained cutlass is actually found in Mac's compartment. The blood is Mironim's; he smeared it on the cutlass and stashed it there to distract the dreamers.
Then, if the dreamers leave Mironim-mer alone after speaking to him, he goes to make his second attack – a Listen roll detects the sound of claws scrabbling outside the carriage. After that there's piercing shrieks coming from Bruja's compartment. The door is locked and will require either Henri's keys or the dreamers breaking it down in some way. When they do get in, Bruja is under attack by some kind of spindly alien crustacean with glowing red eyes – 1/1D4 SAN. It's trying to wrest the heart-shaped valise from Bruja's hands.
The dreamers can intervene however they want to, either fighting or trying to grab the valise themselves. If they get the valise, the monster goes for them, likely leading to a frantic chase through the train. Otherwise, it steals the valise and wrenches it open to reveal – nothing. It's completely empty. The red glow leaves its eyes and from there it tries to escape. Dreamers will have to hold it off for 1D6 rounds until Henri can get to them, but the thing isn't trying to kill anyone and just wants to get away. When Henri gets here, tentacles shoot out of the walls and restrain everyone. Of course, if Henri is already with them this is the first thing he does.
Even if she was hurt in the attack, Madame Bruja cackles madly. 'He'll never find it!' she yells. 'Never!'
Henri's first instinct is to throw the monster off the train and it'll take a Persuade roll to get him to hold back. The monster will nod vigorously if accused of Blackjack's murder but also waggles its jaw tendrils beseechingly – Psychology indicates it's struggling to speak, but something is holding it back. Henri will agree to keeping the monster in the Padded Compartment for later questioning, and at some point if they haven't cracked onto it yet they'll realise that Mironim-mer is missing. He'll be back in human form next time they see him.
Parlour Scene
If they don't make other arrangements, Henri gathers the passengers in the Banquet Hall for the dreamers to announce their deductions. If they accuse Mironim-mer, he quietly surrenders. He confesses to killing Blackjack; he had assumed his true form when the kitten came into his compartment, which is when he killed him and hid the body. However, he struggles when he tries to explain his motive. He gets as far as, 'I was mesmerised...Her Enemy…' before he collapses, writhing in agony. When he has recovered, he can silently indicate Bruja as 'Her'.
After that, Henri asks what the dreamers want to do with him. He won't contemplate anything barbaric like handing over to the cats to be ripped apart so really the options are to have him tried in Ulthar or to bring him before King Kuranes. Either way, he'll be spending the rest of his time aboard the Express restrained in the Padded Compartment.
Dreamers gain 1D6 SAN for correctly deducing the murderer, or 1D4 if they don't figure it out until the second attack.
The Lovers' Heart
Madame Bruja's story can be found in a crumbling gothic tome in the Waking World. Either the investigators go looking for it specifically or they stumble upon it when they fail a Library Use roll. Despite being a folk tale, no-one along the SOE route has heard of it due to its Spanish origins.
quote:
A grisly little myth told in the town is that of the Sorcerer and the Crone. The Sorcerer married late and foolishly. As a reward for his folly he one day surprised his young wife with her lover. Enraged he summoned the dark powers, and tore the unhappy pair to pieces. He ripped the hearts from their bodies and burned them to ash, vowing they would have no rest even in death. Their broken bodies were tossed to the dogs.
He reckoned without the dead girl’s mother, a crone of horrid malevolence, who prayed daily before the church for vengeance. Her cries were heard, although it is doubtful if the answer to her prayer was truly Divine. It is whispered the church was built on an older and grimmer foundation raised by the ancient Romans in worship of their pagan gods. One day she stood before the church holding aloft a glowing ruby the size of a clenched fist, and of peculiar shape, as if it were fashioned of two lovers’ hearts entwined.
The Sorcerer, seeing this stone, was consumed with desire for it. He ordered his men to seize it but the Crone hid it in her breast. He had her searched, but the stone was gone and even under torture she would not reveal its hiding place. She was condemned for witchcraft and burned in the square before the church. As she was engulfed in flames the Sorcerer yet demanded the stone from her. Consumed by fire, she at last unlocked her lips. “Hate is stronger than love,” she screeched. “And death is stronger than life. Only in your dreams will you find it,” she taunted the Sorcerer. With that she died.
The Sorcerer went mad with lust for that lost stone. In his last days, raving, he locked himself in his tower. Believing he had found the answer to her taunt he burned himself alive in his own crypt.
Some say the pair know no rest, but are seen even now on dark nights, chasing each other amid the storm clouds. The Crone yet holds her glowing prize aloft and shrieks with delight at the Sorcerer’s vain pursuit. “Hate is stronger than love,” she cries. “And death is stronger than life!” Surely no merciful Providence would allow such horrors to exist.
If confronted, Bruja freely admits that she is the Crone that the story refers to. She has been pursued in the Dreamlands ever since, and several times now the Sorcerer has come close to seizing the Lovers' Heart. Bruja is totally consumed by hate and now plans to throw the stone into the Gulf so she can defeat the Sorcerer forever. If the dreamers don't know that the valise is empty, Bruja will say she keeps the stone in there. Otherwise, she simply won't tell them it's true hiding place: inside her chest, replacing her heart.
Mironim-mer has been hypnotised by the Sorcerer, who now knows where he is at all times and can take control of his body. He tries to fight the Sorcerer's will, but doing this always makes him revert to his true form. If the dreamers totally fail to apprehend him, he'll tear Bruja to shreds in search of the Heart and hand it to the Sorcerer as soon as the train pulls up in Thalarion. The Sorcerer blasts Mironim-mer with has magic and leaves him behind to escape with the stone. The pieces of Bruja's undead body continue to wriggle and writhe (SAN 0/1D4) and must be either removed from the train or locked in the Padded Compartment for the rest of the journey. The investigators lose 1D4 SAN for failing to stop the second murder.
The book suggests this as a good stopping point for the second night on the Dreamlands Express. We'll swing back later for the third (and final!) part of the scenario.
Next time: the moon hits your eye like a big pizza pie!
DEATH (AND LOVE) IN A GONDOLA – PART ONE
Original SA postDEATH (AND LOVE) IN A GONDOLA – PART 1
Our heroes head east to the city of canals, and there its past glory, present decay, and eternal romance affects everyone, even Fenalik.
That's Amore!
There's a lot going on in this scenario and to its credit it does a good job of keeping everything straight for the keeper. The main plot thread involves the search for the next Simulacrum piece, in this case the Left Leg. It's been incorporated into the clockwork automata of a fancy clocktower. While that's happening, there's the Love sub-plot, in which investigators help a pair of star-crossed lovers escape the Fascists. While that's happening, Fenalik's cold undead heart is stirred with nostalgic memories of Venice and he can't help but relive his time there – his malignant presence corrupts the city and makes life harder for the investigators. The Love sub-plot can easily be excised if you don't think your players will be interested, but if they're of a romantic bent you should definitely keep it in.
The events of the campaign run on a tight schedule and happen over a course of about five days with new development in the plot threads each day. I'll present the events according to the schedule suggested by the book.

Arrival
The trip from Milan to Venice is blessedly short. On board, the investigators see a young woman in black and wearing a veil, weeping openly. Her only company is a middle-aged maid by the name of Bice. If they can offer some comfort to the poor woman, she'll introduce herself (in excellent English, should the investigators not speak Italian) as Maria Stagliani, a Venetian native who was holidaying in Milan. Sadly, her holiday has been cut short by the tragic death of her father, an academic who caught pneumonia after falling into the canals.
When they arrive at the station, Stagliani's two suitors are waiting for her. The first is Alberto Rossini, a Fascist bureaucrat accompanied by a troop of Blackshirts. He's quick to accost Stagliani, and the investigators will hear him offering stiff condolences before trying to usher the reluctant woman into a waiting government car. Investigators may notice her other suitor, a handsome young man named Georgio Gasparetti, angrily striding towards them. Stagliani sees him and begs him not to get involved, but Gasparetti is clearly too hot-headed to realise that picking a fight with a whole pack of fascists might be a bad idea. At this point, Stagliani begs for help from the investigators.
The intrusion of these rich tourists diffuses the situation. Gasparetti slips away, while Rossini blusters and demands the investigators' names and papers. If the investigators take no other action, Stagliani gets in the car with Rossini – fortunately, it's a short ride to her home and Rossini has no ill intentions towards her at this point. If the investigators offer to escort her, she introduces them to Rossini as family friends (an obvious lie). Either way, she makes sure to find out where they're staying or recommend a hotel for them if they haven't decided.
If they agree to escort her, she explains her trials and tribulations. She absolutely loves Gasparetti and despises Rossini, who as well as being a Fascist is fat, forty and plagued with bad breath. She's weeping again by the time she reaches her door.
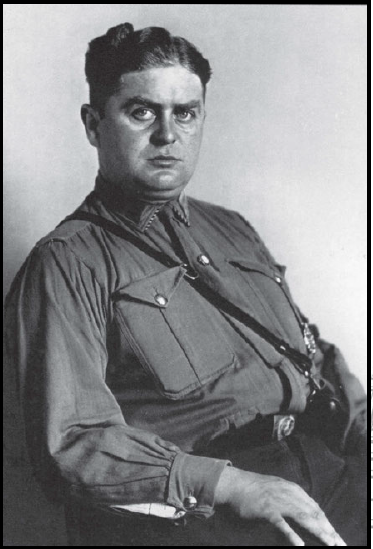
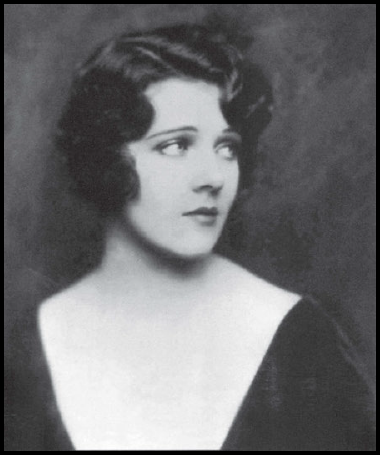
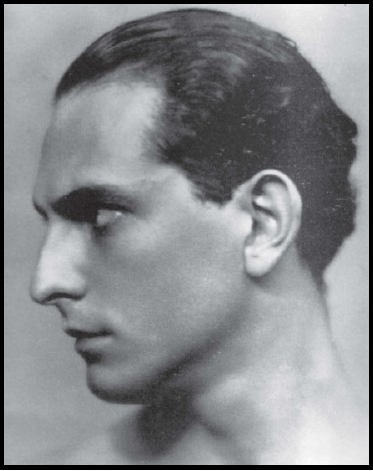
Left to right: Rossini, Stagliani, Gasparetti.
The Suitors
Georgio Gasparetti is an idealistic young Communist who was too young to fight in the Great War – wars are devices of the bourgeoisie to expand their fortunes, but he is saddened he missed a chance to prove his bravery. He's passionate, but naive and bad at picking his battles, as the encounter in the train station proved. He loves Stagliani but as a man of low birth, her father didn't approve of their marriage and now he'll never get a chance to change his mind. He believes that the Blackshirts are to blame for his death.
Alberto Rossini is absolutely to blame for Papa Stagliani's death. The old man didn't approve of Rossini either, so he sent the Blackshirts to rough him up. He feels no remorse for causing the death, but his macho code prevents him from making a move on Stagliani until her father's been laid to rest. His Blackshirts are omnipresent in Venice, always seen lounging in large groups or menacingly following the investigators in pairs. The first time the investigators need to contact the government for anything, it's probably Rossini they have to deal with. Rossini is also, haha, an occultist. He has initiation in some kind of fashy secret society and he uses this to intimidate his subordinates, but the investigators doubtlessly have stronger magic chutzpah than he does.
Next time: the investigators rob a cathedral!
DEATH (AND LOVE) IN A GONDOLA – PART TWO
Original SA postPurpleXVI posted:
I'm imagining a Disney musical number where Fenalik swings off lamp posts and rides gondolas while singing, but everything he comes near either breaks, bursts into fire or wilts, or straight-up dies. Yet he either doesn't notice or doesn't care.
Funny you say that!
DEATH (AND LOVE) IN A GONDOLA – PART 2
Love - Day 1
If they haven't heard already, this morning begins with the news of Arturo Faccia's brutal murder. Around noon the waters of the canals take on an oily appearance until they're freshened by the tide.
That evening, Gasparetti rocks up at the investigators' hotel having just spent some quality time with Stagliani. He's endlessly grateful for whatever small assistance they offered and wants advice from these powerful signors on what he should do in his current situation. During a night walk in Venice he'll pour his heart out about his the breadth of his love for Stagliani, saying that their romance symbolises the rise of the proletariat and the breakdown of the old order. He'll also mention the growing tensions between the Fascists and Communists following the December riot. He invites the investigators to Papa Stagliani's funeral, which he plans to attend to pay his respects.
At 4AM, a woman runs through the street screaming 'Morte! Morte!' She disappears into the fog before the investigators can pursue her.
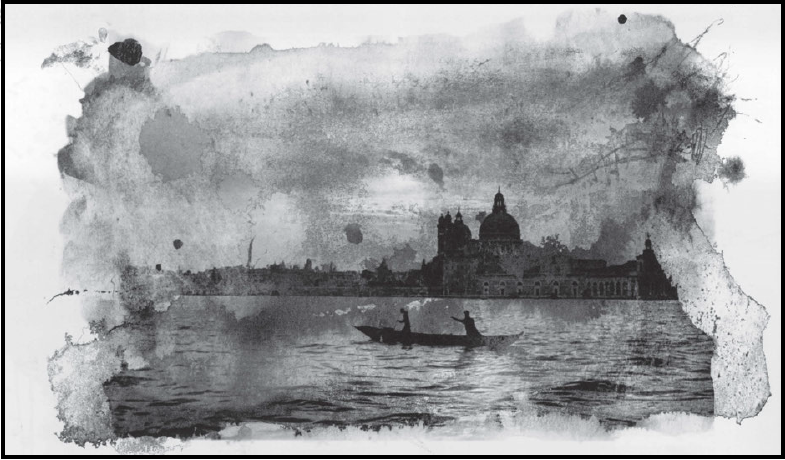
Death – Day 1
The investigators will probably use this day to get settled in and hit up the library. There are plenty of resources to be found, but they'll require a mix of Italian and French to decipher. Befriending Gasparetti gives them an eager and loyal translator if they lack one, and though Stagliani is too upset to contribute she can recommend one of her father's colleagues. Beddows' notes mention Napoleon's invasion of Venice and that's probably the first place investigators will look. After the Venice Senate rolled over for him, Napoleon's troops swept into the city and put into his action his plans for civic reform.
A Library Use roll finds records of a strange plague that struck the city after the troops entered, causing its victims to suffer crippling pains in their left legs. A second roll pulls up an account from a Capitaine Dubois who had to disperse a mob that came for one of his privates. Why? They believed he had brought evil to the city in the form of a strange porcelain leg. One more roll leads to Dubois' diary; turns out he confiscated the leg from the private, suffered its Baleful Influence and wisely decided to bury it in the Basilica di San Marco. 'The task before the investigators seems clear enough,' the book states. 'They must steal into one of the most famous cathedrals in Europe and spirit away a human-sized leg.'
Also, the investigators might be curious about The Devil's Simulare that they first heard of in London or Paris. They know it was stored in the San Maria Celeste church, but asking the Venetians turns up blank looks, as the church was burned down in the 1569 Arsenal Fire. The Simulare was among the illuminated manuscripts that survived, and it's now held at the Biblioteca Marciana where the investigators are probably already researching shit. Reading it activates the Dark Crusader scenario.
Love – Day 2
The screaming that the investigators heard last night was the result of a grisly murder. The victim Mario Rossi was found impaled on ten-foot iron spike, throat torn open. His fiance Anselma Moretti is being held by the police. Curious investigators will probably need to bribe the cops to find out more. As far as they can tell, the victim was hurled onto the spike from the ground, and though terribly mutilated the body was totally drained of blood. This disturbing detail is being kept secret from the press. As for Moretti, she's gone totally insane – if they can secure an interview with her, it takes hours of Psychoanalysis to get her to talk, which elicits a traumatised description of Fenalik doing his thing. After this, Moretti tries to gnaw out her own tongue.
At noon the stinking waters rise and clog the canals. Fresh flowers appear in the street shrines to the Madonna and St. Mark. The statues in the St. Marco weep tears of blood during the evening service.
Oh, and the investigators also get a letter from Stagliani! Hand-delivered by Bice, the poor woman thanks the investigators and formally invites them to the funeral.
Death – Day 2
The Left Leg is supposedly buried beneath a stone in the chapel of St. Isidro. There's a mosaic here depicting the saint's death – as he is dragged by the galloping horses, his left leg is close to being torn off. Spot Hidden finds the paving stone described by the captain in his diary, darker and heavier than the others. Science (Geology) suggests that it might be made of meteoric iron, and this alien metal has insulated Venice from the effects of its aura. All they have to do now is figure out how to fuck around with it without anyone noticing.
Two people and a Strength roll is required to lift the unearthly stone. If they come during the day, it's a Luck roll to not be interrupted by a tourist group. Failing that, it's another Luck roll to not be caught by the sacristans. Breaking in is actually a riskier proposition, as the Piazza is busy and well-patrolled even at night. A better idea is waiting in the cathedral for closing time before making their move. If you've ever been to one of these old cathedrals, you'll know it's a gloomy place filled with all kinds of weird niches, and a Stealth roll and a few hours of discomfort is all it would take. Breaking out of the San Marco is easier than breaking in, and if they want the investigators could just wait for the early Mass.
That fucker! Our leg!
However, after all that, the investigators will find that the cavity beneath the stone does not contain the Leg. Instead there's a sealed letter containing the panicked confession of the bastard who stole it, apparently to fix another statue. The wax seal on the letter depicts a cherub set against a shield cradling a doll. Any Venetian can identify it as the seal of the Gremanci family, a long line of automaton makers and former princes of Venice. Stagliani actually has a treasured Gremanci-made doll, while Gasparetti will mention that they spend more time these days making prosthetics for maimed veterans.
Next time: death at a funeral! (not really)
LOVE (AND DEATH) IN A GONDOLA – PART THREE
Original SA postZereth posted:
Oh, I'd somehow missed that that's what the Baleful Influence did rather than some sort of generic curse.
I kinda glossed over it, but yeah, any concentrated effort to destroy a Simulacrum piece - the book cites hitting it with a blowtorch or throwing it in a compactor - will not destroy the piece but will have an adverse effect on whoever is currently the 'owner' of that piece.
LOVE (AND DEATH) IN A GONDOLA – PART THREE
Love – Day 3
There's news of another murder, throwing Venice into a little Satanic Panic. A gondolier was found torn to gibbets in his boat. The investigators' waiter says his brother-in-law saw Death himself poling a gondola; this was just Fenalik out having a good time. The flooding tidewaters have crept into several low-lying houses and children who played in the water are now sick with black blotches on their limbs.
Amidst these conditions, the funeral does not go well. The coffin is to be taken by gondola to the cemetery island of San Michelle to be interred but the water reeks, particularly in the lagoon. Gasparetti and Rossini both attend the funeral and spend the entire miserable service glaring at each other over the top of the coffin; Stagliani pays no attention to either of them. Afterwards there's a wake in the Staglianis' luxurious four-storey home. When the investigators leave, Stagliani thanks the investigators and Gasparetti leaves with them to avoid further pushing his luck with Rossini.
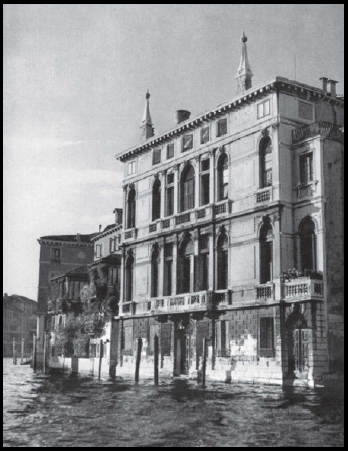
As they leave the funeral, Gasparetti challenges their gondolier, saying that he's taking the long way. The gondolier reassures him, but Psychology reveals he is nervous, and Navigate indicates he's taking them away from their hotel. If the investigators don't commandeer the vessel, he takes them to a run-down campo where the Blackshirts are waiting. They plan to give everyone on board the boat a good beating and probably a dunk in the canals to round it off.
Ashamed that he's got his new friends in trouble, Gasparetti immediately leaps ashore to fight the Blackshirts while urging the investigators to get away. The gondolier's not moving, so they'll need to shove him overboard if they want his pole. Alternatively, they might go ashore to fight; there's six Blackshirts and depending on the size of the team that could mean equal numbers. If the investigators pull a gun, they scatter but the police are soon on the scene. It's worth reminding the investigators that unless they're Italians, pulling out an illegal firearm or even worse killing someone is going to land them in a heap of trouble. When the cops turn up, they'll only arrest non-Blackshirts. If there was fighting, Gasparetti is the worst-injured and will need help getting home.
That night, two huge fish are seen swimming in the canals, each with human arms and hands.
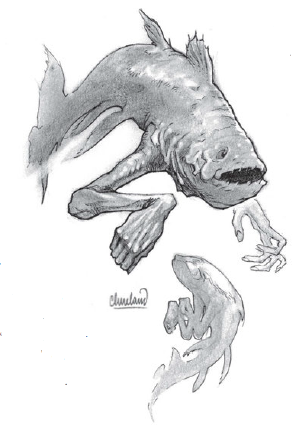
Death – Day 3
The Gremanci factory is an old stone building in in the Campo Della Bambino, close to a bunch of university student homes and industrial buildings. There's also a lot of broke veterans loitering around the campo, many of whom have impressively made prosthetics. It's not hard to talk to the Gremancis, but if the investigators fail to hit it off with them or – even worse – are German, they're going to have to break into the factory after-hours to find information.
When the investigators arrive, they'll see elderly Antonio Gremanci fitting a veteran with a new prosthetic leg. They'll have to wait until he's done before he'll speak to them and he'll absolutely not suffer any interruptions. When they show the letter to him, he is shocked by it and calls his son Sebastiano in from the factory. Sebastiano is in his late twenties and walks with a limp; Spot Hidden reveals that his left leg is also a prosthetic. He's a war veteran but hates the Fascists and will immediately warm up to other veterans or anyone getting hassled by the Blackshirts. He's also got a hacking cough from exposure to poison gas, for which doctors have recommended smoking as a way to strengthen his lungs. It's the 1920s.
The Gremancis identify the writing as belonging to Marco Gremanci, Sebastiano's grandfather. Antonio is embarrassed, but Sebastiano is amused at the old man's gumption. Unfortunately, he passed away in 1918 and as such will not be able to identify the mystery project that required stealing the Left Leg. Sebastiano mentions that his death came as a relief, as he had long suffered crippling arthritis (his left leg, if the investigators think to ask). If things have been going well so far, Sebastiano is willing to let the investigators go through the family records, where they will discover that Marco was commissioned to make a set of larger-than-life gilded clockwork automata for the Palazzo Rezzoniani.
If the investigators manage to meet and befriend the Gremancis before going to the funeral, the Blackshirts try to intimidate Sebastiano after they leave. His response is to get in touch with his old army friends: the investigators can enjoy the rest of their time in Venice protected by their very own bodyguard of jovial ex-military criminals. This will make the encounter with the Blackshirts after the funeral much easier and far more satisfying.
If the investigators are forced to break in, there's a map of the factory and room-by-room description like a dungeon crawl. It's as creepy as you'd expect a dark, empty doll factory to be. There's no supernatural dangers, just hundreds of staring doll faces.
Love – Day 4
There's no further murders – Fenalik's eaten his fill – but the citizens of Venice are going crazy. Newspapers report isolated mobs and looting in parts of the city. If the investigators have been keeping odd hours, the suspicious hotel staff report them to the cops, causing them to be held up for hours while they get tossed back and forth between the pigs and the government. More seriously, their passports are likely to be confiscated during this process.
Concerned scientists from the university are taking samples of the canal water, which is now black as oil. Hysteria builds in the city with rumours that touching the water spreads the plague. People shut themselves away in churches and mobs throw suspicious individuals into the canal.
In the afternoon, Bice contacts the investigators with a note from Stagliani. The Blackshirts are holding her captive in her own home and she believes that Rossini plans to force her to marry him. She is also concerned about Gasparetti, who did not make an appearance at her balcony last night. She requests that they contact him; the investigators will probably feel obligated to render any other assistance that they can.
Gasparetti's fine, but nursing a fresh black eye. The Blackshirts intercepted him on his way to meet Stagliani, but he managed to get away. As soon as he hears about Stagliani's plight he vows to rescue her and enlists the investigators' aid. Naturally, his first and only plan is to storm in through the front door, but he's open to suggestions. Canny investigators will suggest getting in contact with some of his fellow Communists – they're itching to get back at the Blackshirts after what happened last Christmas.
At the Stagliani house, Maria is trapped upstairs with two Blackshirts. Another six are loitering downstairs, one at each entrance and four enjoying a meal prepared by Bice. Rossini is away finding a pro-Fascism priest to officiate the marriage. The book recommends going with whatever the investigators plan for, but it would be good to warn them against going in guns blazing (as much as they might want to by this point). If they don't want to fight the Blackshirts, they could try chasing them away by feigning some kind of supernatural event – fascists are a superstitious and cowardly lot. Whatever happens, Rossini arrives with the priest just as they're about to leave with Stagliani.
Rossini isn't much. Killing him is probably not the best idea, but Fenalik's actions provide a good cover if they want to. If they attack, he'll pull out a derringer while Stagliani throws herself in front of Gasparetti. That said, his lust for Stagliani isn't worth dying for, nor can he bring himself to physically harming her. If he's alone he'll probably even surrender, but this is less likely if the Blackshirts are still around. After Rossini's dispatched, all that's left to do is get married. Rossini's priest is a Fascist sympathiser, but Gasparetti knows plenty of leftists in the church. 'You wanna get married? Great. These rich jerks are witnesses. Sign here please.'
That evening, a woman possessed by the devil is exorcised in the street. A murderous mob stabs an epileptic to death mid-seizure. The baying of a hound echoes through the city all night.
Next time: stop the clock!
LOVE (AND DEATH) IN A GONDOLA – PART FOUR
Original SA post Merry Christmas!LOVE (AND DEATH) IN A GONDOLA – PART 4
Death – Day 4
The Palazzo Rezzoniani is easily located. It's a tourist site, the grand palace that housed the now exctinct Rezzoniani family. It's open all summer, but in winter the investigators will have to make an appointment with caretaker Nonno Fidele. Fidele will happily explain the tragic demise of the Rezzonianis: the last one died in 1918, an elderly recluse with arthritis (you'll never guess where) whose only relative was a grandson lost in the Great War. He died alone in the winter and wasn't discovered for months. He'll show the investigators into the Palazzo for a pittance but will come to chase them out after a couple of hours; giving him more money extends the time they can explore the place. Six hours is probably the most he'll let them stay there before he grows tired and suspicious. He won't let them in after dark for anything less than L500 and he won't stick around waiting for them either.

If the investigators come to the Palazzo during the day, the winter sun vanishes behind a thick fog. All is dark and silent.
The automata the investigators seek are in the Palazzo's great clock tower. There's eight of them that gradually emerge onto the balcony below the clock face in complex procession to ring out the hours. There's single chimes every quarter-hour but the whole gang comes out on the hour to count out the whole thing. The clanking of the clockwork is extremely loud and every chime sends twinges of pain up the investigators' left leg. The best view of them is on the third floor of the Palazzo in the room where the last Rezzoniani died; there's a stained armchair facing a window that stinks of corpse and still has a visible imprint as if it clings to the memory of the dead.
Getting to the top of the clock tower is harder than it might seem at first. There's a long staircase with steep and irregular stairs much unlike the shallow even ones that are now common in the 20th century, and if the investigators haven't been sightseeing enough they'll be exhausted by the time they reach the top. There is a padlocked trapdoor at the top of the stairs that take a Strength check to break through, but on a Hard result it's weaker than the investigator anticipates and they'll send themselves and their team tumbling down the stairs. If it weren't for the later additions of stout metal railings, the investigators would likely plummet to their death. One final flight of narrow stairs takes them inside the clock.
Regardless of day or night, it's dark enough for Fenalik to follow the investigators. He silently ascends to the top of the tower. He knows exactly where his precious Left Leg is and he wrestles with the temptation to grab it and run.
The inside of the clock is claustrophobic and the investigators will have to stoop to avoid gears and press against the walls to squeeze around the automata. Hope they brought a torch. The automata have a sequence they follow that changes their positions every quarter-hour; the investigators are going to have to work around this to figure out which one of them has the Left Leg. Up here the bell is mind-shatteringly loud; every time the clock chimes or rings the hour all work must stop while the investigators press their hands against their ears. After inspecting the statues, they'll notice that Death, the Assassin and the Angel are carved out of solid pieces and can't have the Leg. The Lion has paws, naturally. Only the Turk, the Soldier and the Rustic Lad and Lass show some leg. Then it's just a matter of scraping off the gilt covering them until they find the right one. It's the Soldier who bears the Left Leg.
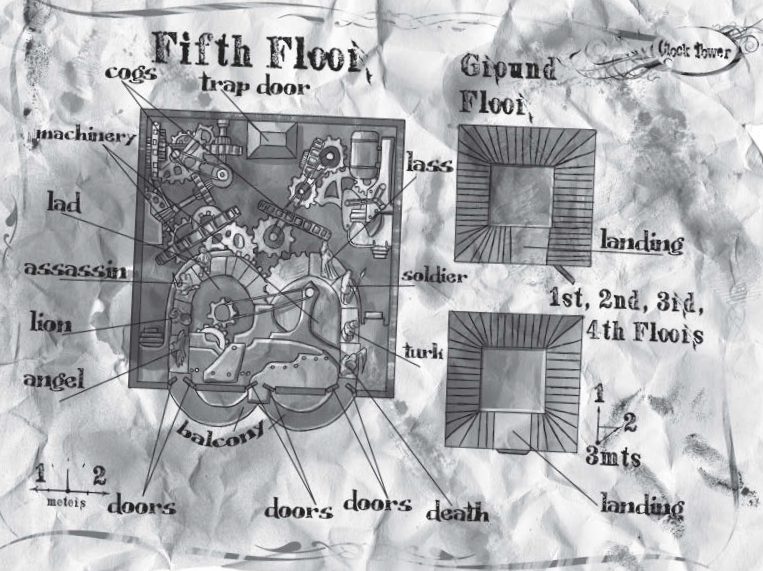
Oh shit!
As soon as they discover this, the next quarter-hour strikes and the balcony doors swing open. Spot Hidden reveals Fenalik, standing five impossible storeys outside the clock. Mortified, he steps backwards off the building – SAN 0/1D3 to see his 'suicide' - but hesitates long enough to make investigators think he's also after the Left Leg. Of course, if the investigators check the ground later they find no body. The book suggests a Spot Hidden roll to notice a bat flying away, but if your players are even remotely genre-savvy they are going to shriek VAMPIRE VAMPIRE VAMPIRE VAMPIRE so loud you'll wish you were never born, so I would leave that out.
Removing the Left Leg from the Soldier is tricky work. Mechanical Repair finds the fail-safe lever that stops the automata from moving, but better wait for them to stop or you'll have to Dodge. It'll take another Mechanical Repair roll to properly detach the Leg, or some sledgehammers if they want to just smash the Soldier to bits. Particularly stupid investigators will try to stop the Soldier while it's moving. Whatever they do, it has the same result: there's a moment of stillness, then the automatons go ballistic. As the clockwork grinds and rattles, the automatons suddenly seem alive, spinning and bolting along their figure-eight track. Their mechanical movements and stiff faces make this terrifying – that's SAN 0/1D6.
Investigators who succeed will realise that removing the Leg has upset the delicate balance of the clockwork. Investigators who fail will realise that the automatons are alive and trying to kill them. Either way, the clockworks are treated as attacking the investigators and they'll have to react appropriately. Investigators who were driven insane (temporarily or otherwise) by this display panic and bolt for the exit, requiring them to Jump or Dodge the lethal clockworks or suffer 1D6 damage per failed roll. They don't stop running even if injured, and must then make a Dexterity roll to not tumble down the stairs.
The investigators have ten minutes to clear out before the authorities and the mobs arrive. The automata spin and crash against each other until broken to pieces.
Love And Death – Day 5
If the investigators haven't found the Simulacrum piece yet and they've been following the Love sub-plot, the fifth day in Venice is going to be their last day to do it. The chaos of the city has reached the point that the Militi have been brought in. There's smoke in the air and zealous mobs in the streets. The manager of the hotel emphatically suggests that the investigators take their leave. In the Piazza San Marco, the flood water is thigh-deep.
It's not all doom and gloom though. If Georgio and Maria were married, the investigators can see them off! They board the Orient Express going back to Milan, safely out of Rossini's reach. The feeling of warmth, well-being and romance stirs the heart-strings of even the hardest investigator, rewarding them 1D3 SAN. Later that afternoon, Rossini confronts the investigators in a public place accompanied by some very large and serious men – real hardcore motherfuckers in suits, not just Blackshirts. He makes it very clear to them that they've overstayed their welcome and that they had better leave Venice no later than tomorrow. Good riddance – the mob's going to get worse before it gets better.
The investigators receive 1D4 SAN for recovering the Left Leg. This piece might cause them trouble as they're leaving Venice – the last thing they want is to be implicated in the destruction of the Palazzo clock tower. If Gremanci Jr. finds out about their theft of the Leg, he congratulates them. He equates Fascism with the occult, so a blow against one is a blow against the other. He'll walk more easily after the Leg is gone but sadly, the investigators will never see him again; his exposure to poison gas in the war is going to do him in before long.
That night, the investigators are plagued by strange dreams. Each one inhabits a white humanoid form, scuttling like a spider over the outside of the train cars, peering into each window. From this outside view they watch themselves eating, sleeping, conversing, but as dispassionately as if they were watching common livestock and without a trace of sympathy. They feel themselves as Fenalik appraising themselves and being amused by their own weakness. Then that dream dwindles into nothing but blind anticipation, then darkness.
Next time: Trieste!
COLD WIND BLOWING – PART ONE
Original SA postYeah, Venice is a strong contender for best scenario in the campaign. Personally I'm a big fan of Lausanne too, so I appreciate that Milan is book-ended by two really strong scenarios.
COLD WIND BLOWING – PART 1
Our heroes dine with Herr Winckelmann, a personality with a long-term sense of obligation; he introduces them to a powerful contact, and hints toward the Right Leg.
Background
Hope you all had a holly jolly holiday! This is going to get kinda complicated so bear with me.
If you have never heard of him (as was the case with me before reading Horrient), Johann Joachim Winckelmann was an influential art historian and archaeologist who is considered to be the founder of modern archaeology. In Horrient, his studies of ancient Hellenic societies led him to discovering the Mythos, which he studied in secret. He came into contact with a lloigor colony and was compelled by them to make a delivery of a magic medallion to the colony near Trieste. His murderer was a lloigor cultist who wanted the honour of delivering the item to his masters, but Winckelmann had hidden the medallion and it remains lost to this day.
As a side-note, Darren Maclennan criticised the use of a comparatively obscure historical figure for a cheap thrill in his review. He also suggested that if your players don't know who Johann Winckelmann is, you should treat them like they've been living under a rock and talk him up like a 1700s Justin Bieber.
If you're not familiar with the lloigor, they're kind of like Mythos dragons. They're invisible vortices of psychic energy who have the ability to drain magic from humans, as they did back in the good ol days when they used to have legions of human slaves. They have a 'unified' mind structure with no subconscious or capacity for imagination; this make them ultra-pessimists and contact with the lloigor mind can inflict suicidal depression. When they do need to take on a physical form, they go for big reptile monsters. The Trieste lloigor live in the Postumia cave network and are worshippers of Ithaqua the Wind Walker – the magic power they steal is used to amplify the effects of the bora, the vicious winter winds. Their cult is old and deeply entrenched in Trieste, with dozens of cultists throughout the area.
The cult discovered the Right Leg of the Simulacrum and handed it straight over to their masters. The investigators will have to steal the Leg from a veritable dragon's den.
Makryat traced the Right Leg and figured that the lloigor cult found it and it's probably rotting on the lloigor treasure pile. The investigators have been doing well so far, but Mehmet is worried that taking on a whole-ass cult is probably more than they can handle. As such, he's dropped a line back to Constantinople saying that he's found the piece in Trieste. The Brotherhood of Skin have come to collect, though that means they're trespassing on the lloigor's turf. These aren't like Faccia's incompetents back in Milan, these are real Brothers of the Skin and they are absolutely not fucking around.
In addition, Winckelmann's ghost still haunts Trieste. He's been waiting for someone like the investigators to show up and complete the delivery of the medallion.
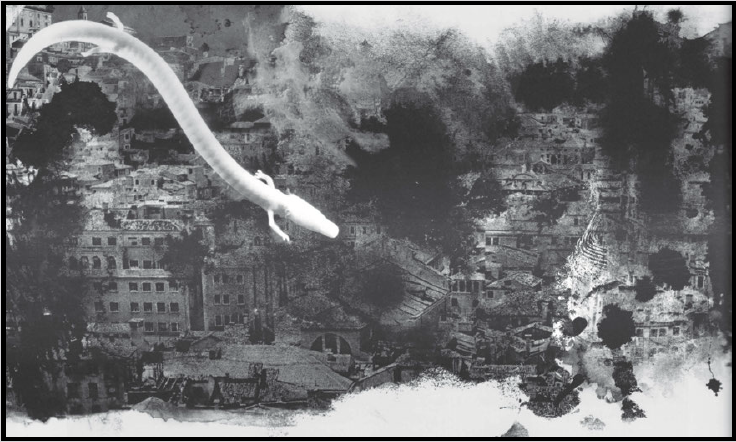
Baby It's Cold Outside
As the investigators disembark, they get the first taste of the bora, which forces a Strength roll from them to resist being knocked clean off their feet. In addition, every night they sleep in Trieste they must resist getting their magic drained from them by the lloigor; they must roll POW or lose 1D6 MAG. Investigators who fail the roll have terrible dreams of giant monsters moving around in dark water or of a howling thing racing towards them at impossible speeds – this knocks off 1 SAN. Investigators who lose more magic points than they have make up the deficit as additional hours they spend sleeping every night. Local doctors are familiar with the symptoms and say it's an illness that comes up in these parts this time of the year, but they can't do anything to help.
The investigators' lead from Professor Smith is to look up Johann Winckelmann. If an investigator is an archaeologist or can succeed on an Archaeology roll then they already know who he is. Other investigators will come up short in their inquiries until an amused city clerk recommends the Museo di Storia e d'Arte where Winckelmann's mausoleum stands. It's a literal dead end, but investigators will be intrigued by the frieze on the mausoleum wall. It depicts a group of humans making offerings to animal spirits, but the humans have been worn by time and appear to have disproportionate or missing limbs, while the animals spirits look like oriental dragons and could have been carved yesterday. Archaeology identifies it as early Roman, but there's no creatures like that in any Roman myths. Cthulhu Mythos brings to mind the lloigor and a dozen other serpent-like beasties – along with a SAN 0/1 for the suspicion that the artist was working from personal knowledge. Inside the mausoleum is Winckelmann's sarcophagus, atop which is a reclining figure holding a medallion with a man's head in profile.
Researching Winckelmann in the library – literally looking him up – is more fruitful. A full day's research turns out tonnes of information on the man, including the details of his murder for a collection of medallions he was carrying at the time. These medallions are on display in a velvet-lined box in the museum, a collection of seven that display Classical historical scenes. Spot Hidden lets investigators notice that wear on the velvet indicates there must have been eight medallions at some point. Consulting the curator reveals that the medallions were left to the museum by the Termona family, of whom Antonio Termona is a noted scholar who lives nearby.
In the library, the investigators notice a man sitting in front of a book with his arms folded into his jacket. He reads the pages in front of him then waits for an attendant to come around and turn the pages for him. He reads and waits again.
Investigators might also be inclined to check out the Locanda Grande where Winckelmann was killed. Library Use determines that it was knocked down and replaced with the Hotel Vanoli. As they approach the Vanoli, Spot Hidden lets them notice a pale face watching them from a window. If they ask hotel staff about that room, they will say it's unoccupied and has been for a long time.

There's a joke about tentacle porn somewhere here but i'm not the one to make it
Antonio Termona is a bigwig in the lloigor cult. He's been charged by his masters to find the Winckelmann medallion and has totally screwed the pooch on it so far. As is what happens when you fail the lloigor, his left arm was amputated and replaced with a scary-ass tentacle. He wears his sleeve pinned up and claims that it's a war injury, but suspicious investigators can Spot Hidden to notice there's something writhing under his shirt. His house is full of valuable-looking Mythos antiques that he fished out of the lloigor cave; all of them are covered in what looks like a strange glaze but is actually limestone secretions from stalactites.
If the investigators can get past Termona's scary butler Marco (who had one of his eyes replaced with a tentacle and wears an eyepatch to hide it), Termona is quite friendly and welcoming to the investigators. His family holds Winckelmann's diary and personal papers and he's willing to share them with the team. The papers are in Latin and are nothing more than rough notes on his excavations. The diary is in an ancient Greek dialect and Termona claims to have never read it – a lie. He's willing to lend it to investigators and even recommend a translator who can help them.
After they leave, Termona gets in contact with the cult and arranges for someone to tail the investigators. He hopes they will find the medallion so that he can steal it and present it to the lloigor himself.
Next time: being this close to a gang war between rival cults!
COLD WIND BLOWING – PART TWO
Original SA postCOLD WIND BLOWING – PART 2
The Translator
Termona's recommended translator is Marcius Montanelli, fellow cultist. He receives the investigators in his home office, where he sits in a wheelchair covered by a big blanket. This is because he too has earned the lloigor's ire and has lost a leg as a result – Hard Spot Hidden to see his tentacle twitching under there. He is a polyglot who mostly translates for businesses, but is looking forward to the new university semester as it gives him a chance to flex his Latin and Greek skills. Like Termona, Montanelli is already familiar with the diary. Alternatively, the investigators might choose to go to a separate translator instead, or even work on it themselves if one of them has Classical Greek in their repertoire.
The diary is Winckelmann's chronicle of his studies into the Mythos, a lot of it detailing his interactions with the lloigor. Notably, the diary actually contains the workings for a Contact Lloigor spell. The investigators only find this out if they translate it themselves, though. Translation takes a day and a half and if handled by Montanelli or another translator results in a heavily bowdlerised copy with the really juicy Mythos details excised. A home-made translation makes the diary into a hefty grimoire that teaches Contact Lloigor, although actually studying it would take months. Whatever translation they go with, they'll learn Winckelmann had interactions with the 'Things' in Postumia.

I Always Feel Like Somebody's Watching Me
For the rest of the scenario, the investigators can enjoy being followed by fucking half the population of Trieste. In addition to the more unsavoury but mundane elements of Trieste society looking to make a buck off them, the investigators have any and all of the following tailing them at any point in time, starting with:
The Lloigor Cult: The Lloigorites (my term, patent pending) have appointed low-ranking culty Cesare Druni to track the team. This was a bad choice because Druni is very tall, very thin and has some anime-looking red hair with a single black lock in it. Spot Hidden picks him out right away, and if confronted Druni claims to want to practice his English but was basically too anxious to start a conversation. Sure, whatever. Later the investigators see him get bundled into a car by two Turks for his troubles. Next time they see his hair it's on a short fat dude. That brings us to…
The Brotherhood of Skin: As mentioned, they are not fucking around. Fahim Salleh and a small army of Brothers have been sent to find the Simulacrum piece. They have heavily modified themselves with skin magic, often possessing decentralised organ arrangements that let them walk away from otherwise lethal injuries. They are disguised as regular Turkish businessmen, which means very serious-looking men in suits and fezzes. This shouldn't bother (non-racist) investigators until they realise they just keep seeing these dudes everywhere, even loitering around outside their hotel rooms.
The investigators might be of a mind to follow one of the Brothers, which if they're successful at leads them to a run-down pensione hotel by the docks that the cult is using as their hideout/people abattoir. Salleh and two other brothers (one with Druni's face) will be hiding here; they will try to kill the investigators with butcher tools as soon as they're discovered. If things go bad, Salleh feigns death; his Lego organs set-up will let him survive to fight another day.
The Blackshirts: These fucking guys. They're doing the thing that Blackshirts do, which means hassling foreigners and anyone else who catches their attention. Funnily enough, their omnipresence is the main thing stopping the rival cults from really throwing down with each other and settling this shit once and for all.
Helmut Grossinger: AKA the weird dude from the library. Poor ol Grossinger is an object lesson in what happens when you fuck with the Mythos cults. He was/is an investigator and a damn good one who was getting a little too close to the Lloigorites for their comfort. As such, they decided to totally ruin his fucking life. Grossinger's hands and tongue have both been melted off with acid. His Sanity's not great but the man's trying his best and he soon sees the investigators as kindred spirits. If approached, he gives a totally incomprehensible warning to them.
Winckelmann: After translating the diary, the investigators feel like they're being watched. If they turn around, they see a pale-faced stranger who disappears the next time they look. Now that they've got the diary, it's time to really turn this haunting up.
Fenalik: Oh yeah and this fucking guy is still around. It's kind of a shame that after Venice he's not super involved in this scenario. Total Party Kill suggested maybe having some atmospheric encounters with him, like the investigators are walking along when the bora splashes warm blood all over them. Otherwise, he's always down to clown if he thinks the investigators are in danger.
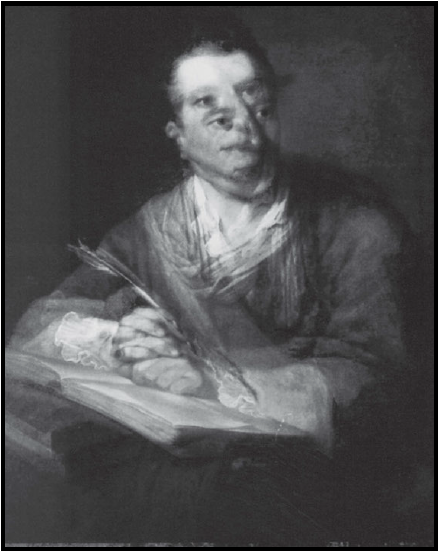
Thriller, Thriller Night
The bora has torn down the power lines near the hotel the investigators are staying at and caused a blackout. The staff have given all guests a supply of candles and matches and are serving a candlelit dinner in the common dining room. If investigators attend, Winckelmann starts fucking with them, doing things like making the table levitate off the ground or making them think their food is full of maggots. Aside from the table, all of the effects are largely only perceivable by the investigators, and they soon make fools of themselves in front of everyone.
Things get worse after dinner. Termona trusted one investigator in particular with the diary; that investigator gets pushed up against a wall by an invisible force and hears the word 'tagebuch' whispered in their ear (German for 'diary'). They later find a bruise on their shoulder that bears a resemblance to the god Bacchus. For the rest of the night, the investigators suffer all kinds of poltergeist shenanigans. These escalate until they are literally thrown out of their bedrooms, costing them 1/1D6 SAN.
The exception to this is the room with the diary. Whoever's in here is instead woken by the freezing cold. The fireplace burns with an eerie blue flame and frost gathers on the windows. Instead of ferns, the pattern it traces out a picture of Bacchus surrounded by his maenads. Suddenly, the fireplace goes back to normal and the frost melts to slush. The investigator will need to be treated for incipient hypothermia.
If the investigators don't get right into researching Bacchus the next day, the hauntings come back, much more violently.
Next time: medallion get!
COLD WIND BLOWING – PART THREE
Original SA postCOLD WIND BLOWING – PART 3
This Poor Bastard
The book suggests that the investigators might want to hold a séance with a Oujia board – can we get a citation on whether that's historically accurate or not? If they do and they succeed on the Occult roll the planchette spells out M-A-R-C-O-P-O-L-O before shattering. Marco Polo was actually Venetian, but asking locals will get directions to a street called Via Marco Polo. Otherwise, the book suggests hitting the books. Library Use turns up a sketchbook by a Nicholas Burnett which includes sketches of landmarks in Trieste. One of them depicts a carved lintel above a doorway showing a scene of Bacchus with his maenads; it's identical to the frost image and costs that one investigator SAN 0/1. It's annotated with 'carved doorway, Via Marco Polo, 6 June 1761'.
The investigators are headed to a deserted villa on Via Marco Polo, though it may be hard for them to recognise the warped and cracked lintel as being the one from the sketches. They'll either have to break in or talk to one of the neighbours to get the key. The investigators are alone until they reach the cellar, at which point Winckelmann manifests (SAN 0/1D4). He moves slowly as if under water, and as he gets close investigators will be able to see the decay on his ghost bod. He recreates the moment in life when he hid the medallion before disappearing; digging up the flagstone he indicated reveals the Medallion of Ithaqua.
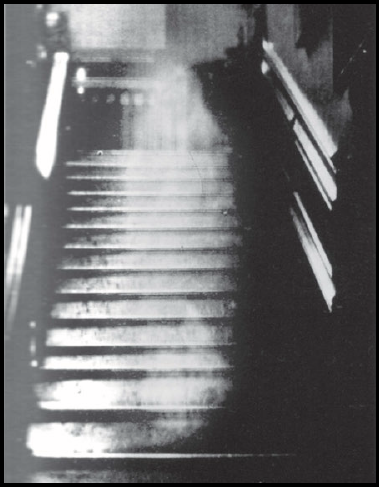
While they're in the library, Grossinger makes his move. He emerges behind a stack of books with his stumps thrust out, silently motioning for the investigators to follow them. If they do, he takes them to his hovel down in the seedy part of town. He hands them various scraps of paper, burnt in places, that seem to be fragments of a diary. They contain bits of his research into the lloigor and reference Ghatanothoa and 'human fish'. Among the fragments is a photo of Grossinger during happier days in Bavaria, back when he had a wife and a kid and hands to hold them.
 After they take his notes, he ushers them back out and points to the north-east: he wants them to travel to the Grotte di Postumia and destroy the lloigor cult. Good fucking luck. It's up to you if you want his mutilated body to appear somewhere later or if he arrives at a timely moment to help the investigators.
Let Me Show You What The Howl Is For
The investigator who picks up the medallion feels a shock before a blast of cold air rushes out of it. They hear a terrible howling in the distance and feel a chill running up their arm (SAN 1/1D3). They are now bonded to Ithaqua (the Wendigo, the Wind Walker) unless they can succeed on an Extreme Power roll. From now on, they're immune to the effects of the cold and indeed revel in the winds of the bora, but they can hear the terrible hunting howl of Ithaqua every day they stay in Trieste. This forces them to make a roll for SAN 1/1D6 every sunset, with failed rolls costing a flat 1 point after 6 points have been lost to this. If this causes them to go permanently insane, they abandon the mission to go as far north as possible and worship Ithaqua in his domain. This effect is permanent, lasting even after they dispose of the medallion, but it's unlikely to come up after leaving Trieste – best retire to the tropics to stay safe and sane.
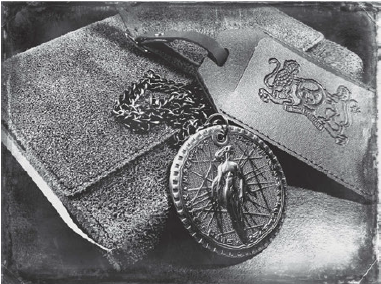
The investigators may want to return the diary to Termona if they're unaware of his true motives – Grossinger is waiting for their return in a nearby alley and tries to warn them away. If they ignore him, Marco shows them right into the sitting room and locks the door behind him (Listen to detect). If they realise they're trapped, they may try to escape: breaking down the door requires a Strength roll, and while there is a window in the room it's too narrow to wiggle through unless someone smashes it. Either approach means a fight with Marco, who has been left by Termona to stand guard.
If they don't escape, Termona comes in and maintains his friendly act from their previous meeting. He's interested in finding out what they learned from the diary; if they whip out the medallion he's overjoyed. Marco, Montanelli and as many other cultists as necessary to make even numbers with the investigators come in and try to capture them. They'll probably use their tentacles for this fight, which can stretch out three meters and attack like a whip – SAN 1/1D4 to witness. If the investigators lose, they'll be taken to Grotte di Postumia.
Alternatively, if the investigators win the fight or attack Termona or Montanelli first, they'll eventually spill the beans on the cult. They're okay with telling the investigators about the lloigor – they figure that between the cult and the lloigor themselves that's a self-solving problem. If they kill Termona well, there's plenty more human fish in the sea. A different culty steps up to replace him in later scenes.
Next time: spelunking!
COLD WIND BLOWING - PART FOUR
Original SA postCOLD WIND BLOWING - PART 4
Ted The Caver's Something Or Other
The book says the investigators should have enough clues by now to point them to Grotte di Postumia. Here's the problem with this set-up: there's not really any hard evidence that indicates the Simulacrum piece should be there. In fact, there's plenty of evidence that the cave is full of evil psychic lizards, so players might question the wisdom of going anywhere near the place. Salleh has a letter from HQ telling him that the Lloigorites probably fed the piece to the lloigor, but the investigators might not have gone through all the trouble of finding and 'killing' him. You could have Termona or someone else drop a reference to it, or maybe have more spooky times with Winckelmann. Anyway.
Postumia's actually a stop on the Orient Express, just 50 miles out from Trieste. The caverns themselves are also heavily controlled by the lloigor cult, who even have their people running the guided tours. As soon as the investigators leave Trieste, the Lloigorites mobilise, contacting their people in Postumia so they know to set a trap. Assuming Termona's alive, he boards the same train as the investigators along with a handful of other cultists, though he makes sure to ride in a different carriage. What they don't know is that they're being watched by Salleh and the Brothers, who also move out in the hopes of finding the Simulacrum piece's location.

Assuming the investigators don't try to break into Grotte di Postumia, they'll probably want to take the cave tour. Considering the awful weather this time of year, they might be the only ones. However, their tour guide Carlo is a Lloigorite, and the cult has a bunch of their people on the same tour posing as tourists while no less than 20 cultists go into the caves to wait. The tour is supposed to take two hours, half of which is spent riding in super modern trolley cars powered by a gasoline engine. All the cultists are carrying torches and weapons, but only a few have guns – don't wanna risk a cave-in.
If you've ever been on one of these cave tours, you probably know what it's like. If you haven't I highly recommend it, they're really cool. The cave is lit up in places with electric lights, more often than not just to showcase a limestone formation with a funky shape. Carlo expects the investigators to die soon and points out the formations with morbid glee – the Sepulchre, the Brain, the Beheaded Dwarf. There's a river that runs through much of the cave; Carlo stops by it at one point and wades in to grab something out of the water. He comes back holding an olm, a 'pesce umano' that looks like a pale wriggly snake with vestigial legs. If there's a lady investigator, he waves it at her to try and freak her out – but this isn't likely to work on a newbie investigator, let alone one who by now has seen some real shit.
Eventually, the investigators reach the end of the trolley car portion of the tour. Carlo leads them out and asks them to stand together – he says he wants to show them how black the darkness of the caves really is. He moves to one wall where there's an electric switch box and turns it off, plunging the cave into total darkness. Then, slowly, flicking lights turn on: the torches and lanterns of the lloigor cultists. Termona is there, along with more than a dozen others, surrounding the investigators.
The book notes, 'Seasoned investigators may already have guns in their hands by now.'
Termona lets his tentacle drop out of his sleeve and demands the medallion from the investigators. But before anything can happen, there's a scream from the outside of the circle followed by a torch shattering, then another. The Brotherhood of the Skin are attacking, swinging cleavers and meat hooks. They don't need torches – dead men's eyes see in the dark just fine.
DISRESPECT YOUR SURROUNDINGS
Shit hits the fan. The investigators are almost completely forgotten as the two cults go ham on each other. This scene does a fantastic job of capturing how fucked a cult vs cult fight would be. There's a long list of things to throw at the investigators as they're running away, and they're so good I'm going to include all of them in this post.
- A Lloigorite hoisting a Brother into the air by a tentacle that comes out of his chest, the Brother swinging his cleaver around in vain.
- A Lloigorite blows a Brother's brains out but the gunshot causes a stalactite to dislodge and fall on his own head, killing him.
- An injured Brother slaps a patch of someone else's skin onto his wounds like it's a bandage.
- Two Lloigorites advance on a Brother who is chanting as he cuts up a fallen comrade. His spell completed, he flings the lumps of flesh at the cultists, which immediately seal their faces shut and suffocate them (SAN 0/1D4).
- As they flee down a partially-flooded corridor, they're intercepted by Carlo, who points a gun at the lead investigator. Just then, a 20-foot-long giant olm, mutated by years of exposure to the lloigors' magic, swallows him in one bite and disappears back into the water (SAN 0/1D4).
- Salleh advances on the investigators, his eyes giving off the phosphorescence of decay. If they thought they killed him before, they lose SAN 0/1D3. Suddenly, the tip of Termona's tentacle erupts from his chest. Termona's laugh of triumph is cut short when Salleh just turns around and keeps attacking him anyway (SAN 1/1D3).
The trick to this battle isn't to run it as like a real-ass battle. You just want the investigators to be scared shitless and thinking they'll be next if they don't stop running. They might get to a point where they think they're safe – that's when they hear a large group of people approaching. The only place to hide is behind a set of stalagmites that look like pointy teeth. This calls for a round of Luck rolls; the investigator with the worst roll gashes their knee on one of the 'teeth'. Behind the formation is a narrow passage that just so happens to lead to the lloigor grotto.
Next time: never cut a deal with a dragon!
COLD WIND BLOWING - PART FIVE
Original SA postPurpleXVI posted:
Again it's probably intended that he shows up to reveal a secret passage or with vital clues or something. But I find it more amusing to imagine that he shows up in some tense action showdown as a Crippled Master and kicks a cultist so hard his rib cage caves in.
The lloigor are invisible because they're scared Grossinger might see them.
COLD WIND BLOWING - PART FIVE
Ugh, I've been calling them the Brotherhood of Skin this entire review but they're actually the Brotherhood of the Skin. I like mine better. I hope they edit that into the third edition.
Deals With Dragons Are Okay Sometimes
The grotto is huge, a massive underground lake ringed with stalagmites. As the investigators look out over the black water, the lloigor bellow into their very minds:
quote:
SO...YOU HAVE BROUGHT IT AT LAST!
I certainly hope they did. Receiving this transmission immediately costs them SAN 1/1D4, with failure requiring more tests to resist the depressing side-effects of coming into contact with the lloigor mind. They must roll Intelligence versus their own Power as they try to rationalise the waves of despair flooding them. If Intelligence prevails, they understand that the despair is an effect of an 'outside' mind. If Power prevails, they curl up into a ball and cry for 1D6X5 minutes. If they roll a 00 (book doesn't make it clear on which roll so I assume the Intelligence roll), they immediately try to commit suicide by jumping into the lake.
The lloigor want the medallion. They only want the medallion and will keep demanding it. They ignore any requests for a deal because they simply don't care about the Simulacrum or most of the shit in their hoard, they just want the medallion. Investigators are free to look around the shores of the lake, which are actually covered in piles of scrolls and old magic items, all of them slowly being enveloped in limestone. It'll take half an hour and a Spot Hidden roll to find the pile that the Right Leg is sitting on top of, then some smashing with a heavy object to break it off the pile.
The investigator who holds the medallion must make a Hard Power roll to be able to relinquish it. Alternatively, the other investigators will need to Persuade them to let go or be willing to hold them down and take it from them. The medallion can be chucked into the lake or left on the shore; if the latter, it slowly rises into the air and floats over the lake. They're free to go. However, if they don't hand over the medallion or can't…
quote:
GIVE US THE MEDALLION!
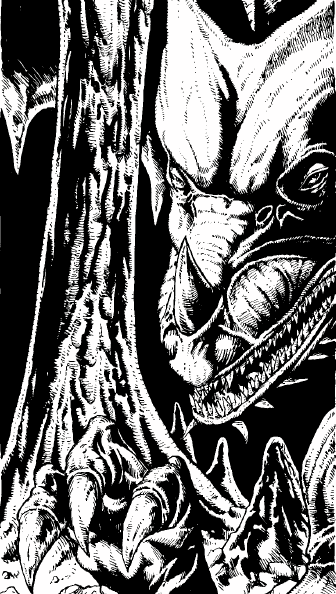
A wave washes out from the lake as one of the lloigor materialises a giant olm-like body and runs after the investigators. Better start running. If they turn around, they'll see this massive beast filling the corridor behind them – SAN 0/1D8. The earth starts to vibrate and the teeth at the entrance to the grotto threaten to crash down, requiring either a Dexterity roll to tumble through or a Dodge roll to avoid getting it by a falling stalactite. Failing either deals 1D8 damage.
Pursued by the Brothers, the Lloigorites and possibly one of the lloigor, the investigators make it outside where the winds of the bora have been whipped into a fury, causing the investigators to take 1D3 damage every five minutes they stand exposed. If they need a getaway vehicle, there's a lot of automobiles around that belonged to people who got stabbed/shot/eaten back in the caves. If the lloigor is pursuing them, it launches an implosion vortex at them. If they can't get clear in time, they and everything else within five yards is crushed into a space the size of a tennis ball, dealing 100D6 damage (read: instant death).
If the investigators were smart, they brought their luggage to Postumia. Otherwise, when they get back to Trieste, they find two extremely messily dead bodies around wherever they were keeping their shit. Thanks Fenalik! That'll also be 1/1D4+1 SAN.
Man Fuck Italy
As the SOE leaves Trieste, investigators see Winckelmann one last time on the platform. If they handed the medallion over to the lloigor, he waves farewell, his face peaceful as he fades away. They gain 1D3 SAN. If they didn't, his screaming face is pressed up against each window as the train moves past, costing them 1/1D4 SAN. They'll also get 1D4 SAN for recovering the Right Leg. The book suggests giving them more Sanity if they held onto the medallion for knowing they've helped stave off the return of the Great Old Ones but uh, did they? Would they? Seems more likely they'd know they've doomed themselves to carrying around a piece of the fucking Wendigo for the foreseeable future, for no clear benefit.
Anyway, how fucking good is it to not have to deal with any more Blackshirts?
Next time: a very different dream!
IN A CITY OF BELLS AND TOWERS – PART ONE
Original SA postIN A CITY OF BELLS AND TOWERS – PART ONE
Background
This is a very short scenario and most of it is in the artful writing of the thing, so let's see if I can get it done in one-two updates. Pissed about the scroll thing, the Jigsaw Prince sends the investigators a bottle of magic wine that sends them into Dream Zagreb, the reflection of a city which is otherwise not on their itinerary. Of course, if he can convince them to drink strange liquids given to them by an anonymous donor, you might ask why he doesn't go whole hog and give the investigators like, poison wine instead. I'd argue that this actually fits if you accept my personal interpretation of des Esseintes, which is that he's clearly a huge gay bitch who lives for drama and he's definitely petty enough to pull some shit like this.
This scenario was inspired by the work of Thomas Ligotti, and in fact in the first edition actually quoted The Journal of J.P. Drapeau directly. This is why some lists online actually credit Ligotti as a writer for Horrient. The quotes have been replaced with new messages that more directly relate to the plot of the campaign. This is a very well-written and atmospheric scenario, but sadly, it's not really something you can easily play. Much like the Dream Lausanne part of Nocturne, much of the scenario is going to revolve around the players reading handouts or hearing you describe spooky things. Since it's an optional scenario, see how your players enjoy Lausanne. If they're into it, definitely run Zagreb for them. If they spend the session giving you blank stares and asking, 'So can we keep moving into the city?', skip it and run the next chunk of Dreamlands Express instead.
Me, I'm a huge slut for Ligotti and we're covering every scenario, so we're doing this.
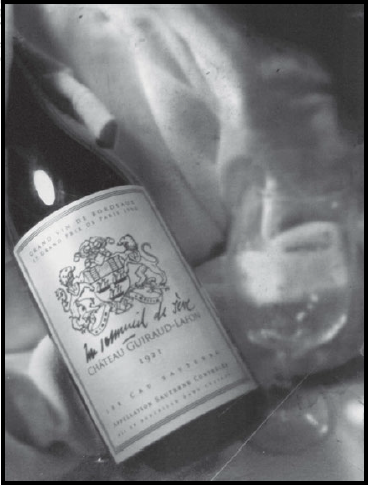
Chug chug chug chug
As the investigators relax in the dining carriage, their waiter Maurice brings them a fine bottle of Sauternes to finish their meal. The label is from Chateau Guirard-Lafon, a vineyard that he believes is near Yquem but in actuality is near no place on Earth. The label has 'un sommeil de seve' scribbled across it, roughly translating to 'dream of the sap'. When uncorked, it fills the room with a sweet fragrance, and if asked to sample it the waiter assures them it's the best wine he's ever had. If they drink it, they'll probably agree. Maurice at this point moves to introduce the anonymous benefactor who offered the wine, but the 'rotund gentleman' has disappeared.
Drinking the wine isn't necessary. Simply breathing in its scent has an effect on the investigators. Mind you, Maurice and everyone else just has a really shitty sleep with weird dreams. Only the investigators get to go on an adventure.
The dreamers awake in their beds at 3:10AM the next morning. The night conductor announces that the train has arrived in Zagreb, and their names are on the list of those departing here. While they argue with him, they might hear someone speaking to them from the platform. A man in a black robe with a deep hood and holding a skull is standing outside, bidding the dreamers to join him. Their luggage is piled at his feet.
quote:
“What ho!, [investigator name], abed so early? And you too [another investigator name]? Sluggards! Did you plan to slumber like swine and forego one of Europe’s great cities, hurrying onwards to your gathering task? Bah! Come, come. I have arranged your stay here. Time flows swiftly, and we have much to talk about ere dawn. Perchance you will permit me to tell you the strange history of the Sedefkar Simulacrum in full, and of what you can expect to find on your arrival in Constantinople. Hah! Follow good fellows, and let the Devil steer the course.”
He turns and walks away into the thick fog that envelops the station. Where he stands is a page from an illuminated manuscript written on human skin. This is one of 10 player handouts, each one written about the Simulacrum from one of its 'suitors', with the final entry written by the Simulacrum itself. They're found throughout the city and they offer a lot of insight into a lot of the bigwigs in the campaign. The book even suggests writing one for one of the dreamers. I'll include them all in the next post.
If the dreamers refuse to get off the train, they'll go back to sleep only to wake up at 3:10AM in Zagreb, same as it ever was. This'll keep happening until they get off the train, just in case you forgot we were playing Horrient and thought you had a say in things.
Who Am I To Disagree
The dreamers are alone in a fog-covered gothic version of the real Zagreb. The robed man is always just ahead of them, beckoning them from the next street or from across a canal but always disappearing by the time they get there. Time passes strangely, but the bells always ring out the hours. As they explore the city they encounter a series of surreal images much like in Lausanne, but unlike Lausanne there's actually something like a puzzle here. It's not much of one, but it's there. The surreal events here seem to allude to events in the campaign, but there's no explanation for them like the Lausanne events so don't quote me on that.
The bells are ringing six by the time the dreamers reach the robed man. He leads them into the great star-shaped fortress in the centre of town. If they ask him about the pages they've been discovering, he explains that they're 'letters from dead lovers'. If they ask him about the Simulacrum, he explains that like them he too once sought knowledge, but eventually learned too much; the skull he holds is in fact his own, no longer able to contain everything he knows. He's willing to share some of his hard-earned knowledge with them, gratis. If dreamers press him about it, he'll even lift his hood and show them his flabby skull-less head; I hope the 1D2/1D6 SAN was worth it, idiot.
If they accept, the robed man essentially turns on a Mythos fire hose and sprays gallons of eldritch knowledge all over the dreamers. Mechanically, every minute they listen to his high-density babbling they lose 1D10 SAN and gain an equal number of points in Cthulhu Mythos. If you're playing with the optional 7E rules that let them use the skill for spontaneous spellcasting, this is a significant powerup. If their Sanity reaches 0 doing this, well, the last thing they remember is holding their own bloody skull.
If they refuse or leave before they go insane, he shouts at them and warns them that they need to get back to their beds before dawn lest they be lost forever. The bells are now ringing seven and the Orient Express is whistling its imminent departure. For the frantic sprint back to the station, each dreamer must roll Intelligence, Strength, Constitution and Dexterity in order and get no more than 2 failures or be left behind. They fling themselves onto the train just as it leaves, make their way back to their compartments only to see their beds occupied by...themselves (SAN 0/1D3).
Then they wake up in Zagreb, at 3:10AM, as the night conductor calls for them to depart. If they tell him there's been a mistake, he'll realise there has and apologise profusely. The Express goes on towards Belgrade. As the train leaves, they'll see raising a sad hand in farewell. 'The other hand cradles a bone-white object that does not speak.'
Investigators get refunded up to 2D6 SAN of that lost to the hooded man. Sweet! Dreamers who missed the train sleep a solid 24 hours then wake up every night at 3:10AM for 1D10 nights, screaming in terror. They lose 1 SAN per night but eventually get 1D4 SAN back when the nightmares recede, after which they are averse to bells and the number 7. Dreamers who lost all their Sanity wake up believing that they have no skull. They are permanently insane and can no longer be played.
Next time: love letters!
IN A CITY OF BELLS AND TOWERS - PART TWO
Original SA postIN A CITY OF BELLS AND TOWERS - PART TWO
It Must Be Love, Love, Love
Here's all the love letters to be found in Dream Zagreb. The last one, as mentioned, is from the Simulacrum itself. See if you can figure out the others!
An Illuminated Manuscript, in Scar Tissue on Human Skin posted:
We were always destined to be together. From the moment I saw you I loved you; so beautiful and cruel, so heartless and perfect. I, your vile servant, was not fit to worship at your feet. Yet I caressed your alabaster limbs. I kissed your shining eyes. I held you close, closer than skull to skin.
I knew from that first moment of ecstasy that we were doomed to part, that you would use me and discard me as a snake escapes its old skin.
I tried to write down all you were. I thought that way I would remember you. I thought I could pin your essence down like a flayed hide and hold you forever in my heart. I should have known that any attempt to describe your loveliness was doomed from the start. Yet I wrote in a fever of longing, and I drew you on scrolls of skin. I hoped and dreamed that you would always be with me. But now you are gone. All I have left are a hollow hide and words, empty, useless, tormenting words.
A Letter Embroidered on Turkish Carpet posted:
My love is the pure love of a worshipper who adores the idol that he has never seen. Until we meet I am in torment. I can do nothing but seek you, plot and plan and yearn for that moment when I hold you in my arms. My heart, my body, burn for you. My life is yours. You hold it in your white, white hands.
To prove my love I killed a man for you. I took him by surprise. He thought I was his friend. He trusted me and I butchered him in the night.
Yet once was not enough. I killed him a second time, my arms red with blood to the elbows. His shocked eyes held the final betrayal. I wept as I wielded the skinning knife.
Still you were obdurate. So I killed him again. And the man I murdered to prove my love was myself.
Written in Dried Blood on the Inside of a Strait Jacket posted:
I lust. I hunger. I thirst. I rave. I cannot live without you. You are under my skin. You are my self. I had you once. Then I was perfection, killing and reveling and laughing with joy. I lost you and became a brute. Mad with desire for what I have lost I want to kill myself but I cannot. My shriveled skin resists the knife-thrust, my dead heart cannot be stopped again. I will kill all those pathetic would-be lovers who stand between us. When I seize you at last I will despoil you, ravish you, consume you. You will be me. I will be perfection, and laugh and kill and revel once more.
Sheet Music with Lyrics posted:
I was a weak man yet I dared to raise my eyes to your divinity. I said that I sought you for another. I lied, even to myself. Had I got hold of you I would have caressed you, held you, never let you go. I was a weak man. I could never seize you using my own small strength. Yet I longed for you so that I made a wish, and my wish came true. I saw you on the golden stage, so perfect and beautiful. I should have known that I was too insignificant to succeed, I the unworthy one, a mere bag of flesh and squirting blood, singing with stolen lungs. Yet I dared to dream.
Oh reader of my record remember this, I was a weak man.
Note Held by a Tableaux of Stuffed Animals posted:
I loved you once but now no more. Life hurt too much. I sought a way to kill the pain. I found a path to dreams. My love for you was killed. I loved the needle more. The dreamer opened the path to the other world. I tried to sell you, tried to sell what cannot be bought or sold or raised, but I was tricked, swindled, fooled. Now I am trapped in the dreams I once sought and they have become my nightmare.
Tattoos on a Tapestry of Human Skin posted:
Life rips the weak apart with lion teeth and lion claws. I was strong. I glimpsed you from afar and knew I wanted you, knew that you would only give yourself to the strongest of souls. I ripped others’ flesh from their bones to rebuild myself. I tore through dreams to find the path to your door.
I know that when we meet you will join with me forever. I am unlike all the other fools who whine that they love you. I am strong.
Yet you still shun me, you turn your face away. I see only one smooth white shoulder. I would bite the skin from that shoulder. I would tear and devour.
A Page Torn from a Diary, Fluttering in the Wind posted:
I loved your shifting shape, my dancing, golden dream. I tried to take you for myself. I failed and fell into the abyss. Now you mock me in the ceaseless wind that never lets me rest. You relish my fate, my cruel golden one, and yet I adore you. I cannot pray for my lips are sealed. I cannot speak for my jaw is locked. Oh give me shelter from the heartless ones that gibber in the frozen wastes. I am he who screams at your window. I am the blizzard-driven dead.
Sentences Whirling in the Cold Air posted:
YOU ARE OURS.
WE DO NOT CARE FOR YOU.
WE SEEK ONLY THE GOLD.
WE LONG FOR IT AND CLAW FOR IT IN A FROZEN HOWL.
YET WE HAVE YOU.
WATER, DROP BY DROP, FORMS A LIMESTONE SKIN UPON YOU.
THE MILLENNIA UNROLL WHILE WE WAIT IN THE DARK.
STALAGMITES FORM OVER YOU LIKE ICICLES.
YOU ARE ONE WITH THE ROCK.
YOUR LOVELINESS DOES YOU NO GOOD HERE.
YOU WILL STAY WITH US NOW.
Words in Blood, Hanging in Mid-Air posted:
Flesh of my flesh, skin of my skin. I love you with the love that devours all things, lives, souls, worlds, time itself. When you return with your thousands of years of hatred and power and madness you will provide one brief chord in the cacophony that surrounds the Throne.
Words Engraved Upon a Mirror posted:
All you who say you love me do not know what love is. You hunger after power. You love the reflection of yourself that you see in me. Only my master understands what love truly is. It is a weakness to be exploited, a power to be drained, a sickness to be eradicated. Only mortals can love, for only mortality tries to claw a brief moment of meaning from life’s unending brute indifference. I tell you this, none of you really love me, for if you did my beauty would consume you.
All those who truly love me die.
In order:
Sedefkar
Mehmet Makryat
Fenalik
Arturo Faccia
Edgar Wellington
Jigsaw Prince
Johann Winckelmann
The Lloigor
The Skinless One
The Sedefkar Simulacrum
Next time: Vinkovci!
BREAD OR STONE – PART ONE
Original SA postBREAD OR STONE – PART 1
Wherein the investigators’ journey is delayed by anarchists, and a kiss from a stranger leads them to seek a missing archaeologist and his terrible discovery.
Background
This is an optional scenario but different to the others as it's neither a) set in a different time period or b) set in the Dreamlands. It's also probably the best scenario in terms of like design; it's the only one that's not written like a script to be followed and accounts for the fact that players might want to approach things in different ways. If there's one bad thing it's that the presence of the Brotherhood is almost an afterthought, but oh well.
The Mims Sahis (Gothic for 'skin knife') is an artefact connected to the Simulacrum that's probably just as old as the statue. It was created by Voorish worshippers of the Skinless One and was probably used back in the day to cull and experiment on human beings before the Hyperborean civilisation rose to prominence. It was discovered and named by Gothic barbarian Unwen and like the Simulacrum was passed down by multiple owners through the ages. Fast-forward to 1923 when it's discovered in the 'Crusader's Tomb' archaeological dig, actually the secret vault for a mysterious sect of monastic warriors called the Order of the Noble Shield. Lead archaeologist Dr. Dragomir Moric was struggling to understand what he discovered when a local newspaper ran a story that featured unreleased details about the site. Moric was forced to end the dig and dismiss his team.
Moric was staying with an old war buddy, accomplished surgeon Dr. Goran Belanzada, who agreed to help him with his research into the strange knife. Belenzada took the Mims Sahis to his laboratory while Moric pored over the Noble Shield's archives. What Moric discovered disturbed him; he crated up the materials and stored them away before contacting his daughter and asking her to meet him in Vinkovci. He knew that the knife could and needed to be destroyed. The Noble Shield couldn't do it, but they didn't have access to 1920s technology.
Meanwhile, what Belenzada discovered fascinated him. Not only was the knife perpetually razor sharp, any living tissue it cut remained alive for hours afterwards! He became more obsessed with the knife the more he studied it. His experiments grew more and more strange until he was able to successfully transplant the head of a pig onto the body of a dog. He saw endless potential in the little knife for developing new surgical procedures and more advanced prosthetics for war veterans.
The two men obviously disagreed on what was to be done with the Mims Sahis, but Belenzada eventually relented and pledged to help Moric destroy it. Of course, he took the necessary precautions to protect the knife when the time came. Before Moric could load it into a hydraulic rock crusher, Belenzada shot him in the back and hid the body in the woods. He continues his macabre studies in his laboratory.
Meanwhile, the local chapter of the Brotherhood have gotten wind of the Mims Sahis discovery. Vesna Femic was the journalist who managed to persuade student Lazar Andic to get her into the dig site. The members of the Vukovci Vinkovcima ('Wolves of Vukovci') saw the photos of the vault in the paper and realised it could be the location of the fabled knife, one of the cult's missing treasures. They tracked down Femic and Andic, tortured them for info and killed them – but not before stealing their faces. They now know Moric's daughter Jazmina Moric is on the way to Vinkovci and they plan to kidnap her too.

Anarchy In Vinkovci
I hope your investigators took Serbo-Croation. Also, keepers might have difficulty getting this scenario under way if one or more of the investigators is still unconscious from Zagreb.
Vinkovci station is crawling with cops and soldiers. As the train pulls into station, the Chef de Train announces that there's been unavoidable delays and all passengers will have to disembark immediately. Listen rolls overhear talk about bombs and damage to the tracks. Their passports are checked by Captain Velemir Karkunica, a humourless cop who ruthlessly grills the investigators. He's particularly interested in finding out if they're socialists associated with the Ljudi Provosude Vojska ('People's Justice Army' or 'LPV') or if they have any experience with explosives. Take a guess who's responsible for bombing the tracks? If the team can avoid giving any suspicious answers they're free to go. After the passport check, a representative of Compagnie Internationale de Wagons-Lits apologises to them and explains that they'll be held up for three-four days while the tracks are repaired. They can stay in Vinkovci, head back to Zagreb or find their own way to Belgrade by car. If they pick the latter two options, uh, skip this scenario I guess.
While the investigators get their luggage and sort out taxis, Spot Hidden lets them notice a well-dressed woman suddenly darting behind a luggage rack and into the ladies room; she's being followed by a man in a fisherman's cap and overcoat who loses sight of her. This is Jazmina Moric. Investigators who go into the toilet after her can hear her taking deep breaths as she loads a revolver. Later, when the investigators are about to get into the next available taxi, she's moving quickly towards them, pursued by the same man. She shouts a greeting in English, kisses and embraces a male investigator. She whispers that she's being followed and begs to share their taxi.
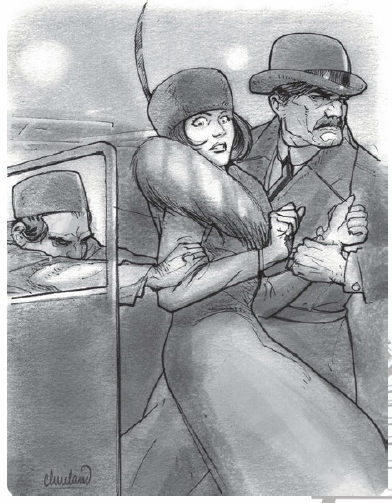
At that point the man in the cap (a Wolf of Vinkovci) runs forward yelling in Serbo-Croation while a delivery truck pulls up next to the taxi. Two more cultists jump out and the three of them try to drag Jazmina into the truck. The two dudes who jumped out both have guns while the man in the cap whips out a knife. Jazmina has her gun and while she's mainly trying to escape, she'll definitely put a hole in someone if it comes to that. What follows is likely to be a very tense and frantic combat, made worse by the fact that it's happening in broad daylight and people are shouting for the cops. The fight lasts for four rounds, at which point it's interrupted by a shrill police whistle. The cultists jump back into the truck and speed away, but not before headshotting any cultist too injured to escape.
As police swarm out of the train station, investigators might realise that they're in deep shit. Jazmina definitely does, and urges them to escape with her in another taxi. If they stick around they're all going to get arrested; better hope they can make those Persuade and Credit Rating rolls.
Next time: the hunt is on!
BREAD OR STONE – PART TWO
Original SA postBREAD OR STONE – PART 2
Mingling With Moric
Jazmina is grateful for the assistance of the investigators and asks them to drop her off at the Hotel Lehrner. She's willing to explain her whole situation to them if they ask. Jazmina received a letter from Dr. Moric explaining the situation with the Crusader's Tomb dig getting shut down, bidding her to meet him in Vinkovci. She knows that he's staying with Dr. Belenzada, though she has never met him personally. Her father was scant on providing details and told her not to talk to anyone until they could meet in person. She doesn't know who the men who tried to abduct her are nor why they would want to do such a thing. There were also some anomalies in the letter; it was written in English instead of Serbo-Croatian and it asked her to get his gun from the study next to his favourite book (Gibbon's Decline and Fall of the Roman Empire), when he actually kept it in a locked box in his bedroom. She asks the investigators to escort her into the hotel and wait with her until her father arrives.
Assuming they're willing to help her, they go to the Lehrner lobby where there is no sign of Dr. Moric. The hotel has no one in its registry under that name, but they do in fact have a letter for Jazmina. It has a cryptic series of Serbo-Croatian words that have no significance to Jazmina. I guess if the investigators are still totally uninterested in helping her the adventure ends here.
If they want to help her, they'll find that she's actually quite capable. Mechanically, Jazmina is a polyglot who speaks six languages along with her native Serbo-Croatian. She's mostly a socialiser type but she's got good skill with her revolver thanks to daddy's shooting lessons when she was younger. The book suggests that if an investigator happens to die here or later, Jazmina would make an excellent substitute.
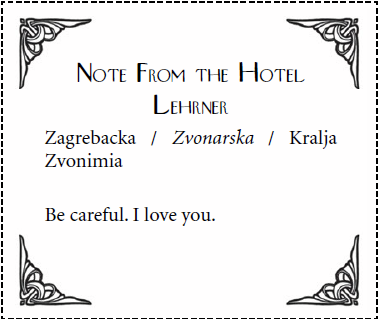
If the investigators want to, they could try and get rooms in the Lehrner, but the Compagnie has booked rooms for them at the Lovacki Dvorac. This is a family-owned business in a massive estate converted into a hunting lodge. The rooms are huge, with roaring fireplaces and trophies on every wall. The kitchen offers up all the cevapi and cabbage rolls you can handle. The Loncar family who owns the place don't really know how to serve international guests but they're willing to give it a go. Upon seeing their lodgings, half of the Orient Express passengers are mortified and leave immediately. The other half are either willing to try and make do or are genuinely excited about the possibility of an impromptu hunting trip.
Oh, and the Wolves of Vinkovci don't give up after this. They'll tail the investigators and Jazmina in the hopes of being led to the Mims Sahis. They're much better at this than the Brothers in Trieste, since they're locals and easily blend in; noticing them is a Hard Spot Hidden roll and they'll melt away into the crowds if they think they've been seen. After noticing them, a Hard Stealth roll lets investigators track them back to the butcher that serves as chapter headquarters where they can have a good cheerful fight to the death, if they want. However, there'll usually only be three out of the seven Wolves working there at any time, so there's bound to be at least one or two ready to pounce at the end of the scenario.
So there's lots of avenues for the investigators to pursue here! As I've said before, this is a really well-designed scenario and doesn't make the assumption that the investigators have to pursue them in a certain order. I'll go through them in the order the book lists them, though.
The Isle of Dr. Belenzada
Belenzada is Jazmina's only real lead here. Sadly, he's not easy to get in touch with, since he's spending most of his waking hours having a merry time playing God in his private laboratory. Jazmina has his address, but chances are when they go there they'll only find his niece Kamila Hanak, who acts as his maid and explains that he's an extremely busy man. They might have more luck meeting him at the Vinkovci General Hospital where he spends his mornings, but only if they can succeed on a Credit Rating, Fast Talk or Persuade roll. If they fail, Belenzada is booked out for the day but will make time for them in the hour-and-a-half window he's at home in the morning. Otherwise, the same rolls above will get the address to his private medical facility.
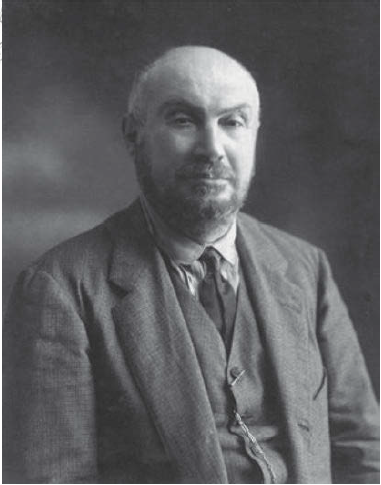
Even if you don't know the fucked up shit going on in there, Belenzada's lab is creepy, a farm outside the city converted into a secure compound. It's got a six-foot brick wall and is constantly patrolled by three maimed veterans who owe Belenzada their lives. They'll refuse to let anyone in unless they happen to namedrop Dr. Moric, in which case Belenzada invites them in.
Belenzada's basically a nice guy, though the horrors of war and his corruption by a Mythos artefact have harmed his ability to relate to anyone who isn't a veteran or a farm animal. What he'll say about Moric is mostly true: Moric was staying with him but their conflicting schedules meant they didn't see each other much. Moric thought some of the things in the Tomb were dangerous and was furious when the story got published. He grew irrational and came to think the artefacts were wicked, though Belenzada tried to argue otherwise (this is true from Belenzada's perspective). He hasn't seen him for several days and thinks he might be in Kunjevci forest, since all of his stuff is gone and one of Belenzada's shotguns went missing (he hasn't seen him for several days because he dumped his body in Kunjevci. The thing about the shotgun is just a flat-out lie).
After the meeting, paranoia takes hold of Belenzada. He does not return to either his home or the hospital and sleeps in the facility. Then he decides to really use the Mims Sahis to its full potential.
Next time: it's alive!
BREAD OR STONE – PART THREE
Original SA postBREAD OR STONE – PART 3
The Cudoviste Kasa
After they've met Belenzada, the investigators can look forward to spending the rest of the scenario hunted by his home-made abominations. They're called cudoviste (literally 'monster') after someone's sighting of one gets reported in the paper. They're amalgamations of various animal and human parts combined together to make one really super dangerous animal. The first cudoviste has the head of a wild boar, the upper body of a gorilla and the lower body of a person. It's not clear where Belenzada is getting all of his apes for this project, but whatever.
The cudoviste is not particularly intelligent but it is cunning and absolutely loyal to its creator. It's also fucking strong and fucking fast and only takes half-damage from firearms. It's been instructed to kill the investigators and to that end, the first cudoviste they're likely to encounter is waiting for them outside their hotel, wearing a hat and a coat to hide its appearance. Seeing it costs 1/1D6 SAN. It'll try to pick off an isolated investigator rather than taking on the whole group at once. If they kill it, no problem – Belenzada just makes another one. There's a little thing you can roll on to mix and match your own crime against nature.
oh shit oh fuck
While Strolling Through The Woods One Day
Investigators who want to follow up on Belenzada's tips will be heading to Kunjevci hunting preserve. They're going to have their work cut out for them: there's six popular trails that each take 1-2 hours to hike, with a 1 in 6 chance they find Moric on each one (that is, assuming they only search one at a time). About a mile down one of the trails, an investigator can spot a strange shape not far from the main path. It's a corpse lying face-up, and Jazmina recognises the clothes as belonging to her father (if she's absent, he's still got his wallet on him).
Moric's face has been blown apart by a shotgun blast, but there's also a bunch of suspicious details here. Moric's wearing a dark suit as opposed to something suited for hunting. Medicine reveals that there's too little blood present at the scene, while Track reveals that someone dragged him here and dumped him. There's hydraulic fluid on his fingers and grey dust on his legs and shoes that Science (Geology) will detect as granite. There's also an entry wound for a small-calibre bullet on his back, which Medicine will reveal to be the actual cause of death, with the shotgun blast done post-mortem.
Jazmina is crushed by this discovery, but is now determined to find his killer. If investigators don't find him, he's discovered by a hunting party around day 3 in Vinkovci.
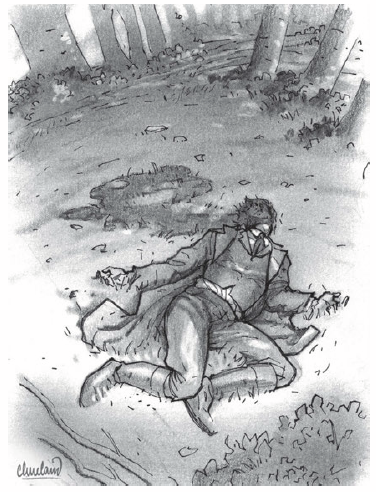
Tomb Raiders
The investigators might want to check out the Crusader's Tomb site. That's a break-in. Getting past the fence isn't difficult, but better do it late at night unless you want witnesses calling the cops about the LPV agents they saw hopping the fence. The site is a series of rooms that was once the basement to a well-fortified medieval building. All of the really interesting stuff has been moved off-site already, but the stone 'sarcophagus' where the Mims Sahis was found is still here. It's clearly too small to have held a body, and the interior is lined with lead tiles. The removed lid has a carving of St. Michael defeating Lucifer, and on the inside there's a stone with an unusual rune that Cthulhu Mythos identifies as an active Elder Sign.
Stop The Presses
Investigators might want to look up Vesna Femic, the journalist who published the article on the Crusader's Tomb. A visit to the office of the Cibalis newspaper that published it will quickly reveal that no-one has seen Femic for several days – the secretary will say that 'she's likely on her back somewhere, researching her next story'. She can be persuaded to give investigators Femic's address. The journalist lives in a single-storey cottage that's had the front door forced open. It's deserted and it won't be hard for investigators to find bloodstains in the bathroom and living room, the latter of which is also missing a rug. There's a darkroom and a writing desk, both of which have been totally cleaned out. A jacket hanging by the door has Femic's notebook, and inside that is a letter from Lazar Andic asking her to meet him at the Rose Garden.
The Rose Garden is a sleazy rooming house primarily used by sex workers and couples having illicit affairs. They pride themselves on maintaining discretion and as such will require a sizable bribe in pounds sterling before they'll admit that one of their recent guests was a student from Zagreb who stole a rug before he left. Of more interest to the investigators is the rubbish wagon behind the building, piled high and partially frozen over. Hidden under the rubbish are two blood-stained rugs which have been rolled around the bodies of Femic and Andic. Both have had their faces removed from their heads, but have been preserved wonderfully by the cold. That's 1/1D4 SAN. If the investigators want to call the cops about this, best to leave an anonymous tip and clear out.
After this, investigators may catch glimpses of a woman who looks like Femic around town. This is actually one of the Wolves, wearing Femic's face.
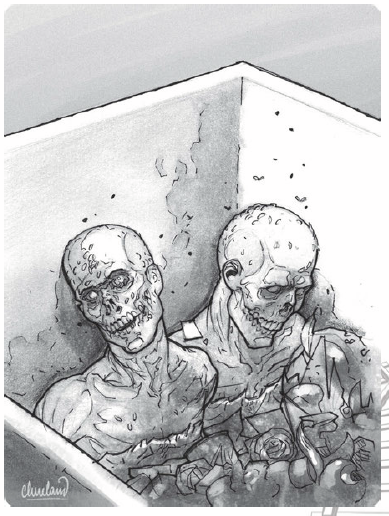
Fuck The Police
If the investigators contact the police at any point, they'll quickly find them to be useless. The cops are totally consumed with the hunt for the LPV to the point that they just flat-out won't care about anything the investigators try to tell them. Dr. Moric's missing? Well, he was a Croatian, so blame his brothers in the LPV. Investigators got attacked? LPV. Rotting corpses discovered? Those damn LPV again. Investigators who push too heavily can look forward to getting arrested and more thoroughly interrogated by Captain Karkunica for their trouble.
They don't care about the obvious evidence for Moric's murder either, and if the investigators push too hard on that front, Major Boskovic of the army will become certain that he was a co-conspirator in the LPV and will want to bring Jazmina in for questioning. Jazmina doesn't give a fuck; she cuts her hair and wears a hat to avoid being spotted. Nothing will stop her getting revenge for her dad.
Next time: knife fights!
BREAD OR STONE – PART FOUR
Original SA postBREAD OR STONE – PART 4
Breadcrumb Trail
Dr. Moric has set up a nice little treasure hunt for his daughter to find research materials. The random words on the note are actually rough directions; asking a local or looking at a map will point the investigators to Zvonarska Street. There's a lot of shops here, but of interest to the group is a bookshop. If they remember Moric's letter, they'll think to ask the shopkeeper for a copy of The Decline and Fall of the Roman Empire. The last copy they had was sold last week and was reserved for the customer's daughter to pick up – naturally, it's for Jazmina. Tucked inside is a note directing them to Pouzdan Zalihi warehouse, as well as telling them that the key they need is 'submerged in the nearby Roman bath.'
Vinkovci was once a Roman city and there are ruins of an ancient bath house, but it's nowhere near the warehouse. Instead, the investigators want to check out the park across the street, in particular the birdbath topped with a statue of Emperor Valens. An investigator who's willing to roll up their sleeves and go fishing around in the muck at the bottom is rewarded with the key. The warehouse is very big on security, but with the key and some personal information from Jazmina, the team can access the stuff Moric's left behind in Lot 187.
There's a big crate in the lot that has all the really juicy cool bits found in the Crusader's Tomb. This includes one of Judas' thirty pieces of silver, a bunch of rare scrolls and grimoires and Moric's notebook containing his observations. The notebook is a slim little tome that lacks spells but only takes a few days to study (if you can read Serbo-Croatian). In addition, one of the scrolls is The Accounts of Tillius Corvus. This is a Latin manuscript detailing the actions of a unit of elite scouts under the command of the titular Tribuni Comites Corvus, the Byzantine soldiers who fought Unwen and the horrors he created with the Mims Sahis. Corvus struck down Unwen but was splattered with the sorcerer's blood and thereafter entered a deep coma. When he woke up, he was no longer human. After that, the scrolls are written by someone else describing Corvus' atrocities and his subsequent exile from Constantinople. Reading the Accounts activates the Sanguis Omnia Vincet scenario.
Moric's notebook also describes the Mims Sahis (which the Noble Shield called the Serpent's Claw) and that he plans to contact Belenzada and destroy the blade in a local cement factory. That's the last entry.

I Was Working In The Lab Late One Night
The expectation is that from here, the investigators will launch an attack on Belenzada's facility. However, Total Party Kill mentions in their review that their players were extremely reluctant to do that, for a lot of reasons. First of all, there's no Simulacrum piece here, and Belenzada's lab is extremely well-guarded – both by his veterans and now a few cudoviste. There's also no confirmation that the cudoviste are actually Belenzada's creations, and the man's clearly got benevolent intentions. Playing through Sanguis Omnia Vincet helped their players make their decision; otherwise, just make sure yours really read the Accounts so they can see what happens when you fuck with the Mims Sahis.
As mentioned, breaking into the facility is no easy gig. As well as creating more cudoviste, Belenzada has actually fixed his veterans by replacing their missing parts with parts sourced from a chimpanzee. The three of them feel great and look terrible, SAN 1/1D4 to see them. The exact numbers and placement of the cudoviste is up to the keeper, but there should be one placed near Belenzada's lab.
Alternatively, the investigators might think of a way to link Belenzada with the LPV enough for Captain Karkunica to take an interest. He finds it unlikely that a noted Serbian war hero would be associated with Croatian terrorists, but sends a detachment of soldiers to check out the facility. Outraged to find the gates sealed against him, he orders them torn off by a truck before sending his men in. In addition, the Wolves might scale the walls and try to find the Mims Sahis. They can all have fun fighting the cudoviste and freak chimp hybrids while the investigators sneak through to Belenzada.
The good doctor is in his surgical lab. When they find him, Belenzada is working on his latest horror show, a half-finished monster moaning on his slab while he stands ankle deep in a pool of blood and twitching gibbets – SAN 1/1D6 to see this. He doesn't stop working even if there's screams and gunfire outside, but when the investigators rock up he shouts at them to get out. If they try to kill him, Belenzada's an ex-military wacko with a gun and a magic weapon, but he shouldn't be too hard for a whole team of investigators to take down.
Alternatively, Belenzada's not totally insane yet. If the investigators put the guns down and stay calm, Belenzada will actually listen to reason. If they challenge him, he tries to justify his actions; the Mims Sahis will let him save hundreds or even thousands of lives, so he had to kill Moric for the greater good. It'll take a Psychology and a Persuade roll to get him stop and see that this situation is totally fucked. Belenzada has a break-down when he realises what he's become, and will beg the investigators to destroy the blade. Weeping, he summons any surviving cudoviste to him, who will loyally wait as he shoots each one in the head. He saves the last bullet in his revolver for himself. If the investigators stop him, he'll turn himself in to the police and confess everything – that is, if any surviving Wolves don't get to him first and torture him to death for profaning the sacred knife.

Crusher Destroyer
Moric planned to take the Mims Sahis to the Bulatovic Cement Factory and feed it into a hydraulic rock crusher. This is probably the best bet for the investigators too. They'll need to break into the factory after-hours, but since it doesn't even have guards this should be easy. More difficult is finding the right machine – anyone with Operate Heavy Machine 30+ can instantly identify and operate the machine, otherwise they'll need to make two rolls to first identify then use it. Like a lot of skills regarding specialised expertise that starts at 01% so uh, have fun.
Also, if the Wolves haven't attacked yet or if there's any still alive, this is where they'll come in. They will fight to the death for the Mims Sahis.
When the Mims Sahis reaches the teeth of the rock crusher, the machine jams and then groans as it tries to break down the artefact. Suddenly, it shatters into hundreds of pieces and is soon ground down to dust. As this happens, the air is filled with static electricity shortly preceding a massive explosion. Smart investigators will already be a safe distance away. Otherwise, they take anywhere from 1-3D6 damage from debris and bolts of arcane energy. Everyone within the radius must also make a Hard Power roll or else suddenly find themselves trapped in a vivid nightmare where they are chained to a stone pillar in a cavern and ritually flayed alive repeatedly for what feels like a year, thus causing them to lose...wait, only 1D6 SAN? For a year of supernatural torture? Okay whatever.
Next time: what if knife good?
BREAD OR STONE – PART FIVE
Original SA postBREAD OR STONE – PART 5
Fuck This Shit I'm Out
On maybe the fourth day, it's announced that the LPV have been captured and the tracks have been fixed. Jazmina comes to see the investigators off at the train station. She plans to move to Paris and invites the investigators to visit her, but first she'll have to sort out her father's estate. In accordance with his wishes, she'll be contacting Dr. Radko Jordanov in Sofia to get him to inspect the items recovered from the Crusader's Tomb – the good doctor will have his own role to play when the investigators get to Sofia.
As the train pulls out, Jazmina waves goodbye from the platform, but is interrupted when she sees a pack of cops beating a man in front of his wife. After a few days in Vinkovci, the investigators can now see that the man is Croatian and the cops are Serbian. If you're familiar with the history of Yugoslavia, you know that things aren't going to get better from here.
Rescuing Jazmina is worth 1D3 SAN, as is finding the body of Dr. Moric. Every cudoviste killed gains them another 1D3. Putting down Belenzada gets them 1D2 SAN, but persuading him to hand over the Mims Sahis gets them 1D4. Destroying the Mims Sahis nets them a further 1D6.
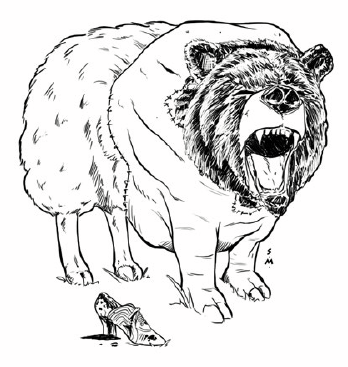
Alternatively…
What if the investigators don't destroy the Mims Sahis? They may decide they'd rather hold onto the blade, seeing as it's so useful and clearly related to the Simulacrum in some way. This is a dangerous idea but one the game encourages, even going so far as including a cut-out Mims Sahis to be laminated and handed to the players – a diabolical little trick to make them attach undue significance to the knife.
The Mims Sahis is a small black knife of crude design made of a substance that looks like black obsidian. The hilt is wrapped in the leather of a marine animal that no longer exists. It is supernaturally sharp and it never loses its edge. The Voorish never had the opportunity to make more than one.
As a weapon, it does a hefty amount of damage for its size (2D4+DB). It ignores any armour its target might be wearing and half of the damage it deals becomes permanent wounds that can never be healed except through magic. As a tool, it is a necessary component to many of the Skinless One's rituals and can allow its user to do new and exciting things with skin. In particular, it's really good at flaying people and can be used to create new relics for the Skinless One, perhaps even a whole new Simulacrum if you put in the time. In addition, it's a battery of magical power, sucking up MAG from its victims and storing up to 25 points inside of itself.
However, it's still an evil artefact, and it was designed first and foremost to cull the human herd. It imbues its wielder with a strange sense of purpose, and using the blade quickly becomes an addiction. It costs its owner 1 Sanity for every week that its owned, as well as 1D3 SAN every time it's used – 'used' is kinda vague here, but I assume it doesn't mean every time it makes a cut, or Belenzada would be totally bonkers. After losing 20 points, the owner of the blade has become ensnared and must make a Hard Power roll if they want to relinquish it. If it drives them all the way down to 0 SAN, they have become a tool of the Skinless One and can no longer be played.
The question might arise: can the Mims Sahis damage or destroy the Simulacrum? It can't even leave a dent. However, when someone applies the blade to the Simulacrum, it feels good. Really fucking good. The blade glides over the statue's surface smoother than silk, and the wielder gains sudden insight into the art of skin. Applying the Mims Sahis to the Simulacrum gives its user 1D10 points in the skill Art (Skin Human) and costs them the same amount of Sanity.
Next time: Belgrade! And racism!
LITTLE COTTAGE IN THE WOOD – PART ONE
Original SA postLITTLE COTTAGE IN THE WOOD – PART ONE
Wherein the investigators must locate and then persuade an elderly collector to give up an arm. For their efforts, she invites them to stay for dinner.
Background
The next piece is being held by the straight-up no-shit Baba Yaga.
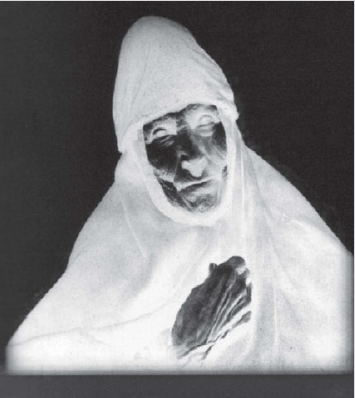
…
...
...
I was so tempted to just leave the introduction like that. Let me try again:
The next piece is being held by the straight-up no-shit Baba Yaga. In Horrient, the Baba Yaga are a trio of priestesses devoted to eldritch fertility goddess Shub-Niggurath, the Black Goat of the Woods with a Thousand Young. Back in the good ol days of old timey paganism, there were whole kingdoms who worshipped the Black Goat, but no longer. Over the years the Baba Yaga have dutifully tended to the sacred woods near Belgrade, but their influence isn't what it used to be and they've been unable to get enough human sacrifices to bring about the mass spawning of the Dark Young that their goddess demands – the spooky folklore shit and occasional child theft is a symptom of the cult having fallen on hard times.
There's a town called Orasac bordering the woods that has 800 tasty little souls on it, but the Baba Yaga can't actually steal anyone from there due to the local Romani population. An annual hearth-ward ritual has protected the townsfolk ever since they arrived. Even worse, every year without a sacrifice is one year that the otherwise immortal Baba Yaga themselves must age. One of the Baba Yaga has disguised herself as a mortal woman and married the local priest to manipulate him into driving away the Romani, but he's proving to be a tolerant and fair-minded individual. Sad!
Orasac is a real town by the way, and the book is quick to mention that it's very welcoming to visitors and hardly anyone, if anyone at all, is ever devoured by eldritch monsters.
Where does the Simulacrum fit into this? Well, the Baba Yaga have a newfound interest in selling antiquities. Centuries of Christian patriarchy have diminished the power of the old ways, but the new ways of science and archaeology are actually changing that. The more modern men try to study and understand the past, the more they inadvertently give legitimacy to the shadows of fallen faiths. As above, so below. The crone of the Baba Yaga doesn't have any attachment to the Simulacrum in particular, but uh, she's got it. Have fun robbing a literal witch demi-goddess!
As a side note, a cool thing in this scenario is that the Romani are actually the good guys: they're the ones protecting people from the Mythos. What's weird is that in spite of that, the scenario exclusively refers to them as either 'gypsies' or 'cigani', which at this point in the 21st century you should fucking know are not the right words to be using for Romani people. The goddamn Wikipedia article has a delineation of the various names used to refer to the Romani that makes it pretty clear if you do cursory fucking research. It's a massive fucking oversight that this wasn't corrected in the second edition. Anyway.

Shopping Spree
As soon as the investigators disembark in Belgrade, they're swamped by a gang of youths who try to take their luggage and load it onto different carts to be taken in several different directions, all the while talking at the investigators in an unintelligible mix of languages. They're shooed away by the older and more professional Petar Ritichit, who is also trying to make a buck off rich tourists but does so in a more collected manner. He helps them get their luggage settled and recommends them a hotel – clearly one he has a deal with, but who's counting. He notices how heavy their luggage is and recommends going to the Bazaar, where he can get them the best prices on whatever they're shopping for. He sees them to their hotel and waits dutifully for his tip.
Ritichit is professional, polite and well-educated, though he does charge a pound a day for his services. If the investigators want a guide or a translator, they could do far worse than Ritichit. If they're willing to pay for him, he'll come back and meet the investigators at whatever time they arrange.
From here, the investigators will probably want to meet up with Dr. Milovan Todorovic, the lead recommended by Professor Smith, but they can kill some time here. There's a hill called the Slope of Dreaming in Kalemegdan Park that will let them access the Dreamlands, as well as the Bazaar mentioned by Ritichit. The Bazaar has some fun shit going on, so we'll go there first.
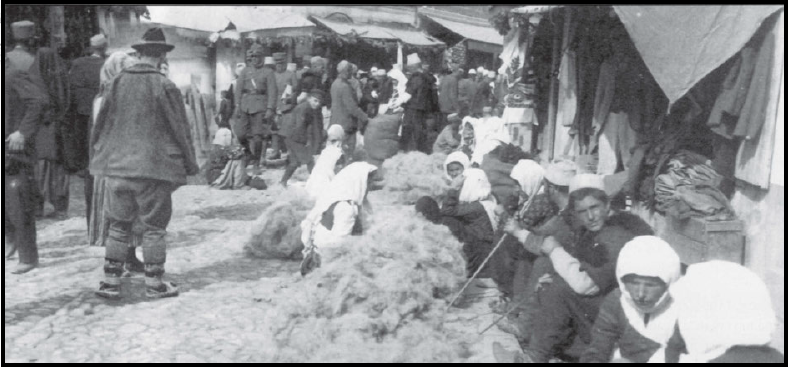
JoJo's Bazaar Adventures
The Bazaar in the Turkish Quarter is a bustling marketplace where you can drop all kinds of plothooks. Stall holders are a mix of Turks and Serbs and racial relations are put to the test on practically a daily basis. Ritichit is indispensable here, as he can translate and keep the urchins off the investigators backs. The book also suggests making them lose shit to a pickpocket, but that seems kinda shitty to me and your players might be bloody-minded enough to spend the rest of the day hunting down whichever poor kid tried to steal 5 quid off of the angriest Brit in the Balkans.
There's an opportunity to meet a fortune teller, because of course there's a fortune teller in the Bazaar, what kind of game do you think I'm running here. She eschews tarot and crystal balls for a strange divination method where she blows the contents of an egg out onto a tray. Naturally, her predictions are cryptic but uncannily accurate. Her black hen stares at the investigators warily, but with a look of anticipation, which is pretty impressive for a fowl to be able to communicate.
There's also loads of antiquities for sale here. The investigators might think to take a look for the next piece and see if they can't make the Belgrade trip a short one. A Spot Hidden roll finds a statue arm that looks like a Simulacrum piece, but as they go to inspect it closer, it's stolen away by a thief. This is the cue for a classic pulpy chase scene through the marketplace, using the rigorous chase rules provided in 7E. Eventually the thief is cornered, leading him to try and fend the team off with the statue arm. The investigators have a band of Serb/Turk (select one) merchants helping them, but the thief is joined by a mob of other Serb/Turk (select one) ruffians. Get ready to rumble!
Unfortunately, the arm shatters the first time it hits someone, and police are soon called to the scene. Oh well. It's about the journey, not the destination.
Next time: going country!
LITTLE COTTAGE IN THE WOOD – PART TWO
Original SA postLITTLE COTTAGE IN THE WOOD – PART TWO
I couldn't think of something funny to say about todorovic
Dr. Todorovic can be found at the Narodni Muzej where he's currently cleaning a statue of the Capitoline Venus. He's initially quite reserved and wary towards the investigators, suspecting them to be rivals from others museums. They'll either need to prove their academic cred or namedrop Professor Smith (or the Morics) before he'll warm up to them. When they do, he'll reveal that he has a supplier working out of the provinces who sends him artefacts of such high quality that they must have access to an undiscovered dig site. He can point them in the right direction – provided, of course, that they can get a permit allowing them to remove antiquities from the Kingdom, something which has become tightly regulated since the War.
He'll be very interested if the investigators bring up the Simulacrum. A rare statue of opalescent marble? There's nothing like that in the museum's collection. Have they seen it? Has it been assessed by scholars for authenticity? Do they have a piece he'd be able to inspect? Why not? Todorovic's interest is purely academic, but the investigators won't necessarily believe that.
The permit the team needs can be acquired at the Bureau of National Treasures, either by proving to the secretary the legitimacy of their request or by giving him a steep bribe to the tune of 25 pounds sterling. When they've got it, Todorovic will happily furnish them with directions to the village of Orasac and a letter of introduction – the village priest Father Kristijan Filopovic was an old friend of his back in college who was persuaded by his wife to move out to the country.
Fastest way to Orasac is by train. Not the Express, oh no, a real peasant-ass train. The investigators will find themselves sharing their crowded carriage with dozens of locals and more than a few farm animals. They're all very friendly and will happily share food and gossip with the team on the way there. At one point in the journey, an investigator returns to their seat to find it occupied by an ornery black rooster. It refuses to budge and will get violent by any attempts to force it out of its usurped seat, much to the amusement of the other passengers.
The train doesn't go all the way to Orasac and a conductor tells them to get off at Kopljare, some three miles away from the village. They are the only passengers going to Orasac, so getting someone with a cart to take them is going to cost them. At least the walk is pleasant.
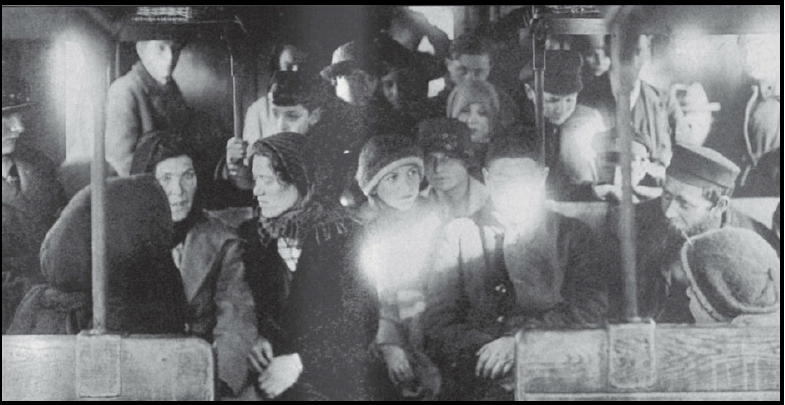
The Simple Life
As the investigators approach Orasac, dogs bark at them and the village children stop playing to hide while housewives call out to them in Serbo-Croatian. If they can't speak the language, invoking the name of Father Filopovic soon gets them results. Failing that, a posse of village men come in from the fields to talk to them. The villagers are actually quite pleased to have these accomplished foreign travellers come to their little burg, and they welcome them without any reservations. There's nothing like an inn, but two investigators can stay with the mayor, while the rest can stay with Filopovic.
There are three main 'factions' in the village:
The Filopovics: Father Kristijan Filopovic and his wife Ana have been married for twenty-odd years. They moved here because Ana wanted to be closer to her family, but as time has passed she has come to see the villagers as backwards hicks while Kristijan has warmed up to country living. They have a large house but no children, and though they're about the same age Ana looks nearly twenty years younger. Of course, Ana is one of the Baba Yaga priestesses, but Kristijan has no idea of that.
Kristijan is the only person in the village who speaks fluent English. Ana's English isn't as good and she is more reserved towards the investigators, but Psychology reveals she's pleased to be hosting these sophisticated visitors. Kristijan is happy to set up a meeting with the antiquities supplier, a batty old woman who lives in the woods that everyone knows simply as Grandmother ('Baba') and an old friend of Ana's family. He'll advise that the investigators wait until tomorrow to make the trek into the woods, and that they prepare themselves – she drives a hard bargain.
If the investigators mention the Romani, Ana is quick to call them thieves and warn that they're not to be trusted, an assessment that clearly makes Kristijan uncomfortable.
The Nedics: The mayor of the village is a jovial middle-aged man named Todor Nedic who can speak conversational English and German. He lives with his wife, his sister, four grandparents, two sons, their wives and no less than seven grandchildren. He invites the investigators to a hectic dinner where the extended family gather around several tables and fight over enormous communal platters. Todor mentions that dinner is being served earlier than usual to accommodate a special annual ritual taking place tonight.
The Nedic family home is comfortably decorated with a selection of furniture passed down through multiple families over several generations, but of more interest to the investigators is the selection of strange antiques that decorate the shelves and window sills. Todor explains that he and the other farmers occasionally dig up ancient potteries and metalworks while ploughing the fields. Spot Hidden draws the investigators' eyes to a unique piece, an elegantly-crafted bone whistle. If they express curiosity about it, Todor immediately makes a gift of it to them and refuses to accept any payment.
If the investigators ask the Nedics about Grandmother, they are very wary about talking about her, as if she might hear them. Todor says she was a scholar in her youth, but must have gone mad if she chooses to live in the woods, a dangerous place that the other villagers are reluctant to enter. No-one remembers her real name, and the last time she visited the village Todor was in his teens. Last year, Todor's sister actually saw her arguing with a Romani man near the fields; he cursed her, but she laughed and called his people ignorant heathens.
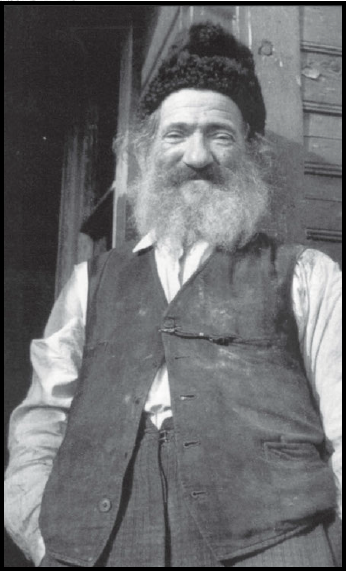
The Romani: The Romani have a semi-permanent camp near the village. Unusually for Balkan Romani, they are Orthodox Christians instead of Muslims, and this common ground with the villagers has formed the basis for their cordial relationship. Father Filopovic has encouraged the growing bonds between the two communities, much to his wife's chagrin. They are led in part by Marko Markovic, a strong-willed man who respects Kristijan but understandably dislikes Ana. More important to the community is the wise woman Luminitsa Venclovic, who is the custodian of traditional lore that has been passed down through matrilineal lines over generations. She knows that there's more dangers in the forest than wolves and the rituals she performs are more than just superstitions. She has extended her protection to the people of Orasac and fears what would happen to them if they refused to let her perform her rites for them.
There's also Tsura Ljubisa, a young woman who used to have an identical twin. When they were children it's believed that a bear took her sister in the woods, but Ljubisa doesn't believe that. She saw a glimpse of her sister in the woods when she was 12 and feels in her heart that she's still alive. She is absolutely right.
Next time: paganism!
LITTLE COTTAGE IN THE WOOD – PART THREE
Original SA postLITTLE COTTAGE IN THE WOOD – PART THREE
Ya'll Ever Listen To Italian Prog-Rock Band Goblin
The night the investigators come to the village, the Romani are planning to perform an ancient ritual. The prosperity of the village depends on good rains, and though they have been good so far Todor has accepted an offer from Venclovic to lead a ceremony that will extend the favourable weather. Kristijan objects to the ritual on general principles, as he feels that the villagers should instead have faith in the Lord, but Todor sees the ritual as harmless and a good way to lift spirits in both communities – and since they already have faith in the Lord, they can put a little something to the side just in case.
Ana vehemently disagrees with the ritual and refuses to let it be performed anywhere near the church or the Filopovic home. She'll beseech the investigators to join her in the church and pray for the souls of Orasac rather than taking any part in the ceremony. Psychology reveals her distress is genuine.
The ceremony begins an hour before dusk with the women of Orasac inviting the youngest daughter of Venclovic's family into the village, to the Nedic house. She emerges wearing a skirt and cape made of leaves, her face smeared with mud. The villagers carry burning torches as they escort her from household to household, swaying and chanting. The woman of each house ladles water over the girl while the man of each house gives her a gift as she leaves. They visit every house save the Filopovics' and by the end the girl is soaked to the skin and freezing cold. At the end, the women of the village bathe her, feed her, bundle her up and escort her home.
The villagers believe this to be a traditional fertility ritual. In actuality, it's a Mythos ritual that wards against the Black Goat, weaving a spell of protection around each house and tricking the Black Goat into thinking she's been fed. Investigators who examine the ritual with Anthropology will come up with a wide range of symbolic possibilities but will ultimately determine the ritual to be benign in nature and intention. Cthulhu Mythos lets them jump right to figuring it out as a ward against Shub-Niggurath.
Venclovic oversees the entire ritual. Investigators who have seen the bone whistle in the Nedic house can roll Spot Hidden to recognise a similar whistle worn around her neck. Venclovic doesn't take kindly to being stared at by strangers and fixes them with a glare that should probably do HP damage.
The investigators who are staying with the Nedics can enjoy the cheerful hospitality of Todor and falling asleep with a belly full of Slavic brandy/paint-stripper. The rest of the team in the Filopovic household can look forward to a frosty reception from Ana if they took part in the ritual. Later in the night, anyone who succeeds at a Listen roll is woken up by the sound of voices coming from the kitchen. It sounds like three people conversing in low, urgent tones. The language is unknown to them, but an Extreme success here will let them recognise it later. If they get out of bed to investigate, they'll need to succeed on a Hard Stealth roll. Otherwise, when they get to the kitchen they only see Ana, who kindly offers them some tea.
There was no-one else in the kitchen. Ana was warning her sister-priestesses and all three voices came out of her mouth.
I Highly Recommend Listening To The Soundtrack To Suspiria
The investigators at the Nedic household are treated to a hearty breakfast with the rest of the family. If they haven't received the bone whistle, Todor's sister gives it to the investigator with the highest Power and explains with signs and simple language that it protects them from wood spirits – if they're in danger, blowing on it will frighten the spirits away. Whether they believe that or not, it would be rude to refuse it.
The rest of the team gets similar treatment from the Filopovics, though obviously lacking the chaos of the 20+ extended family. Ana in particular is in high spirits this morning, a sharp change from the night before. Kristijan gives them directions through the woods, as well as cheese and bread and booze for the trip. Before they leave, Ana pulls an investigator aside and warns them that some of the people in Orasac cannot be trusted, especially those with Romani sympathies – 'they have had their way long enough', she says cryptically.
The illustrations for this scenario are fan-fucking-tastic, thanks for asking.
The hut is only an hour's walk west into the woods, but the investigators will not find anyone willing to act as guide for any amount of money – anyone they recruit will barely walk beyond the village boundaries before making a lame excuse and ditching them. On their way, they'll see smoke coming from fireplaces in the Romani settlement and may want to make a brief detour to visit them. When they get to the borders of the woods they'll find rich green pasture but strangely, no-one seems to be bringing their animals to graze here. As they enter the forest, it's not long before they seem to find themselves in the deep woods where the evergreens grow to great heights and fungal life abounds. The smell of humus is heavy in the air and an Extreme Listen roll lets them detect a faint, omnipresent hum.
The smell of fresh bread cuts through the smell of rotting wood, and after climbing a low slope the investigators find themselves in a clearing faced with a cottage made of rough-hewn wood. It has a quaint briar-wood fence and a young girl can be heard humming inside. Investigators who find this scene suspicious are allowed to make a Spot Hidden roll to detect that there's just something slightly off about the cottage and that they keep seeing movement out of the corner of their eyes, even though nothing's changing. As they move through the gap in the fence, they must roll Luck, and the investigator with the worst roll trips over and gashes their right hand across the fence.
The door to the house is shut, but when the investigators knock, the woman inside calls them in.
Next time: dinner time!
LITTLE COTTAGE IN THE WOOD – PART FOUR
Original SA postLITTLE COTTAGE IN THE WOOD – PART FOUR
She Seems Nice
The inside of the cottage is one large room, the walls of which are covered in shelves that are packed with bits of statuary. There's a large clay-brick oven and a tapestry frame where the young woman of the cottage is working. She gets up and introduces herself as Kcerca, speaking to the investigators in Serbo-Croatian. If they don't speak that, she does her best to make herself understood. If they ask about Grandmother, she says that she's away on an errand right now but that the investigators are more than welcome to take a seat here and wait for her. She prepares them slices of fresh-baked bread with berry jam, humming all the while.
The shelves are tantalising. There's dozens of statue arms in there, and anyone who looks for the Simulacrum piece will be able to see plenty of strong contenders, none of them easily removable from the shelves without bringing everything down – in fact, if an investigator fails a Dexterity roll while trying to yank out an arm, the whole shelf goes crashing to the floor, causing Kcerca to apologise on behalf of Grandmother for the lack of organisation. They're not gonna find it in the shelves; it'll take a Hard Spot Hidden roll to see a faint outline of porcelain up in the rafters of the cottage.
While they wait, Kcerca goes back to working on her tapestry. An investigator who goes around to look at it will see an in-progress depiction of a peasant village. Education reveals that it's actually a depiction of Orasac, while Spot Hidden reveals that not only is it Orasac, but it depicts the actual villagers right down to the clothes they were wearing today, calling for a SAN 0/1 roll. Kcerca doesn't stop humming the entire time.
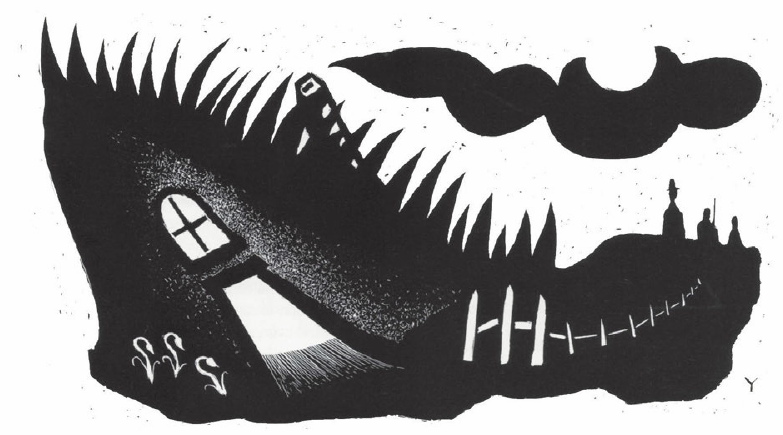
Eventually, the investigators hear a fluttering noise outside before Grandmother walks in. She's the picture of a Slavic old lady and she smiles at the investigators with her few remaining teeth. Kcerca embraces her as she comes in and the two of them launch into a conversation in a strange dialect neither Serbian nor Serbo-Croatian. Science (Linguistics) identifies it as an oddly antiquated dialect, whereas anyone who got an Extreme Listen success back at the Filopovic house recognises it as the language they heard there. They sound happy and excited and they keep smiling at the investigators. When they're done, Grandmother speaks to them in broken English, inviting them to stay for supper.
As Kcerca tends to dinner preparations, Grandmother is willing to talk a little about her artefact collection, saying that her father was an archaeologist and she followed him around to dig sites as a little girl, where she developed a fascination. She moved to this area after finding out its proximity to an ancient Roman trade route and has made a living off the artefacts here ever since. She can't travel as far as she used to, so selling the antiques is more of a hobby now than anything else. That said, if she does have the statue they're looking for, they better be ready to pay up. Meanwhile, Kcerca greases a roasting pan and lines it with chopped vegetables.
As the investigators describe the artefact, Grandmother's keen eyes dart around the shelves. If they actually describe what they know of the Simulacrum, Grandmother will be surprised; she's familiar with the legends, but she never would have thought she would own part of the statue (Hard Psychology: she's not surprised at all). Soon, Grandmother directs a search of the entire cottage, probing every shelf and every nook and cranny to no avail. As before, it's easy to find dozens of statue arms in the cottage, but none of them seem to be quite right. Meanwhile, Kcerca inspects the heat of the oven and places the pan inside.
Then, Grandmother's eyes go wide. There it is! Up there in the rafters! How'd it get up there? There's nothing like a ladder in the cottage so the investigators are going to have to push some furniture together to climb up there. The piece is stuck in there real good and the investigator is gonna have trouble pulling it out. Grandmother murmurs something about being careful while Kcerca opens the oven to check the heat. Her eyes glazed over, Grandmother starts singing an odd peasant ditty and swaying slightly.
Then everything goes to shit.
OH SHIT
The investigator manages to pull out the piece, definitely the Right Arm of the Simulacrum. As it comes free, the arms on the shelves clench and grab the investigator. They're not statuary but real dismembered human arms, riddled with countless writhing filaments. So too is the roof not thatched but actually a roiling mat of moist cilia. Grandmother cackles and stands up straight while reaching for the bread shovel; she slides it under the feet of the trapped investigator and unerringly guides them towards the gaping oven – which, by the way, is now a hooked maw, stretching wide enough to accommodate a whole person. Kcerca shrieks paeans to Shub-Niggurath as she attacks the investigators with a knife.
That'll be SAN 1/1D6. You on the shovel, make that SAN 2/1D6+1.
To quote the book, the investigators are on the menu of an avatar of an Outer God. Escaping is going to take some good rolls. First, whoever's on the shovel has to roll Power to realise what's happening and be able to avoid getting dumped into the oven. Whoever's getting knifed by Kcerca has to Dodge her initial attack or take hefty damage. Everyone needs to make a Dexterity roll to avoid getting grabbed by the writhing, gripping former statuary. As the cottage starts to rise, everyone will need to roll Luck to keep their balance. Know will let them find the exit in the dancing, shifting walls of the cottage, with a Jump roll needed to get out safely. The book suggests skipping some of these rolls and I'd let it slide as long as my players looked you know, appropriately scared.
If they can make those rolls, they land safely outside of the cottage, now revealing its true form as the Walker in the Woods. It stands on two goat-like legs and unfurls six mighty tentacles as Grandmother and Kcerca sing a wailing song, the herding call of the shepherds of Leng. The trees beyond the clearing are moving – three Dark Young of Shub-Niggurath are approaching to help feed the investigators to the Walker. They look like nothing less than walking baobab trees covered with mouths and tentacles – that'll be SAN 1D3/1D10.
The investigators are sure to die here – that is, if they forget to blow the bone whistle.
Next time: huff and puff!
LITTLE COTTAGE IN THE WOODS – PART FIVE
Original SA postLITTLE COTTAGE IN THE WOODS – PART FIVE
Blow The House Down
The bone whistle is about six inches long and exquisitely carved with patterns of flowers and vines. Archaeology or History identifies it as Byzantine-era, but carved by a Slavic craftsman. It's a rare find and something far too valuable to be a casual gift. Blowing on it produces a low, warbling tone with strange harmonics that are felt rather than heard – Spot Hidden reveals that the trees shudder in symphony. It can be blown full-force only once, first requiring a Constitution roll to take a big lungful of air. As the note sounds, it rises higher and higher, vibrating with teeth-rattling force. At its apex it shatters, possible cutting its player in the process.
Blowing the whistle is the deus ex machina that saves the investigators here. The book accommodates for a wide range of possible times they might choose to blow it. If they blow it when they make it out of the cottage, this is what happens.
The Walker hunches on its legs and sways in place as if uncertain. The Dark Young are thrown into total confusion by the sound, emitting ululations from their many mouths and swinging their tentacles wildly. Grandmother's song rises in pitch as she attempts to control them, but that just makes things worse. One of the Dark Young smacks her with a tentacle and the force sends her flying across the clearing with a sickening crack. She lands hard against the stump of an old oak tree. The investigators now have 1D4 rounds to get the fuck out.
The Walker is no longer maintaining its illusions and is withdrawing the mycofilaments that accelerated the clearing's growth. The investigators can now see that the woods around the clearing are dead, and the cottage's fence is bones topped with skulls. Investigators who look back as they run and failed a Luck roll will get an excellent view of the Walker in the Woods risen to its full stature, and lose 1D6/1D20 SAN in accordance.
They'll also hear a terrified scream. Grandmother is holding onto Kcerca's arm tight and staring her dead in the eyes as she sings a different song. In seconds she drains the life force out of the poor girl, leaving her a desiccated husk as she stands up, her bones healing. That's 1/1D6 SAN.
The forest becomes like a maze to the investigators. They'll need three successful Navigate or Track rolls to escape. An Extreme success counts as two Regular successes while a failed rolled means they lose more time getting turned around in the forest. A fumbled roll means a random encounter: either panicked wolves, a panicked bear or an angry Dark Young.
I sincerely hope someone remembered to grab the Right Arm in all of that.
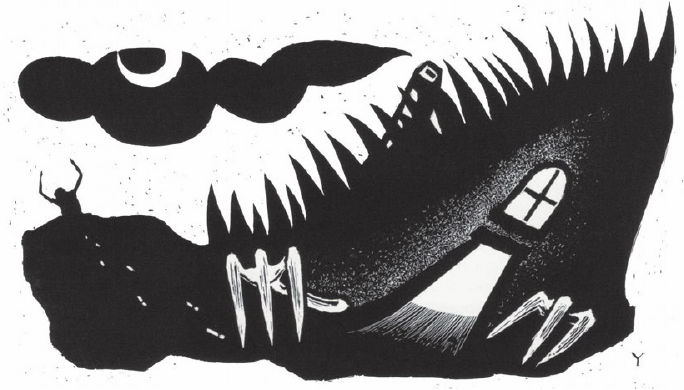
Hunting Season
If the investigators failed their Navigate rolls they escape the woods but have no idea where they are. There's other villages near Orasac, but if they lack a translator they'll have difficulty getting directions, especially if they're wild-eyed, filthy and wounded. Alternatively, they might run into the Romani, who will take them in and see that they're taken care of. If the investigators share their story, the Romani aren't surprised at all; that's just the shit that happens in the woods. They all stay the fuck away from whoever's holding the Arm, and Venclovic warns them that they'll meet their doom carrying the evil artefacts.
As they talk, a Spot Hidden roll reveals a familiar face at the edge of the crowd...Kcerca! If they mention her by name, the young woman asks for her description. When she hears it, she wails and collapses to her knees. This is of course Tsuba, twin sister to Kcerca. She always believed Kcerca had never died. Well, now she knows.
This news fills the Romani with anger. One of their daughters, stolen and corrupted by the witch? Markovic swears vengeance. At dawn tomorrow, the Romani will hunt.
The investigators are invited to join the party. If they do, they'll set out with a fearsome hunting band in the dark hours of the morning. They can guide the Romani to the now empty location of the cottage – Spot Hidden reveals that only a thin layer of soil covers a Roman-era mosaic underneath, decorated with similar horrors to those the investigators encountered yesterday. After that, the investigators need to match their Track against the Walker in the Woods' Stealth 80. Each failed test means a day lost and more of the hunters dropping out of the band, eventually dwindling from 15 to 3, at which point they call off the hunt. If they do find the Walker, it'll be partially dormant, looking like a huge mass of rotting vegetation. The investigators and the hunters have one free round to do as much damage as they can against something almost totally immune to firearms. Good luck. If they survive, they're friends with the Romani for life.
Alternatively, they may not want to join the band. No hard feelings. No-one could blame them for wanting to get the fuck out after the day they've had. One of Markovic's sons can drive the investigators to a train station, or back to Orasac. If they do go back to Orasac, they'll find Father Filopovic in the church, where he's staring down in mute horror at the withered body of Ana. Guess Grandmother was still hungry.
Depending on how the investigators plan to get back to civilisation, they might fall victim to the Baba Yaga's magic. Grandmother is too weak to attack directly but she still follows the investigators and makes her fury known to them. She plagues them with boils, or just appears menacingly in the distance. In one extremely memorable encounter, she summons a plague of hundreds of black chickens to attack the investigators – anyone who's played Ocarina of Time can tell you how horrific that can be.
Fuckin Witches Man
The investigators get 1D4 SAN for the Right Arm but nothing for eluding Baba Yaga, on the basis that she's still out there. Come on. Escaping her clutches, knocking her down a peg, doesn't that deserve anything?
As the Orient Express leaves the station, it starts storming. As they look out the window, the investigators can see something moving on the hillside. It's the Walker in the Woods, keeping pace with the train. Now it is a cottage on chicken legs, then when the lightning strikes it becomes a loping monster the size of a house. Riding it is the Baba Yaga, her hands raised above her head, her voice like grinding stones audible above the storm, cursing the investigators with unholy malice. That's 1/1D6 SAN.
But no attack comes. An Occult roll lets the investigators realise that the Baba Yaga is the power of nature, and inside their metal box mounted on twin iron rails, the investigators are protected from her magic. When they cross the border into Bulgaria, the investigators will see that the Baba Yaga follows them no longer. They're probably not welcome in Belgrade again. Best think about what they want to do on the return trip.
After a quick nap, of course.
Next time: one last trek in the Dreamlands!
THE DREAMLANDS EXPRESS – PART SEVEN
Original SA postTHE DREAMLANDS EXPRESS – PART SEVEN
It's Been A While!
No pictures for this update, sorry it looks like shit! If you'll remember, last time we left off in the Dreamlands the dreamers lost a cat friend and solved a murder. The banquet that takes place on the leg of the journey between Zar and Aphorat takes on a decidedly morose tone. Zsusza decides to lighten the atmosphere by performing a dance, one that shows her mourning over not only Blackjack but her dreams of dancing.
Meanwhile, the Sarnathians are impressed by the skills of the dreamers and decide to ask for their aid in negotiating with the Beings of Ib. They will tell their side of the story and ask them to find out what the Beings want. The Beings are happy to explain their side of the story (AKA 'the truth') and the terms they're looking for. They want straightforward war reparations: 10 000 rubies and sapphires to rebuild Ib, a letter of apology from the king of Sarnath, and the holy statue of Bokrug the Water Lizard returned to them. Otherwise, the Sarnathians will meet their DOOM. Persuade or Law can get them to relent on the money and the apology, but not the statue.
As you might expect, the Sarnathians don't want to give an inch if they can avoid it. They'll need to be persuaded otherwise. They will eventually agree on the rubies and sapphires, since they're so rich that it's nothing for them. They will eventually agree on a shoddy and extremely vague apology. They will refuse to give up the statue on the basis that an annual desecration ritual has brought the Sarnathians prosperity the last thousand years. The closest they'll agree to is a promise to maybe return the statue at a future time and place to be decided later.
The whole time, Karakov tries to sell weapons to both sides. He gets nowhere with the Beings, who are serenely confident in the power of their DOOM, but he's this close to a lucrative deal with the Sarnathians. He tries to rope the investigators into helping him set up shop in the Dreamlands. An entire world without guns? An untapped market! Think of the profits!
Thalarion
Thalarion is the City of a Thousand Wonders, a real Anor Londo-looking piece of work with spires that stretch beyond vision. However, much like Anor Londo the place is full of demons and paved with the bones of people who did not come back after seeing the eidolon Lathi. Henri advises not to disembark here, as it's another place that he stops at only to pick up lost dreamers.
At Thalarion, the Sorcerer tries to board. He looks like nothing less than a skeleton with burning red eyes and he glides onto the platform with a clacking of bones. Henri refuses to let him on board. Not because he's a spooky scary skeleton, mind you, but purely because the Sorcerer has already ridden the Express to the Gulf of Nodens. He cast off his dream artefact, in this case his humanity, and in accordance with the deal with Nodens he can no longer ride the Express. Henri explains all this to the Sorcerer with unfaltering politeness.
Dreamers who are watching this will notice Madame Bruja watching as well, a wicked smile on her face. She darts away when the Sorcerer looks in her direction.
At this point, the Sorcerer hypnotises Henri. Henri's eyes take on a red glow and his arms drop to his sides as he lets the Sorcerer past. He can be slapped out of his trance or Persuaded to stop the Sorcerer from boarding. Otherwise, any attack drives the Sorcerer away. If no-one does anything, the eidolon Lathi descends from Thalarion to stop him. She is the dream of a woman who has yet to be and who hopes to become real in the eyes of a dreamer. She descends with fluttering silks and piping music, causing the Sorcerer to flee in terror. Henri now owes her another favour.
Any dreamer who sees Lathi must roll their POW versus her Appearance or fall hopelessly in love with her. If they fail, they'll need to be physically restrained lest they pursue her back in Thalarion to be with her. If this does happen, Lathi's agreement with Henri means she must return any dreamers to the train. But the dreamer never forgets her dark eyes and inhuman loveliness.
Xura
Xura is the Land of Pleasures Unattained. It is a country of picturesque beauty from which laughing voices can be heard, but anyone who gets too close will find this to be an illusion. It's a land that reeks of abattoir and is filled with things no longer human. Henri draws all the curtains shut and burns candles and oils to hide the smell. Dreamers might be tempted to view the charnel gardens regardless of the danger, but doing so risks falling prey to its enchantments – only the tentacles of the trainbeasts stop a bewitched dreamer from walking off the train to their death.
The Ghoul That Was Guillaume tries to board in Xura. This might actually be the second time the dreamers have met Guillaume! He first appears as an optional encounter in Paris, should the dreamers visit the Catacombs and step off the beaten track. Really, he's just down there. Guillaume became a ghoul centuries ago during the Great Famine and has survived underground ever since. He's not dangerous and mostly just wants to be left alone. When he encounters the investigators in the Waking World, he tries to play off his condition with a certain savoir-faire, but he deeply regrets his degeneration into monstrosity. Meeting the investigators drives him to board the Dreamlands Express that he might reclaim his humanity.
He holds a well-chewed scrap of ticket and is lugging around his dream artefact, his own rotting carcass. Henri is not having this, viewing him as a potential danger to other passengers. He'll need to be convinced otherwise, or else the dreamers will have to sneak Guillaume on later. Once aboard, Guillaume stays in the Baggage or Padded Compartment. He promises he'll try very hard not to eat anyone.
If the dreamers think to ask, Guillaume has actually met Comte Fenalik! Back in Poissy, it amused him to feed the leftovers of his victims to the ghouls. One night, Guillaume found Fenalik embracing the statue he kept in his cellar like a lover. He told the ghoul that if anything ever happened to the statue, he would hunt the thief from beyond death itself. The look he gave Guillaume at that moment was so terrible that he fled and never returned.
Next time: more diplomacy! Cat funeral!
THE DREAMLANDS EXPRESS – PART EIGHT
Original SA postTHE DREAMLANDS EXPRESS – PART EIGHT
Fucking Sarnathians
As the train leaves Xura, the Sarnathian delegation hatch an awful plan. They intend to murder the Beings of Ib before they can convene with the king. At the moment, it looks like it'll take the Beings another thousand years to send a new delegation. Why not let it be someone else's problem? They propose this ingenious scheme of theirs to their chosen dreamer over dinner.
If the dreamer refuses to join them or otherwise expresses disapproval of the plan, they immediately back out in case the dreamer tattles on them. Haha, kill the Beings? What a funny joke! You didn't take us seriously, did you? Here, have another drink. However, if the investigator agrees then the Sarnathians show no mercy. They storm the Padded Compartment and kill every Being inside. The Beings fight bravely to the last, possessed with a strange confidence. The Squeaker manages to squeal one final DOOM before it too is crushed underfoot.
If Henri finds out what's going on he stops the massacre immediately. Otherwise, he is unable to throw an important diplomatic delegation like the Sarnathians off his train, and opts instead to confine them to their compartments until they can be handed over to Kuranes for judgement.
Aira
Aira is a tranquil landscape of rolling hills and sighing breeze. It was the dream of the shepherd boy Iranon, but Aira and its people stopped existing as soon as he stopped believing in his dreams. Henri stops the train here because he hopes that one day, if he keeps returning here, someone will remember Iranon's dream and the people of Aira will return. There is a broken marble pillar with an inscription dedicated to Aira's memory; Henri disembarks the train and stands before the pillar with his head bowed. He quietly returns to the train after that.
In Memory of Aira posted:
Here once stood Aira of the golden domes, the dream of the shepherd boy Iranon.
As long as Iranon sought Aira he remained eternally young and, for that long, Aira flourished.
When Iranon lost hope he turned old overnight and walked into the Bnazic quicksands. That night Aira and all her people vanished.
Oh Dreamers hold fast to your dreams, lest they too perish.
If the dreamers didn't solve the murder, the cats disembark here. Otherwise, they hold a funeral for Blackjack. A double-line of cats marches off the train bearing Blackjack's body, his mother Sophie following behind. They dig a grave in the soft soil with their claws and place him there to find peace underneath the golden grasses. If your players are sensitive types I'd twist the knife by having the cats invite them to say a few words for Blackjack.
Henri reminds the dreamers that soon they'll be at the Gulf of Nodens. If the dreamers don't feel ready to go that far, the conductor is happy to store their dream artefacts in the Baggage Compartment until they do.
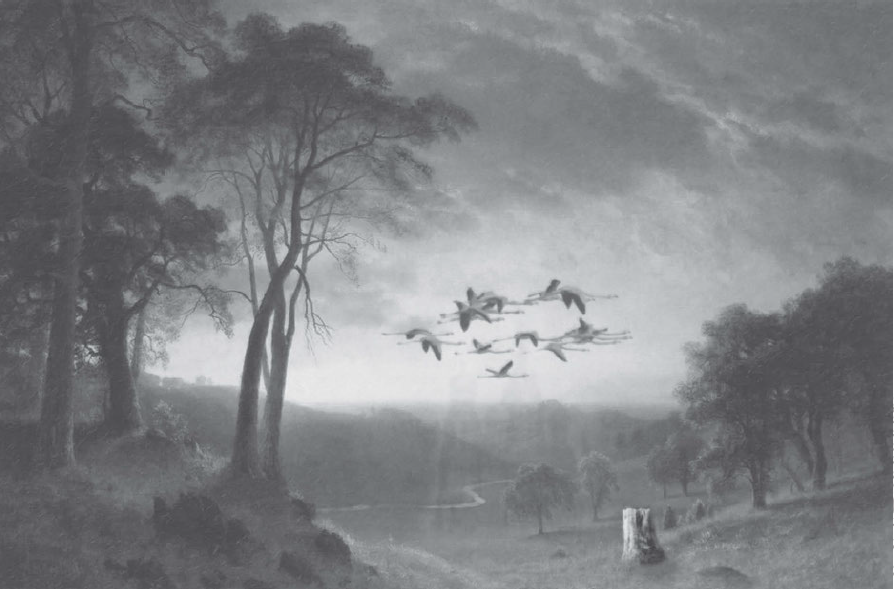
Sona-Nyl
Sona-Nyl is the Land of Fancy, where there is no time and no suffering. It's a civilised land and home to a graceful people. This is Mac's last stop, unless the dreamers have persuaded him that this trip should be his trip to the Gulf.
King Kuranes boards at Sona-Nyl, accompanied by his loyal knights Haragrim and Nadamens. Henri bows deeply as the king boards, and it's implied that it would be polite for the dreamers to do the same. That said, if they don't bow Kuranes is probably gracious enough to overlook such a minor sleight. The third, final and most lavish banquet is served that night. It's initially quite stuffy and formal and dreamers might want to lighten the mood. Getting Zsusza to dance is a safe bet, and if she does then she dances as if she might never dance again – as indeed she might not.
After dinner, Kuranes holds court. If consulted on Mironim-mer, he will rule that the Sarrubian broke Ulthar's law and as such must be tried in Ulthar. Ulthar does make allowances for people who have been beguiled by sorcerers, so this isn't as harsh a judgement as it might sound.
It's also finally time to sort out the delegations. Kuranes is initially taken aback by the Beings of Ib, who are far more repulsive than he expected, but he is nevertheless a just and fair king. He will also be interested in listening to the dreamers' opinion on things, and to undertake any reasonable actions they might propose. Afterwards, he takes the Sarnathians and dreamers aside to deliver his judgement.
Kuranes observes that the Beings of Ib are ugly, but that they had done nothing to deserve being attacked by Sarnath. Their demands are reasonable and the Sarnathians should endeavour to meet them; even if there's no Beings left, the money, apology and statue should be delivered to where Ib once stood. He urges the Sarnathians to relent on their stance. There are many gods in the Dreamlands, and not all of them are content to just sit back and accept prayer. Just because something has been forgotten doesn't mean it no longer exists.
The Sarnathians appear to accept Kuranes' judgement, but a simple Psychology roll indicates they're lying through their teeth. Kuranes shakes his head. Fucking Sarnathians. I imagine he has to put up with this shit every time he calls in a delegation from them. At least he won't have to put up with them for much longer. Dreamers who acted with humanity have gained a powerful ally in King Kuranes and can always enjoy his hospitality in Serranian. They also gain 1D4 SAN for putting up with the fucking Sarnathians.
Serranian
The Cloud City, a huge castle complex from which King Kuranes rules half the time. It's a beautiful if probably slightly boring place. Kuranes disembarks here along with the Sarnathian delegation. The Beings of Ib stay on board the train, as they plan to return to their world through the Abyss. Somewhere in Serranian's vast libraries is a tome describing the Lover's Heart story, if the dreamers haven't discovered that yet.
This is the last stop before the Gulf of Nodens and therefore the last stop if the dreamers want to be able to ride the Express again. If they decide to end the journey here, Henri agrees that it's probably for the best, as he expects some...turbulence on this trip. He'll give each dreamer a firm handshake before he steps back aboard the train.
As the train pulls out, the clouds in the distance seem to form a massive skull with burning red stars for eyes. The train is heading straight for its maw. This is the dreamers' last chance to jump on board for the big finale.
Next time: the big finale!
THE DREAMLANDS EXPRESS – PART NINE
Original SA postRE: bringing a tank or artillery to fight Baba Yaga, I think a far bigger issue with allowing that approach than historical accuracy is it's rapidly leaving the 'horror' part of the game in the dust. I mean if that's the game you wanna play don't let me stop you, but that's not really the CoC experience. Also, it's entirely possible that whoever's driving your tank or aiming your howitzer will lose SAN and have a mental breakdown while they're trying to operate the machinery, so have fun with that.
THE DREAMLANDS EXPRESS – PART NINE
The Gulf of Nodens
The Gulf is shrouded in mist. The trainbeasts leap through it, parting the mist and revealing a monstrous roaring cataract below. Their leap continues and they soar into the abyss, where all is black and dying galaxies whirl overhead. In the distance, the Sorcerer is approaching with a wing of a shantaks.
This is it.
As Henri predicted, there is turbulence. The train comes under attack from the Vengeful Dead and the Sorcerer. The dreamers will have to help protect the Dreamlands Express for the 12 rounds that the onslaught continues.
The Vengeful Dead arrive first. They have come to stop Karakov from achieving peace. They are phantoms conjured by his subconscious, but as long as he believes they're right, they can get him. The first wave is an undead cavalry, shrieking ghosts mounted on spectral horses, each one with a pound sign stamped on its head. They ride through the carriage and go straight for Karakov. The next wave is a pair of ornate cannons dragged up from the deeps to fire at the carriages of the train. The third and final wave is a fearful black submarine that rises from below, also firing upon the train itself.
If the dreamers were carrying weapons in the Waking World, they have them here, though guns are transformed into antiquated equivalents of themselves – crossbows or swords that otherwise still work the same. However, only the Dreaming skill harms the phantasmal cavalry. The cannons can't really do any damage to a dreamer, but the damage they do to the carriages is felt by Henri, who takes damage every time one is destroyed. If he dies, all control of the train is lost. In addition, the nightgaunt stokers take to the sky to defend the train when it comes under attack, but that means the engine is unattended and the train slows down; someone will have to take their place feeding the engine. If no-one does, they'll never be able to outpace the submarine.
Throughout all of this, Karakov heads to the Baggage to retrieve his conscience and fling it from the train. If they help him, or if they push him off the train, the Vengeful Dead disappear – along with Karakov's conscience. Alternatively, did the dreamers reason with Karakov and help him see the error of his ways? This is their last chance to do it. If they can succeed on both a Persuade and Psychoanalysis roll, Karakov finally acknowledges his own guilt and the phantoms can no longer harm him or the train.
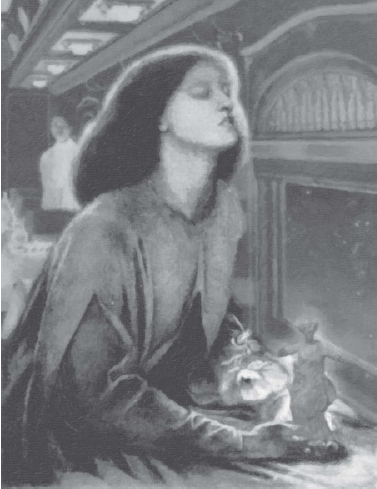
The Sorcerer and the Crone
The Sorcerer and his shantaks arrive on round 11. He will stop at nothing to get the Lover's Heart. Attacking the train directly risks angering Nodens too much, but getting the monstrous shantaks to prise apart the carriages is kind of a grey area. Two shantaks together are strong enough to separate the carriages, and any carriage that's cut off from the Engine veers off course. Clever dreamers who've seen the Engine will realise they can take control of a trainbeast by cutting holes in its back and sticking their arms in.
All the dreamers combined probably can't take down even one shantak, especially with the Sorcerer constantly trying to hypnotise someone every round. Their success here depends on the friendships they've forged during their journey on the train. Most of the passengers can help in this final battle. Since trying to actually roll for everyone who rocks up would be tedious, the book advises just deciding whether or not anyone involved succeeds on what they're doing. Each successful attack from an ally distracts a shantak for one round.
The Beings of Ib: Have the dreamers treated them with respect? If so, the Beings come to the aid of the dreamers.
The Cats of Ulthar: Did the dreamers find Blackjack's murderer? The cats repay their debt tenfold. Hundreds of cats swarm the dreamers' foes en masse. In addition, if someone has opened Karakov's trunk the cats deal with the rats.
Guillaume: Did the dreamers save him? He takes up a piece of broken carriage to use as a spear and calls the stokers to him. He leaps aboard one and bids a dreamer to ride the other one into battle. Viva la France! Viva la Morte! Dogfighting on a nightgaunt requires a successful Ride or Hard Dexterity roll every round, or else the dreamer falls and the nightgaunt stops fighting to catch them.
Mac Mackenzie: If he was persuaded to stay on board, Mac can't help in this fight. He tries to open his briefcase and empty it out, but the tide of papers soon overwhelms him. Left to himself it'll take 10 rounds to shovel all the papers out, at which point he tumbles into the abyss. Dreamers can help by doing something he'd never think to do and remove the briefcase from his arm. If they can't pick the lock or break the chain, chopping off his arm will do the trick.
Madman: The Madman doesn't help in the fight. He gnaws his way out of his bindings and laughs with delight as he throws his artefact then himself off the train. Here's hoping he finds peace and sanity in the Waking World.
Mironim-mer: Did the dreamers treat him justly? He begs them to help him out of his bonds, then assumes his true form and joins the fight.
Monsieur Karakov: Did the dreamers help him save his conscience? He's still a greedy opportunist, but now he's a grateful greedy opportunist. The dreamers have saved his soul, and he rushes to join them in battle.
Zsusza: If the dreamers did not persuade her otherwise, Zsusza walks the length of the train and drops first her artefact then herself into the abyss. Did they convince her to hold onto her dreams? She heads straight for the Sorcerer and starts bludgeoning him with her statue. He keeps trying to hypnotise her, but she is immune, and as long as she attacks him he does not hypnotise anyone else.
Madame Bruja: She cowers in her compartment until Zsusza or a female dreamer is attacked. When that happens, she crawls out onto the train and calls out to the Sorcerer, bearing her valise. The Sorcerer rushes to her and snatches the valise, only to find it empty. Cackling, Bruja becomes the Crone, rising into the air and tearing open her own ribcage. Inside her charred carcass, the Lover's Heart burns. (SAN 0/1D4) The Sorcerer screams and shields his eyes as the radiance of the stone burns him. The Crone tears the Heart out and hurls it, but her hand is knocked by the Sorcerer. The stone bounces across the roof of the carriage and lands at the feet of a dreamer.
If the dreamer picks up the stone, it burns like the sun in the darkness of the abyss. Its rays burn both the Sorcerer and the Crone; when the former is finally reduced to ash, the shantaks disappear and the attack on the train ends. If she's still alive, the Crone thanks the dreamers and drops into the abyss. As she falls, she cries out to them: 'Death is stronger than life! Hate is stronger than love!'
Next time: denouement!
THE DREAMLANDS EXPRESS – PART TEN
Original SA postTHE DREAMLANDS EXPRESS – PART 10
Final Call
The Dreamlands Express lands softly on the other side of the abyss and immediately turns around to make the leap back over to the Gulf. I'd throw in one final heartfelt goodbye from Henri if there's any dreamers still on board. If they cast out their artefacts and leap into the abyss, they fall through endless nightmares, through rushing blackness and the end of the universe. Eons pass in a blink of an eye and galaxies fizzle into nothingness before the cycle of eternity. As the stars burst into bloom again, the dreamers hear the Crone's final words.
Death is stronger than life. Hate is stronger than love. Was she right?
The dreamers finally wake in their compartments aboard the Simplon Orient Express in the Waking World. They gain 1D6 SAN for saving the train and 1D4 SAN for saving Henri. In addition, one of them now carries the Lover's Heart.
The Lover's Heart
This is a magical artefact that looks like a blood red stone carving of two hearts joined together. Cthulhu Mythos identifies it as a symbol of the three-eyed Haunter of the Dark, one of the aspects of Nyarlathotep. He definitely did not intend for the investigators to get their hands on it, by the way. Using the Heart carries a hefty price.
As soon as someone picks up the heart, the final message of Madame Bruja fills their mind. They are filled with a bottomless hate and they will feel like everyone around them returns that hatred. It glows when held, but glows brighter in the dark. In absolute darkness or the gulf of space, it shines like the sun. Every round that the wielder bears it aloft, every undead creature in sight of the stone suffers 1D10 damage per round, ignoring all armour and magical protection. Its burning rays cause them first to smoke then to burst into flames. The damage of this attack is drastically reduced if there's any light present, and it does no damage at all in daylight. Using the Lover's Heart like this costs the user 5 POW and 1D3 SAN every round as they let more hate poison their soul.
The book suggests reducing the damage it deals or increasing the cost but the cost is already pretty harsh for what you're getting, especially since there's only one real encounter where the Lover's Heart is going to come in handy (you'll never guess what it is
).Happy Endings
Guillaume triumphs over his base instincts. He dies, but as a human.
If the dreamers didn't help Karakov, he dies in his sleep. If they did, he wakes up and spends his last few days rewriting his will so that his millions of dollars in war profits are donated to charity. They can learn about this from a newspaper in the Waking World. When asked why he changed his mind, he says it was all thanks to his friends on the train.
If Zsusza is lost, she dies of a drug overdose in Turkey. If she held onto her dream, she has a spectacular season in Turkey and goes on to sell out shows throughout the Balkans. Her fame lets her emigrate to America where she joins the Ziegield Follies and eventually becomes a star in the rising motion picture industry. She never forgets her friends on the train.
Mac returns to London and quietly retires to Inverness. He sets up with pencil and paper and begins writing. If he lost his burdens, he might even write something good one day.
Mironim-mer is tried in Ulthar but is spared a death sentence thanks to both his extenuating circumstances and the surprise appearance of Fortune, his feline companion, who appeals as a character witness. Mironim-mer enjoys a brief and cushy prison sentence before setting out on new adventures.
The cats of the Waking World are kin to those of Ulthar and know the great deeds the investigators have done for them. For the rest of their lives, the investigators find cats that are willing to help them in whatever way a cat can.
So that's The Dreamlands Express! It's good that we ended on a high note there. It's going to be the last one for quite a while.
Next time: Sofia!
REPOSSESSION – PART ONE
Original SA postREPOSSESSION – PART ONE
Wherein the investigators recover the Head and render the Sedefkar Simulacrum complete, much to the delight of the original owner, who soon comes to collect it.
Background
Fenalik doesn't follow the investigators to Belgrade. He goes straight to Sofia. He's just about reached the limits of his patience. He knows the final Simulacrum piece is in Sofia and he can't wait any longer. He squirms around in his coffin aboard the Express, knowing that his precious skin is so close yet so far. He longs for it to be complete so that he can finally kill the investigators, don the Simulacrum and walk under sunlight once more.
The Head of the Simulacrum is actually in a surprisingly easy-to-reach location. It's sitting in storage at Sofia University. However, this close to Turkey the Brothers of the Skin are more powerful than any the investigators have met before. The Sofia chapter are well-armed, well-organised and extremely proactive in their search for the Simulacrum.
A cultist named Nikolai is aboard the same train that the investigators are riding into Sofia. He is taking part in an elaborate initiation test to become a full-fledged Brother. His interference is going to begin a series of events that pushes the investigators to their absolute limit.

Train Fight!
At the Tzaribrod customs point on the Bulgarian border, Nikolai boards the Express and kills a waiter, shedding his stolen cop uniform for a stolen SOE uniform. The Brotherhood have by now noticed that Brothers across Europe are turning up dead, and Nikolai's mission is to eavesdrop on passengers and ferret out potential threats to the cult. He's great at the killing part of his job but not so much at the spying and blending in, and he makes a pretty shitty waiter. The tendency to ignore customers to jot down notes about interesting conversations definitely doesn't help.
While Nikolai tests his skills, the investigators run into Dr. Radko Jordanov in the same dining car. If you remember, he was first namedropped by Jazmina as Dr Moric's colleague who was going to inspect the Crusader's Tomb find. He probably catches the investigators' attention as he sits at his table taking notes with a Latin manuscript in front of him. His notes read, in very big letters, 'SEDEFKAR,' 'SIMULARE,' and 'DZHUDZHETA IDOL?' It's definitely caught Nikolai's attention.
If the investigators introduce themselves, Jordanov's heard all about them from Jazmina and will be happy to share his findings – probably speaking louder than he should from the excitement of it all. The documents found in the vault reference the Sedefkar Simulacrum, and the description of the Simulacrum bears a strange resemblance to a similar artefact discovered by a former student at Jordanov's university, Ivo Penev. Penev called it the Dzhudzheta Idol after the dwarves of Slavic legend, and submitted a nonsensical paper that claimed it to be evidence of a pre-human civilisation. He was laughed out of academia and eventually fled the country, never to speak of the Idol again. However, Jordanov still has Penev's monograph, and he believes that the Idol was probably passed along to another researcher for study.
As Jordanov explains this, investigators can detect their serveur is being awfully nosy with a Hard Spot Hidden or Listen (to angry passengers, that is). As soon as Jordanov mentions a possible location for the Idol, Nikolai tries to bolt from the car. The Maitre d'Hotel tries to stop him and gets slashed with a switchblade for his trouble. As the dining car erupts in panic, the investigators will probably want to pursue Nikolai – this is where those train carriage maps come in handy.
This is an exciting set-up for a chase and it's easy to come up with ways to complicate things for the investigators on top of the ones the book suggests. Nikolai is heading for the nearest fourgon and has a head start. His goal is to pick up his satchel and jump off the back of the train. If he gets enough of a lead on the investigators, he'll have time to throw his bloody hatchet at whoever's in front too. Failing that, he just needs to be able to throw his satchel out the door. The book says that even if he gets shot and killed, his corpse still tumbles out the back of the train, but I'm honestly not a big fan of that kind of railroading. Whatever, that's Horrient for you. Nikolai gets the word back to the Brotherhood whether he lives or dies.
The investigators are probably the first to find the corpse of the real serveur, most likely in the guard chamber of the fourgon. As well as being stabbed and slashed across the throat, his right hand has been messily hacked off – SAN 1/1D3. The surviving staff do their best to calm the passengers down now that the assailant is dead/off the train, while the investigators are asked to give details to the police in Sofia.
The Major
The investigators are detained and questioned by a serious action movie-looking motherfucker named Major Vasil Christova. He asks for them to explain what they saw and compliments them on their bravery if they fought Nikolai. Unusually, he seems to take the discovery of a mysterious hatchetman and a mutilated corpse in stride. If they ask him about that, he replies evasively. They can Persuade or Fast Talk him into giving more details now, but for the purposes of the review I'll save them for later.
Christova escorts the investigators out of the police station. He thanks them for cooperating (they did cooperate, right?) and tells them to be careful. He gets in a car with two heavily armed men and leaves. He doesn't talk to any other police as he goes, and they snicker behind his back.
By the time the team and Jordanov are out of the building it's past 9:00 PM. Jordanov is shaken and exhausted from the experience. He has no energy to look for the monograph tonight, but invites the investigators to come to his home for breakfast first thing in the morning. If the investigators are still inclined to go sightseeing, they'll find that the locals come off as angry and tense. The Baleful Influence of the Head is aggravating the volatile atmosphere of Sofia.
Jordanov recommends a humble establishment called the Fireside Inn to the investigators. Alternatively, they might want to go to the luxurious Hotel de la Bulgarie. Both places offer warm rooms and soft beds.
Neither of them offer protection.
Next time: someone loses an eye!
REPOSSESSION – PART TWO
Original SA postREPOSSESSION – PART TWO
Give Them A Hand
The Brotherhood of the Skin have tracked the investigators. They have a huge sack filled with enchanted severed hands, dozens of them, that can obey commands and run like Thing. These Living Hands crawl into wherever the investigators are staying – coming through the hotel's heating vents or the inn's fireplace – and set to work trying to steal an eye from a random investigator. They come into the room in one great scuttling wave. They get a Stealth check, and if they fail the investigator(s) get a Listen check. Succeeding at the check means the investigator wakes up just as the first hand attacks. Failure means the hand succeeds automatically.
The Living Hands are quick, supernaturally strong and can jump six feet in the air. They attack by scratching, gouging and choking their victims. They only have 5 hitpoints apiece but there's uh, a lot of them. Thankfully, the Brothers aren't trying to kill the investigators just yet – they just need one itty bitty eye. The hands will keep fighting until they can gouge an eye out, at which point the victorious hand will roll the eyeball into its stump and make a break for it. With the other hands protecting it, it'll probably be able to escape back to its master.
The book suggests that the poor bastard who lost an eye should immediately lose 25 points in Spot Hidden and Track, should never be able to raise those skills above 75% from now on AND lose 10 points of DEX AND some negotiable number of APP. Even if that's 'realistic', getting crippled in the most rolled skill in the game seems extremely harsh to me, especially for something that was pretty much unavoidable. All this on top of 1D4 SAN. Naturally, whoever lost the eye is going to be an intense amount of pain and will probably need to dose up on laudanum.
If only their troubles ended there. The Brotherhood are using a spell called The Accursed Eye. The caster immediately gouged out his own eye and replaced it with the stolen one. Now, he can see whatever the victim sees. However, after 24 hours the eye starts to rot away. The whole time, the victim feels a terrible itching inside their empty eye socket along with nausea, dizziness and headaches. Worst of all, they can see what the caster sees. These visions are fleeting but come with a sickening intimacy, as if they were really there. The pain gets worse as time goes on, until eventually the eye totally rots away and the victim's head explodes.
Thankfully, it won't get to that point. More on that later. The book offers a rough timeline of the visions, starting barely an hour after the incident with the sorcerer who cast the spell running through dark alleys, getting into a car with his allies and driving out of the city for the first seven hours.
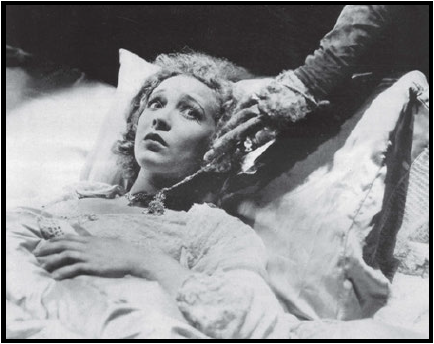
We're Having So Much Fun Today Guys
There's no way to catch up with the Brothers. May as well hit up Jordanov. Naturally, he's aghast to see how much has happened to the investigators in less than 12 hours. Banitsa and Turkish coffee probably doesn't make up for getting maimed but it's better than nothing. Like many academics, Jordanov isn't exactly what you'd call 'organised' and if the investigators don't help him it will take five hours for the good doctor to find the monograph in his cluttered library. It'll take the investigators Spot Hidden to find some boxes of monographs, then Library Use to find the right one. The chap with one eye can sit this one out.
Jordanov has three copies of the monograph in Bulgarian and Russian, titled The Dzhudzheta Idol – Evidence of a Civilisation Older Than Mankind. If the investigators lack both languages, Jordanov can read it out to an investigator, but this takes three hours. The sixty-three page paper eventually degenerates into wild conjecture and baseless assumptions, but the monograph works as a tome and gives a little +1 Cthulhu Mythos. More disturbing is the fate of the past two custodians of the idol. Both of them were academics at Sofia University, but the first butchered his family and wore their flayed skins before suiciding by cop, while the second suffered headaches so severe she drove an icepick through her own eye. Jordanov is extremely shaken by this discovery and will need to be persuaded to contact the university for the investigators. He might be willing to let them use his research materials later, but he is done with this investigation. As soon as the investigators leave he burns all three copies of Penev's monograph.
The current owner of the Idol is Professor-Academician Chedenko, an extremely wizened old man who works out of the office of one of the former owners – Family Flayer, not Icepick Gal. He found it among old mate's belongings and knows a bit about it; so far, no-one has been able to date it or determine any other details about its construction. Chedenko thinks it's just a very well-made hoax, perhaps with an experimental plastic. As he speaks, he pauses sometimes to rub his temples, and he admits to getting frequent headaches. He's still got the Idol and he's willing to show it to anyone with academic guanxi or Fast Talk.
When the investigators come to the Idol's storage room, they find it in chaos. There's three people here, two who have been viciously bludgeoned and the other missing a head – SAN 0/1D6 to see that body spraying blood like a fountain. The window to the room is open and three men stand by it. They are Brothers of the Skin, wearing hoods and masks of tanned human leather. Investigators are just in time to see one of them abseil out the window with the Head of the Simulacrum. The other two turn their guns on the new intruders.
Next time: HP Lovecraft's Rainbow-Six!
REPOSSESSION – PART THREE
Original SA postREPOSSESSION – PART THREE
Get Ready To Die
This is a fucked up encounter. The two remaining Brothers are the rearguard and the book states they fight to the death. One of them has a sawed-off shotgun, the other a pistol and a fucking grenade. On the first round of combat, they get behind cover and the dude with the grenade immediately throws it at the investigators – if they can't make their Dodge rolls that could be a TPK right there.
Look, the idea here is that the Brothers are supposed to get away with the Idol, fine. But this is probably the first combat encounter in the campaign where the bad guys are actually better-armed than the investigators. If the team is mostly nebbish nerds who have one pistol to share, it's going to be extremely hard to win this fight without casualties. Even if your investigators are more militant, they might not have brought their shotguns and rifles to college. Total Party Kill suggests downgrading the equipment of the rear-guard to match the investigators. If you wanted to keep the grenade (I don't blame you), make it easier for investigators to avoid its damage. I would also have the rearguard not be, uh, stupid. Why die fighting here instead of making a tactical retreat?
The investigators will probably rush to the window just in time to see the Brothers getting into a black getaway car – One Eye will recognise it from a previous vision. Another two brothers are running across the parking lot to a truck with a domed tarp covering. One of them is holding a bag about the size of a human head, but it actually contains the freshly decapitated human head of that one dude, not the Head itself. The canvas door of the truck's rear is yanked open, revealing a fucking mounted Maxim machine gun. The gun crew sprays fire at any pursuing investigators.
As the truck starts to accelerate away, a car races out of nowhere and screeches to a halt in front of it. It's being driven by Major Christova, who hops out and starts shooting at the truck. However, the truck plows into the car and knocks the Major aside. As they leave, the gunners spray down every car in sight, making sure that no-one will be able to drive after them.
Of the three people found in the storage room, only one survives, and he's going to need months of medical care before he recovers from the brain damage. Chedenko has been struck dead; the final cause of death was an aneurysm.
Unseen by everyone, Fenalik follows the escaping Brothers through the sewers and dark places under the city.
Welcome To The Task Force
Police and emergency services are on the scene in no time. It's believed that the attackers were anarchists and the investigators are prime suspects. It seems like they're definitely going to be arrested before Major Christova shows up. He manages to get them away from the police inspector and tells them that he's taking them in as witnesses – they must be silent, as 'they' have ears in the police.
A truck soon arrives to pick up the Major and the investigators. It drives several aimless-seeming circuits of Sofia to lose any potential tails before pulling up at an abandoned bakery. Inside are several cops who warmly greet the major, along with a doctor who rushes to treat his (minor) injuries. The investigators are now in Major Christova's safehouse.
Christova asks for the investigators to give him everything they know. It's in their best interests to tell the truth. If they're upfront with him, Christova proposes an alliance. He is the head of a taskforce that is investigating a white slaver group he calls the Butchers. They have abducted or murdered dozens of people over the years and have always left mutilations as their calling card. Christova has been chasing them for three years to no avail. No one else in the police believes they're real, but of course, many of them are on the take from the Butchers themselves. The bakery is this month's safehouse; the last one was bombed. He believes that the Butchers must have some kind of hideout in the mountains to have operated secretly for this long.
Of course, the Butchers are the local chapter of the Brotherhood of the Skin. They're well aware of Christova's efforts and they think they're laughable. They periodically hunt his men for sport. They're not slavers and all of their victims have been murdered and broken down for parts.
Where do the investigators go from here? They get hints from One Eye's visions. After about the seven-hour mark, the visions increase in clarity and intensity. They now cause the investigator to lose 0/1 SAN per vision as they come in hard every hour. They see a vast and dim cavern, like a cathedral of living stone. Then they see limestone mottled limestone shrouded in roiling clouds of mist, as well as an enormous overhang that has Latin numerals carve over ancient cave paintings. Then they see (unblinking, unwavering) a procession of black-robed figures marching through a stone formation like a fanged maw.
About four hours after the battle at the university, the investigator receives one final vision. They see screaming men being torn apart by some savage black thing, something that moves almost faster than the eye can see and tears flesh and bone to shreds. It rushes towards the viewer, then there is an explosion of pain. This costs 1/1D6+1 SAN to witness...but after this, the investigator's eye socket stops itching. The injury slowly starts to get better. Thanks Fenalik!
The visions, combined with some Library Use rolls to reference area maps and local geography, let the investigators pinpoint the Butchers' hideout as being in the Sredna Gora mountain range near the village of Chukurovo. Failing that, Sofia police eventually receives a call from a villager in Chukurovo who claims to have seen 'a horseless carriage with fresh musket holes through its front window'. This stilted tip-off comes care of Fenalik, who has hypnotised a villager and wait this is so fucking silly. Fenalik's tipping them off because the Simulacrum's been vampire-proofed, but if he can hypnotise a villager, why not get them to grab it? Also, how does the task force in their secret safehouse get the tip-off in the first place? It's not like the cops or the villagers or fucking Fenalik are going to know the number to give to the operator. This is dumb.
Anyway, Christova can tell it's an obvious trap but in typical action hero style he's going anyway. The task force is moving out and he wants the investigators with them. If they're lacking in firepower, he's got plenty to spare.
Next time: more spelunking!
REPOSSESSION – PART FOUR
Original SA postREPOSSESSION – PART FOUR
Thanks Fenalik!
It's assumed that the task force moves out just before dawn. The cave they're looking for is just two short miles north of Chukurovo village. It's a really professional paramilitary set-up – or at least, it was before Fenalik attacked. The camouflage tarp hiding the entrance has been torn aside. The cult's fleet of vehicles have all had their fuel tanks ruptured. Another Maxim machine gun has been bent into a pretzel and carelessly tossed twenty feet away from its sandbagged entrenchment. Warm gusts of moist air are expelled from the cave mouth, carrying the scent of decay.
Christova's men are in full 1920s paramilitary getup. They all have carbines and shotguns, while Christova himself is toting a BAR. They plan to take no prisoners.
They won't get to make that decision. In the cathedral-esque main chamber of the Butchers' cave, Fenalik's handiwork lies everywhere. There are dozens of bodies here, some in red robes, some in suits, all of them messy dead. Many of them are still clutching the useless weapons they wielded before they died. Natural World reveals only that there is no animal known to man that should have been able to tear these people apart like this, while First Aid reveals that there is much less blood on the scene than there should be. Medicine reveals that parts of the corpses are already in an advanced state of decay and Spot Hidden finds that these rotting limbs and organs have been stitched on by sorcerous means (0/1D3 SAN). If Nikolai survived the train, he can be found here, along with a corpse that has a blob of gelatinous decay in one eye – the caster of The Accursed Eye. This carnage costs the investigators 1/1D4+2 SAN.
Worst of all is the centrepiece of the chamber. Here stands a fifteen-foot-high pyramid of skulls, thousands of them in all states of decay, the freshest and newest at the top. That's 0/1D3 SAN. Anyone who goes to the trouble of finding a ladder and braving the climb up to the top of the pyramid will find a velvet pillow that still holds the imprint of some heavy object.
Spot Hidden lets the investigators find a blood trail leading out of the main chamber. They can follow it to another dead Brother, this one torn apart in a much more vicious manner than the others. Just behind the body is a small opening, about two feet in diameter, that descends too sharp for them to be able to see the bottom. Anyone brave enough to reach in will find some garlic cloves resting on top of the Head of the Simulacrum – as their fingers brush it, they scrape their cheek on the rough stone floor.
As they turn around to leave, the investigators and the task force notice that half of the bodies that were lying on the cave floor have suddenly disappeared.
OH SHIT!
Fenalik wanted to grab the Head before the investigators, but he was thwarted by the cultist who hid it under the garlic. As such, he's set a trap by turning a bunch of the bodies into weak proto-vampires. The Children of Fenalik have been lying in wait, and now that the investigators have the Head they make their attack.
Seeing that the bodies have disappeared calls for SAN 1/1D3. A particularly wary investigator might succeed on a Spot Hidden roll to see the Children spring up and jump away into the shadows. For the next two rounds the group is terrorised as the Children cavort around them, half-seen shadowy figures crawling along the floors and walls, red eyes staring at them from the shadows. The creatures hiss, growl, whimper and giggle all the while.
They strike when the group tries to leave the pyramid chamber. They are not intelligent and bear more resemblance to wild dogs than humans. They attack with pack tactics, at least one proto-vampire per investigator plus another 1D4+6 if the task force is with them. Multiple creatures try to bring down one target. They quickly regenerate damage from gunfire and can only be permanently taken down with wooden stakes or decapitation – options which the investigators probably won't have. They can be warded off with garlic, but that only keeps them at bay and only protects the person holding the stuff. Much like the cultist fight in Trieste, this is a running battle that's meant to terrify your players rather than present a hard combat encounter. Enough Dodge rolls will let the players escape from the cave into the morning sun.
As they leave the cave mouth, a few of the Children follow them out and are immediately turned to ash. The rest of the creatures howl with frustration and prowl back and forth at the mouth of the cave. It's expected that most of the task force is dead, but not Christova. The Major has had one of the worst days of his life and is sick to the back-teeth with this shit – he gets a bunch of dynamite out of his truck and brings down the cave.
Getting Head
The investigators get 1D4 SAN for acquiring the Head and another 1D4 if they now have all the pieces. Christova thanks them for their assistance and doesn't seem interested in talking about what happened in the cave. As far as he's concerned, the enemies that have plagued him for years are dead and his job is done.
In their hotel room or aboard the train, the investigators might put together the finished Simulacrum. It's a beautiful and disturbing thing to witness, with each investigator seeing their own resemblance in its featureless expression. The effects of the Baleful Influence are more intense than ever, but they seem to disappear when they touch the Simulacrum. There is a strange feeling that that pain and all pain forever would just disappear if they could somehow wear the statue.
The book recommends letting the players celebrate their victory and giving them the opportunity to discuss their plans. Do they want to get on the next train leaving for Constantinople? Lay out all the train carriage print-outs and let them have fun perusing the luxurious menu of the dining cart. Give them their free SAN point for riding the Express. Roll experience and do whatever else you do at the end of a session.
The investigators have completed the Simulacrum. They have outlived their usefulness. Tonight, Fenalik strikes.
Next time:
REPOSSESSION – PART FIVE
Original SA postREPOSSESSION – PART FIVE
OH SHIT!!!
Welcome to the most famous encounter in Horrient.

The fight with Fenalik can happen anywhere. There's ample instructions to make it work if the investigators choose to spend another night in Sofia or drive out of town. For the purposes of this review, we're on the train.
As I'm sure you've gathered by now, Fenalik is an extremely dangerous enemy. He has all of the powers you'd expect a classic no-frills ancient vampire to have. He has ungodly, superhuman strength. He can crawl along the outside of a speeding train like it's nothing. He can shapeshift into a tiger, a bat or a cloud of mist. He can hypnotise people into being his mindless servants. He can regenerate from almost any injury. This combo-platter of powers means he always gets to fight on his terms. A straight-up fight with Fenalik is dangerous, fighting him alone is suicidal.
However, Fenalik's got his own weaknesses and limitations. He doesn't want a drawn-out fight with the investigators either, and he wants to avoid drawing too much notice to his behaviour. If the rest of the train gets freaked out, they might call for an emergency stop, a situation that could spell the end for the vampire depending on how smart the team is. He goes for hit-and-run attacks and eschews direct confrontation for the most part.
Fenalik's opening gambit will probably be to hypnotise an investigator. While they're sitting in their compartment, they see a pair of mesmerising red eyes staring at them through the window while a raspy voice whispers: it's hot inside, why not open the window, let some air in, let me in, it's hot inside. If they fail an opposed POW roll they will slowly get up and open the window, at which point Fenalik's scabrous arm reaches in and tries to pull them out. They get to make an opposed roll combining STR+SIZ versus Fenalik's STR 160. Failure means they get pulled out into the night screaming – 0/1D3 SAN for onlookers – before Fenalik eviscerates them and tosses their head back in (SAN 1/1D6). Thanks for playing!
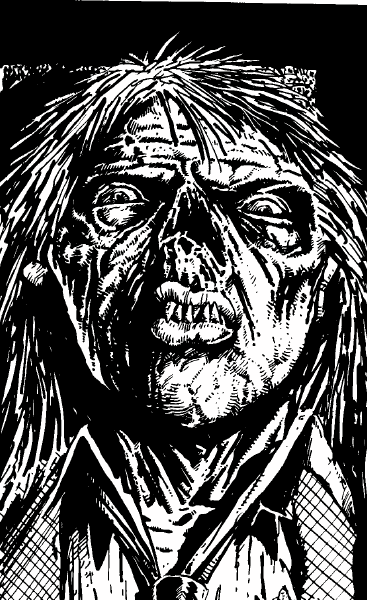
Quick, get the team together. You're being chased by a vampire, if you still haven't figured that out for some fucking reason. Make your Cthulhu Mythos or Occult rolls. What's a vampire's weakness? Garlic! Of course the kitchen of the Orient Express has garlic. Hustle some out of the confused chefs and hole up in a compartment. Fenalik cannot willingly approach garlic and the presence of the stuff forces him to make all his rolls at Hard difficulty.
For the record, religious symbols can work on vampires, but only if they're ones they believed in in life. Fenalik is old as balls; he doesn't pre-date Christianity but he does pre-date the widespread use of the crucifix as a symbol.
At this point he'll try to negotiate. He'll wheedle, he'll cajole, growling behind the door in an inhuman voice. Just hand over his 'skin' and no-one gets hurt. This might be a good time for the investigators to learn more about the Simulacrum, but Fenalik's got a limited patience for small-talk. Hand over the fucking statue or he'll kill one passenger per hour. The best rebuttal to this? Threaten to destroy the statue, one piece per passenger murdered. This is a clear lie, but it's one that Fenalik takes at face value. This strange steel machine they're riding in is proof that modern humanity is beyond his comprehension.
Now the investigators have some room to breathe, it's time to plan their counterattack.
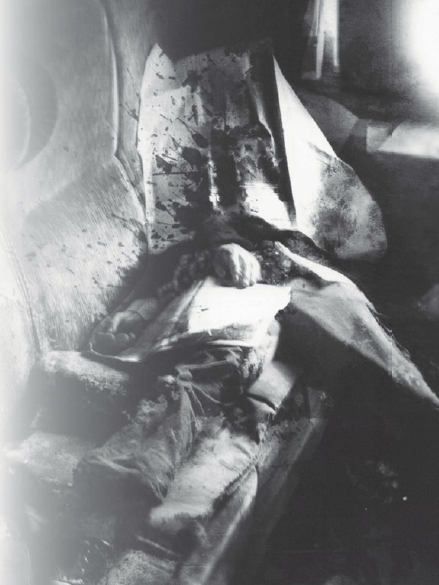
Vampire-Hunting For Dummies
To beat this encounter, investigators need to kill Fenalik or hold out until sunrise. Cowering in the compartment won't work forever – the vampire could hypnotise a guard or someone else into trying to force the door open. Hypnotised individuals act like they're sleepwalking and aren't really dangerous, but they carry a hefty SAN loss when killed since they're innocent people. What will the investigators do when Fenalik sends a hypnotised woman against them? What about a child?
Fenalik will die if he loses all his HP just like anyone else, but he constantly regenerates any damage caused by most sources; only 'permanent' damage can kill him this way. In its most basic form, this can be achieved by scoring critical hits on him with a large slashing weapon like an axe or a wooden stake. In addition, the investigators might have the following tools at their disposal:
The Lover's Heart: Kinda the whole point of this artefact is to make killing Fenalik easier. If the investigators can cut the lights to the carriage and herd him into a corner, that's 1D10 damage per round.
The Mims Sahis: It's a magic weapon, so it hurts Fenalik. In addition, Fenalik doesn't have great memories of the knife, and seeing it stuns him for one round. After that though, he goes totally berserk on whoever's wielding it. Best of luck!
The Accounts of Tilius Corvus: Did the investigators read it? Name-dropping things from the Accounts – like the name Tilius Corvus, the name of his wife, his commander – stuns Fenalik for one round and forces him to make a POW check or temporarily withdraw from battle to regain his composure. Guess you didn't put that as far behind you as you thought you did, eh Tilius?
The Simulacrum: If Fenalik wants the statue, he can have it in his pointy teeth.
 Swinging part of it at him like a magic club does a respectable 1D6 damage per hit.
Alternatively, the investigators could go looking for his coffin. During daylight hours, Fenalik normally sleeps in a bloody soil-lined coffin in the rear fourgon, padlocked on the inside and outside. Convincing the guards to let the team rummage around in there will take some doing – especially if Fenalik planned this and has already hypnotised them – but if the investigators get get rid of the coffin, Fenalik has nowhere to go. If they hold out all evening and get to the coffin in daylight hours, Fenalik's in there. He'll fight like a cornered animal, but if they turf him out into direct sun he'll take 1D3 damage per round.
However they do it, when Fenalik dies he doesn't just crumble into dust. He explodes, showering everything in the vicinity with white ash, as his centuries of unholy existence are ended once and for all. Surviving investigators get 1D10 SAN for destroying Fenalik, with 1 more point per dead comrade avenged.
Next time: Constantinople!
BY THE SKIN OF THEIR TEETH – PART ONE
Original SA postWhite Coke posted:
So Fenalik wants to wear the Simulacrum? What happens if he does?
That has a lot of benefits, but the big one for him is that he would be able to have like, quality of life again. When he had the Simulacrum he was able to walk around in sunlight and be part of society, doing his whole Countess Bathory-type shtick. Whereas when we find him in Horrient, he's a crazy fucked-up monster. We'll be getting into all the ins and outs of Simulacrum ownership in the next set of updates.
BY THE SKIN OF THEIR TEETH – PART ONE
Wherein the investigators reach their last stop, and find there betrayal and despair, and the makings of ever deadlier puzzles.
Background
A long time ago, a man named Sedefkar discovered the Simulacrum and wrote the Sedefkar Scrolls. When he was killed, these came into the possession of a powerful vampire who came to be known as Fenalik. When his mansion home was raided, the Simulacrum and the scrolls were taken as prizes by the raiders. Four of the five scrolls eventually made their way to Topkapi Museum in Constantinople, where they were read by a scholar named Selim Makryat.
Selim was a rationalist with a sadistic bent, and he became fascinated with the scrolls for both the power they symbolised and their disgusting content. When he discovered that the rituals described had actual power, he was consumed by ambitions of becoming the next Osman and formed the Brotherhood of the Skin. They seized the Shunned Mosque, built on the site of Sedefkar's own Red Tower, and from there ruled in the shadows well into the 20th century.
Now, Selim is old. The magic of the scrolls has extended his life and let him replace every part of his body except his heart, which the Skinless One lacks. Death is inevitable. He now hungers for the discovery of the lost Simulacrum that he might perform the Ritual of Enactment, an unholy rite that will fuse his body with the statue and make him a living avatar of the Skinless One; he will be immortal, and the Brotherhood will worship at the foot of their god for eternity. Having lost since lost his drive and vitality, he sent his devoted son Mehmet Makryat to find the Simulacrum for him.
But Mehmet is a heretic. He has studied abroad and attained a great understanding of the Mythos than Selim ever did. He is not interested in serving his father for the rest of his life. He has stolen one of the Sedefkar Scrolls in secret and made his own plans to acquire the Simulacrum. Now that the investigators have arrived in Constantinople, these plans are finally bearing fruit.
So how is the Constantinople scenario? In a word...bad. The plot twist that occurs here has always been one of the most controversial elements of the campaign, but I think part of this is due to the way it's delivered. The Brothers seem to be countless in number and have control over everything in Constantinople to the extent that the investigators are fucked pretty much as soon as they get off the train. The Brothers easily find out who they are, where they are and what they're planning, so they decide to toy with them. The investigators can look forward to getting jerked around the entire time they're in Constantinople until dumb luck lets them escape. And that's not even getting started on Mehmet!
What makes this worse is that while the rest of the campaign made an effort to incorporate socio-political events that were happening throughout Europe, the portrayal of Constantinople seems to rely on old Orientalist cliches more than anything. I'm not an expert on Turkish history by any stretch, but this is Constantinople in 1923, the very year that Mustafa Ataturk becomes the first President of the new-forged Republic of Turkey. I would assume that things would be looking up for most of Constantinople's (Turkish) populace. Even if you must insist that the depraved back-sliding Turk is in cahoots with the Mythos, how come the foreign military occupying the city aren't at least a little curious about a cult that treats them as equal opportunity targets?
What I'm trying to say (probably very badly) is that the Brotherhood of the Skin depicted in the Constantinople scenario just isn't believable. They are just totally immune to the great political forces acting upon the city, a depiction which has only been chosen to justify why the investigators are totally helpless before them. Contrast this with pretty much the entirety of Delta Green, or even earlier parts of Horrient that actually incorporate the politics of the era into the scenario. It's fucking disappointing.
Anyway. Anyway.
Welcome to the shit-show
The investigators arrive in Constantinople and almost immediately lose their luggage in the chaos at Sirkeci Station. This probably means losing parts of the Simulacrum unless the group made very careful precautions and don't let the bags holding the pieces out of their sight. The various officials at the station ensure the return of the luggage within 1D3 days, but the Wagons-Lits staff get it back to the investigators in no more than an hour. Either way, a Luck roll is required; failure means the Brotherhood have discovered the investigators.
If the investigators happened to miss or lose any pieces on the way to Constantinople, they receive a telegram from Mehmet-as-Beddows advising them to check the local Societie Generale. The missing pieces are there. Thanks Mehmet!
The book advises that keeping the Simulacrum secure should be a constant concern for the investigators. Ironically, the best move is probably to just leave them in suitcases in the hotel room. Obvious protective measures attract interest and storing the pieces in a bank vault or something like that calls for another Luck roll to avoid discovery. If the Brotherhood's spies find out, the book suggests that a gang of maybe a dozen Brothers might be sent by Selim to steal the Simulacrum, but it doesn't really provide any support for how that might go down. If the investigators play it stupid, they get kidnapped by the Brotherhood and things move quite a bit faster.
An interesting piece of news that the investigators hear about when they arrive is the kidnapping of a child, taken from the front of his family's tea house in broad daylight, the fifteenth such kidnapping in recent weeks. The police suspect Greek slavers, but I'm sure you can guess who's really behind it. The idea that the Brotherhood can just like, steal that many children so brazenly without any kind of huge public outcry really stretches my suspension of disbelief. Remember how crazy people got back in Venice just because of two murders and a flood?
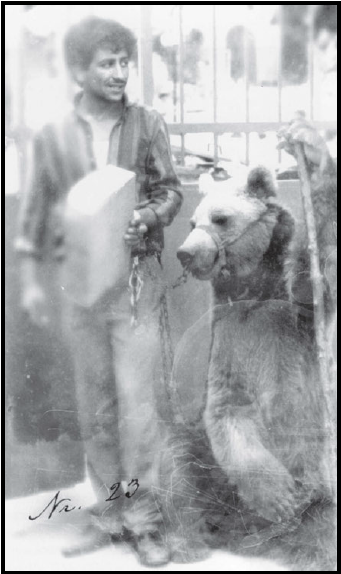
Also, should the investigators explore Constantinople at night, they find themselves being followed by a Romani and a bear. Trainers with dancing bears aren't an unusual type of street performer to find here, but these two are always seen lurking in some dark alley, watching the investigators. The first time they are seen, a Listen roll lets them hear the Romani mutter, 'Take care, my friends' as they pass. After that, the sightings of the pair grow stranger as their silhouettes seem to distort or combine into one entity. Whatever other grievances I have with this scenario, some of the imagery it uses is beyond reproach.
Next time: (useless) investigations!
BY THE SKIN OF THEIR TEETH – PART TWO
Original SA postBY THE SKIN OF THEIR TEETH – PART TWO
Trust No-One
The first half of the scenario is actually pretty open-ended. The investigators need to find the Shunned Mosque and the Sedefkar Scrolls, but there's a lot of ways they can do that.
The staff at the hotel will recommend the investigators acquire the services of a scribe – as well as writing and translating documents, the scribes are familiar with Turkish bureaucracy and can help investigators navigate the city. They can find one in the Grand Bazaar in Stamboul. When the team gets there, they are shouldered aside by five burly Turks who attack a scribe, beating him up and breaking his laptop writing desk. If the investigators talk to him, he is a polite little man who introduces himself as Feyar in impeccable English. He apologises to them and explains that he was attacked because some business they did with the government went badly – they can't hurt the government, so it's better to shoot the messenger. He is a brilliant scribe and will happily work for the investigators.
He is also an agent for the Brotherhood of the Skin, as were the five men who attacked him. The whole thing was staged so he would be noticed by the investigators. If hired, he gives a full account of anything the investigators do to Selim every night. If not, he shadows them perfectly and does the same thing – no roll is allowed to discover him. So that's nice.
Also, should the investigators decide to ask locals about the Shunned Mosque or anything related to the quest, they get nowhere. The keeper rolls 1D10 every time they ask someone. On a 1, they run away, terrified of breaking silence. On a 2-9 they know nothing. On a 10, they or someone nearby is a Brother who ensures the investigators are marked.
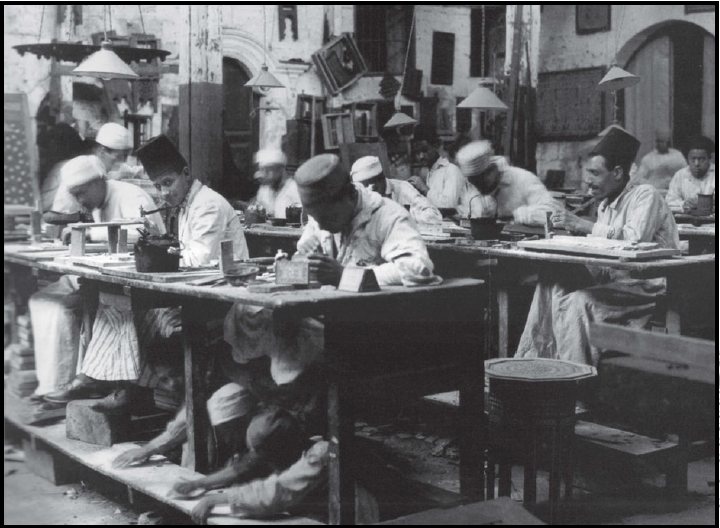
Take A Look, It's In A Book
Our good friend Library Use. There are apparently 400 mosques in Constantinople, with new ones built every year as old ones fall to disuse. However, none of them are referred to as the Shunned Mosque. Canny investigators will try looking up mosques of ill reputation or ones that have a record of crimes taking place in the surrounding area. This pulls up references the Red Mosque, a long-abandoned mosque that has since become a hangout for local criminals. The book suggests finding this probably takes about two days.
Looking up the Sedefkar Scrolls requires a Luck roll as well, which reveals that they're being held in Topkapi Museum. Getting to the scrolls isn't easy – the current museum director is a staunch Turkish traditionalist who distrusts foreigners. He'll require a Persuade roll before he'll even let the investigators see the scrolls and an additional Fast Talk before he'll let anyone study them. He needs to be convinced that doing so is somehow beneficial to Turkish identity and international reputation. However, the tubes that housed the scrolls are now empty, save for a note:
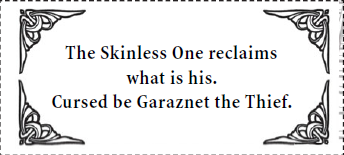
Garaznet turns out to have been a Kurdish scholar who died some 400 years ago and left no descendants. He is buried in Uskudar Cemetery. The Brotherhood stole the scrolls decades ago but put the note here only recently; it's a deliberate attempt to draw the investigators into a trap. More on that later.
Palms Sweaty, Mom's Spaghetti
While researching in the Grand Bazaar, investigators may hear about a man named Beylab the Perspirer. Beylab is a disreputable information broker who can find out anything for anyone. He happily works with foreigners, since they typically pay more than locals. With 24 hours notice, anyone can make an appointment to see him at his base of operations in one of Turkey's traditional bath-houses. Beylab has also been compromised by the Brotherhood: he once feared nothing, now he fears only them. If the investigators make a meeting with him, they will be walking into another set-up.
The baths are segregated by gender, so only male investigators will be able to see Beylab. Investigatrixes will enjoy the baths in the presence of two Brothers who've been disguised as women to take them out if they try to help their fellows. Investigators meet the Perspirer, an obese man who lives up to his name, in a marble room much like a sauna. One has to be naked to enter the male baths, so unless they get really creative the investigators will not be armed.
Beylab very convincingly recites the script given to him by the Brotherhood. He tells them that there is an insane cult in the city that worships a statue, that has eyes everywhere and gathers in the Red Mosque. They are responsible for the kidnappings of children, none of whom have been put up for sale (a fact he mentions casually). The statue is a treasure capable of great evil, but it is two-faced: the Kurd Garaznet knew of the 'good path' of the statue. Garaznet was an enemy of the cult and knew the ritual that would destroy the statue, which was buried with him upon death. Destroying the statue will destroy the cult.
What Beylab doesn't realise is how far the Brotherhood is willing to go to maintain this charade. As Beylab bends over to scoop water out of a nearby basin, one of the bath attendants comes up behind him and cuts his throat (0/1D4 SAN). Flames quickly emerge from the stone he was sitting on and incinerate him as he dies. The flesh boils and slides off of the skeleton, then – still boiling – becomes alive, spreading out in a red carpet and trying to ensnare the investigators (1/1D8+1 SAN). This Flesh Thing can attack up to three targets at once, flowing up its victims legs and boiling them to death over three rounds. It can't be hurt by conventional means, but cool water like that in the nearby basins is its weakness. Dumping enough water on it reduces it to lumps of inanimate flesh.
Alternatively, the investigators could make a run for it – 1D6 SAN to hear the screams of the Flesh Thing's victims as they run away. Spot Hidden lets the investigators spot the telltale scars on the bodies of Brotherhood cultists among the fleeing bathers.
Next time: grave robbing!
BY THE SKIN OF THEIR TEETH – PART THREE
Original SA postI think Lovecraft was a funny silly man and he's burning in Hell and I hope it bothers him that I rub my dirty miscegenated hands all over his work.
BY THE SKIN OF THEIR TEETH – PART THREE
Stiff Upper Lip
If the investigators look for help from the embassies, or if they've been attacked by the Brotherhood in the baths or elsewhere, they can find an ally in the Deputy High Commissioner of the British Embassy. This man, Sir Douglas Rutherford, will even arrange for a car to pick up the team if he wants to speak to them. Rutherford is a racist stuffed-shirt, but he has resources that the investigators might find valuable.
When they meet him, Rutherford is distressed. His son has been stolen from the embassy, the latest in the string of kidnappings, and he begs the investigators to help find him. He can offer them money and whatever aid he can render them. The problem with this set-up is that it implies a new level or urgency to the kidnappings, as if dozens of Turkish kids don't matter but this one white kid absolutely must be saved, but whatever.
James Rutherford was playing in the embassy gardens when he was taken. Spot Hidden lets the investigators notice the strange scarring around the eyes and ears of one of the groundskeepers – a Brother of the Skin! He tries to escape if discovered, and if captured starts ranting about how the Brothers have all the children and soon the Skin Beast will kill them all. At this point, the tattoo on his arm activates its deadly spell and causes his throat to fill up with skin, choking him to death (1/1D6 SAN). After this, Rutherford spares nothing to help the team.
But this amounts to nothing; the book has him give information but nothing else. He claims to have secret resources given to him by the British Government, but somehow this is a 'private affair' that doesn't warrant their use. As if having the embassy compromised by spies who abducted the child of a ranking diplomat somehow isn't a cause for concern? Considering the clear and present danger involved, the investigators should be able to get a detachment of armed guards at the very least.
But of course, that would make the next part of the adventure too easy.
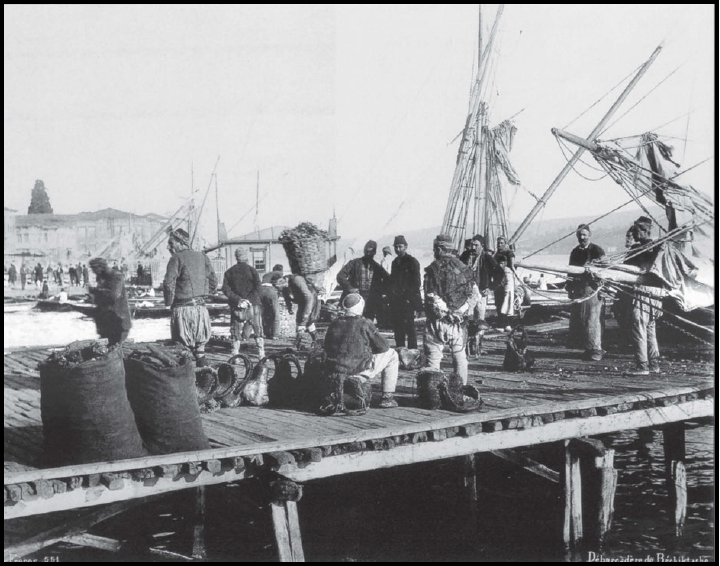
It's My Job, To Steal And Rob
If they don't get captured by the Brotherhood, then investigators will eventually have to make the trip to Uskudar Cemetery, across the other side of the Bosporus Strait. This requires a boat trip, but while there is a regular ferry that runs until late night, a pack of rich and heavily-armed tourists with picks and shovels is not going to pass without comment. They'll probably have to catch the last ferry over and stay in the cemetery until morning.
Hiring a boat might be a better option if investigators value their privacy. The fisherman Hakim the Unruly will take them over for 10 pounds, no questions asked, but will double his prices when he sees the digging equipment – you see, the wise effendis should have informed him of the risky nature of their operation. He is a ruthless businessman and him and his crew are happy to kill the investigators and dump them overboard if they think they're unarmed. If things start looking dangerous, he'll abandon the investigators unless they've warned him ahead of time and promised a bonus.
Do the investigators have a translator? Hakim will do it, if all else fails. He'll be sure to rub the team's nose in the fact that this dodgy fisherman is now their foremost scholar.
On the way over, the investigators might notice another smaller boat, headed in the same direction but keeping a stiff distance away. This is Mehmet.
The cemetery is huge, a jumble of Islamic and Christian graves going back centuries, packed in tightly together. Garaznet's grave takes 1D3 hours to locate. Natural World or Science (Geology) reveals that the soil here is more loosely packed-together than it should be. As the investigators start digging, a shambling figure in rags approaches them, bearing a lantern. Hakim or Feyar identify him as Companion-to-the-Dead, a crazy beggar who lives in the cemetery and talks to the graves. He's mostly harmless, and unless shooed away will sit on a nearby gravestone and watch the proceedings. He whistles and sings, saying 'they' are restless tonight and that 'they' move in great numbers.
As the investigators get ready to lift the stone slab that shelters Garaznet, Companion will get excited and shout encouragements. But when they do start to prise up the lid, he suddenly starts screaming at them to not open it, pushing the investigators away. He's not a serious threat and can be pretty easily shoved off.
When the lid is opened, a disgusting stench fills the air. Garaznet's sarcophagous is full of boiling flesh – another Flesh Thing. It tries to grab and hold onto a single investigator while the Brotherhood launches their attack. Forty Brothers emerge from the shadows, stepping out from behind graves all around the team, as if the dead themselves have begun to rise!
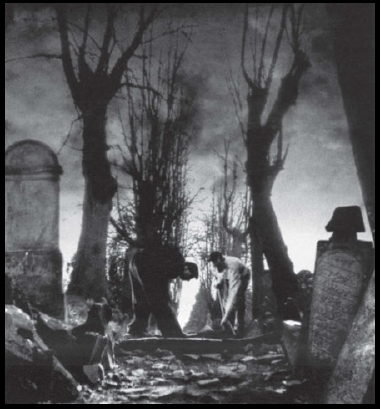
GRAAAAAAAAAAAVES
Here's the problem with this encounter.
First of all, this is an absurd amount of effort on the part of the Brotherhood to capture the investigators. If they can mobilise forty cultists just like that, it probably would have been easier to just drag the investigators out of their hotel beds. Clearly, no-one in Constantinople can stop them.
Second of all, the expectation here is that this isn't a combat encounter. That there are forty cultists is irrelevant, as the intent is that there's just too many for the investigators to take down – the book may as well have said '60' or '200'. Nor is there a map of the cemetery provided that would help the keeper run this as a huge fight.
The thing is, the investigators will probably have guns (pistols, shotguns, rifles, maybe even an SMG if they're really crazy) and the skill to use them, whereas the Brothers literally only have knives. The book assumes four investigators, so that still leaves three of them and possibly Hakim and embassy bodyguards, if you let them have a couple. They might even be paranoid enough that they brought water to neutralise a Flesh Thing. So why shouldn't the investigators stand their ground and fight here? If they're tactical and cover the angles of approach, they should have a pretty good chance of surviving. Moreover, are the Brotherhood truly so devoted that they'd be willing to throw themselves into gunfire to make an opening for their allies? As religions go, worship of the Skinless One seems to be extremely materialistic and self-centred.
If you put in the effort and planned around a really gung-ho team of investigators, you could make a really sick combat here. Maybe make the Brothers fight smarter and it becomes a terrifying stand-off against a horde of cultists, ducking and weaving around the graves as cover, gunfire lighting up the night.
Whatever.
Next time: skin!
BY THE SKIN OF THEIR TEETH – PART FOUR
Original SA postBY THE SKIN OF THEIR TEETH – PART FOUR
Dealing With Daddy
Escape is extremely unlikely. The investigators are herded through the graveyard and brought into a circle of cultists, where they are disarmed and tied to ancient graves. The cultists make way for a huge oilskin-wrapped bundle to be brought into the circle as well – whatever's in there squirms and whines. Behind that is the elderly Selim Makryat, who is carried on a chair supported by four cultists.
Selim doesn't bother with introductions and skips straight to questioning the investigators through an interpreter. If he doesn't know already, he wants the location of the Simulacrum and the Scroll of the Head. If the investigators refuse to answer, he hits them with Curse of the Putrid Husk, a particularly nasty spell that makes them feel like they are trapped in their own body while their organs rot and fall out. It's an illusion but an extremely convincing one. He does this to each investigator in turn until they go insane and tell him everything he wants to know.
After this, he mocks the investigators and casts Create Skin Beast. I feel like the description really speaks for itself.
 posted:
Unwrapped, the oilskin bundles reveal twelve writhing children, alive but in horrible torment. They have been literally sewn together with stout twine—almost randomly by limb, by torso, by nose or ears. Wherever sufficient skin might be pulled away from a body, there it has been stitched to another child. A few pitiable victims snivel and wail, but most kneel dazedly, beyond all belief, reason, or tears. Three large tubs are brought forth. Gesticulating cultists gather around each. The air crackles with dark magical energy, and soon the contents of the vats are heard to sputter and hiss. A smell rises up which reminds the investigators of the Beylab-Beast. In the tubs is human flesh, heated to melting with Melt Flesh spells. The contents are then poured over the screaming children. As the greasy, scalding flesh envelopes them, Selim chants the words of the spell, accompanied by those Brothers whose dead men’s tongues can chant the unutterable secret syllables that accompany the casting. The hot flesh melds the obscene mass into one. As it settles over the children, all that can be seen are their maddened staring eyes, and their mouths through which shoot tentacles of skin. The whole entity begins to undulate, and arms and legs of the children poke through the hardening crust of flesh. It is upon these limbs that the now-formed Beast begins to slowly move, always toward the horrified investigators. Sanity loss to witness the entire despicable creation of the Skin Beast is 1D3/2D6+4 Sanity points.
James Rutherford isn't in there, before you ask.
I have a problem with this scene because while it's undoubtedly horrific, it goes a bit too much further than what I'm comfortable putting into my game. When you have something terrible happen to kids in your game, you really do risk alienating your players unless they're total sociopaths – I can't speak for your group, but I lost interest in having children murdered and tortured in my games a long time ago. In addition, having your bad guy hurt kids is pretty lazy writing of the kind that plagued the 90s; I particularly like Darren Maclennan's quote on the subject, saying that oWoD bad guys tortured so many children there must have been vending machines where you could get a six-pack.
Even if you're on-board with the horror here, this is like bad supervillain shit, leaving the heroes to get killed by some awful death trap while you walk away. Selim and every other cultist immediately leaves after creating the Skin Beast, so uh, what's the game plan here? Are they just gonna let it roam around eating people in the morning? Not to mention that this is a significant amount of resources to put into just killing some dudes. That's 120 MAG and a dozen children, plus whoever else you had to kill to get all that melted flesh. And Selim wants to make two of these things? Just for shits and giggles? If they're able to do this kind of shit in Constantinople, why haven't they just completely taken over the place yet?
God, whatever.
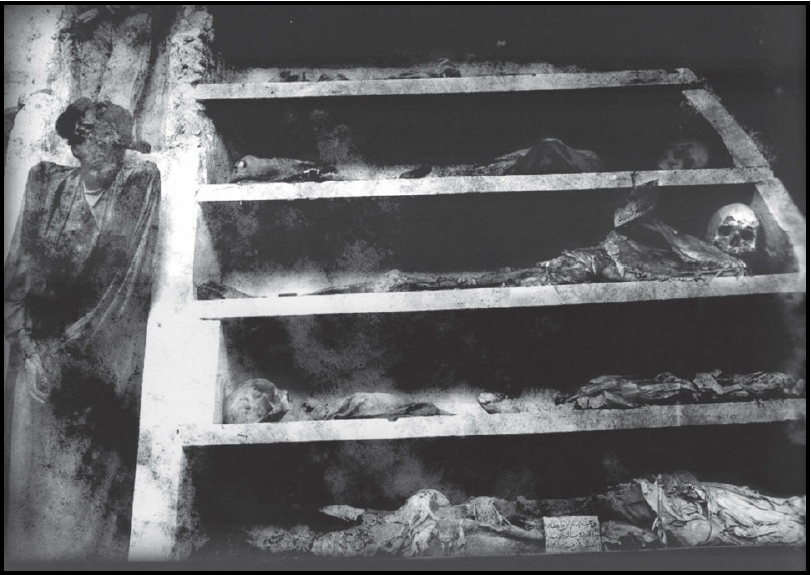
Bear With Me
The Skin Beast attacks by absorbing its victims into its mass. Things are looking pretty bad for the team, and it's unlikely they'll be strong enough to break their bonds on their own. Instead, it's probably Companion-to-the-Dead who comes to their rescue, cutting the investigators loose. The Skin Beast doesn't get a chance to properly eat anyone either – just as it's about to, a fucking bear comes roaring out of the night to fight the thing. At this point, some of the departing cultists realise they should probably check on their pet monster and find out things have gone wrong. Depending on how many come to look, this might be a fatal mistake, since they explicitly leave the investigators' weapons behind.
As the investigators escape, someone beckons to the investigators. It's the Romani bear-tamer they might have seen earlier. The book says that if Feyar's still around, he'll reveal that Feyar's a spy but uh, why would he still be around? Surely he would have fucked off with the other cultists by now.
The Romani is named Aktar and he helps the investigators get back to Stamboul where he offers them refreshments and helps them patch up any injuries. As they sip tea and cope with the horrors they've witnessed, Aktar tells them his story. He is not Romani but actually a Turkish spy working for Ataturk. He was keeping track of the Brotherhood's movements. They couldn't get him, but they did get his only child. Pursuing them, he tracked them to the Shunned Mosque, where he unfortunately found what was left of his daughter. He wants revenge but knows he can't go to the police; he proposes that the investigators join forces with him, as he knows the secret way into the Shunned Mosque.
One small problem: this is all a lie. Aktar is actually Mehmet in disguise. He had always planned for the investigators to get captured and lose the Simulacrum, you see. It's not clear what he would have done if Selim had just sealed the investigators' faces shut instead of fucking around with the Skin Beast, but maybe I'm just not as smart as Mehmet.
See what I mean? At this point, the investigators haven't been able to do a single fucking productive thing in the scenario. We're like halfway through and they're still gonna get jerked around some more.
Next time: skin, interrupted!
BY THE SKIN OF THEIR TEETH – PART FIVE
Original SA postTick tock Daeren.
BY THE SKIN OF THEIR TEETH – PART FIVE
Body Shop
Aktar/Mehmet recommends that the team goes to the mosque as soon as possible, and they probably won't have a reason to disagree. Of course, the Shunned Mosque isn't that hard to find and it's possible that they'll head there before going to Uskudar. If they do, they'll find like six Brothers of the Skin who act like any other street gang. There's more inside the mosque, who will tell them to fuck off if they've come this far. The entrance to the main dome is blocked by a huge curtain – if investigators push their way into there, they're not coming back out.
However, there is a secret tunnel into the mosque hidden in a Byzantine-era cistern. The trip there is a spooky little journey through the sewers by boat, followed by a secret door that leads to a narrow spiral staircase (if anyone asks how far they go, Aktar simply says, 'To Hell, my friends'). The smell of rot wafts up as the investigators approach the bottom.
In one of his reviews, Darren Maclennan said that the Shunned Mosque gave him nightmares, and I believe it. Underneath the mosque is the terrible abattoirs where the Brotherhood stores limbs and organs for future use. There's an antechamber full of large urns containing whole de-boned bodies, magically preserved for future use. There's a preparation room full of surgical equipment, some of it kept it perfect condition (for cultists) and some of it rusty and bloody (for victims). There's not one but two rooms full of parts hanging on hooks, magically preserved from decay. There's only one guard back here – the rest of the cult is in the mosque proper.
Crashing The Party
Every Brother in Constantinople has turned out to see the ascension of their master – some three hundred cultists are gathered under the dome of the Shunned Mosque. Preparations for the Ritual of Enactment are already underway and everyone's having a great time. As long as they act casual and don't look too raggedy, the investigators should be able to mingle with the cultists. Six hundred stolen eyes are focused on a stone column standing beneath the great dome, carved with niches like a five-sided star with a central spoke.
Selim plans to end his ritual with another Skin Beast. A dozen children are brought under the dome, at this point still mostly unharmed. James Rutherford is among them. During the proceedings, a group of Brothers hovers near them, needle and twine at the ready. If they haven't made a plan yet, Aktar suggests that the investigators wait until the ritual is underway before they make a move for the children.
Red-robed Brothers enter the circle. Each one places a part of the Simulacrum in one of the column's niches so it looks like a Mythos version of Operation. Following them is Selim Makryat on his stupid chair. The gathered Brotherhood stands in silence as he pulls a scroll from his robe and begins to read aloud from it – anyone near Aktar can hear his sharp intake of breath. He steps down from his chair and moves into place to be absorbed by the Simulacrum, but as he begins to read the final words Mehmet casts Control Skin and seals his mouth shut. Selim's weak from casting his first Skin Beast like an idiot, so he struggles to undo the spell while Mehmet makes his move.
In the confused uproar that follows, the book says that this is the best time for the investigators to help the children but uh, fucking how exactly?
Mehmet snatches the scroll from his father and finishes reciting the words of the ritual. The Simulacrum pieces fly to him and close around his body like armour. Then they seem to dissolve as they sink into his flesh. His skin stretches and distends to accommodate them, his eyes bulging from his head. His scream of agony becomes a peal of maniacal laughter as he calls on the Brotherhood to tear his father apart. As they skin Selim alive with their fingernails, Mehmet's body returns to normal and the Simulacrum pieces return to their niches.
quote:
“No longer will the Brothers of the Skin cower beneath the dome of this place, fearing to make their presence felt in the world. With the power of the simulacrum we need serve no one, not even The Skinless One. The simulacrum gives us the power of even He, and The Skinless One shall do our bidding, and make great our destiny!”
Mehmet commands his congregation to capture the investigators alive. There are guards at both entrances to the mosque, but Mehmet's not a fucking moron and isn't interested in creating another Skin Beast, so the children can escape. Isn't it nice that his apathy lets the team feel like they've done something productive? The investigators on the other hand have no chance of escaping and are captured in short order.
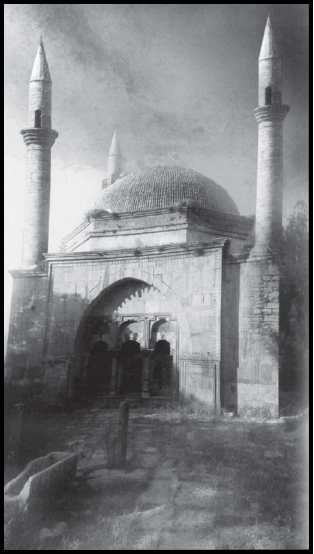
Long Time No See
The investigators are bound and marched into one of the minarets of the Shunned Mosque, which have been converted into combination prisons/shrines. Tanned skins of past victims hang from the walls like tapestries. The cult's many living victims are confined in cells or left lying on the floor, all of them suffering from the cult's cruel mutilation practices and many of them totally insane as a result. One tongueless victim strains at the bars to his cell and tries to prise the tongue out of an investigator's mouth before he can be shoved away by the Brothers.
The investigators are taken to the cell at the very top of the minaret, which is occupied by a man who's lost both arms, both legs and both eyes. His stumps have fresh skin patches and he wears nothing but a blood-stained blanket and a suit jacket around his shoulders for warmth; he fearfully begs to know who's there when the investigators enter before passing out again. The two guards chain the team to the walls and refuse to answer any questions, but something about being up here clearly terrifies them – they mutter to each other in Turkish about 'the Flapping Man' and can be heard running down the stairs.
Investigators who make a Hard Intelligence roll recognise the man as what's left of their old friend Professor Julius Smith. Fully realising this costs 1/1D6 SAN.
Next time: even more skin!
BY THE SKIN OF THEIR TEETH – PART SIX
Original SA postBY THE SKIN OF THEIR TEETH – PART SIX
This FUCKING Guy
The investigators languish in their cell for hours before Mehmet decides to pay them a visit, now cleaned up and smoking a cigar. He's on his full Bond Villain routine here and he has come to gloat. He talks about the whole adventure from his perspective, from the origins of his plan to the reason he picked up the investigators, to how he followed them across Europe and possibly cleaned up their messes along the way. He reveals that there was never any way to destroy the Simulacrum in the Sedefkar Scrolls. He's probably also keen to find out what the deal was with Fenalik, if the investigators are inclined to tell him.
He's absolutely happy to answer any and all questions the investigators might have, up to and including a full description of his motivation. Quite simply, he sees the Skinless One as a tool to be used instead of a god to be worshipped, and wants to succeed where his father failed in presiding over a new world order that he commands with the powers of skin. He will be leaving for England aboard the Orient Express at once – while that's happening, the investigators can look forward to a slow and agonising death. But not from the Brothers of the Skin, oh no.
You see, now that the Simulacrum is complete, the Baleful Influence kicks off in a big way to those attuned to the statue – such as, for example, the investigators who've been carrying the damn thing around for weeks. The Scroll of the Left Hand contains a spell called the Ritual of Cleansing; if they don't perform this every 100 hours, their bodies will warp and mutate until they eventually die. This is what did Fenalik in the first time, way back at Charenton Asylum in Paris. Until then, they can while away the hours talking with Professor Smith, at least until the mutations drive them insane and they eat him alive.
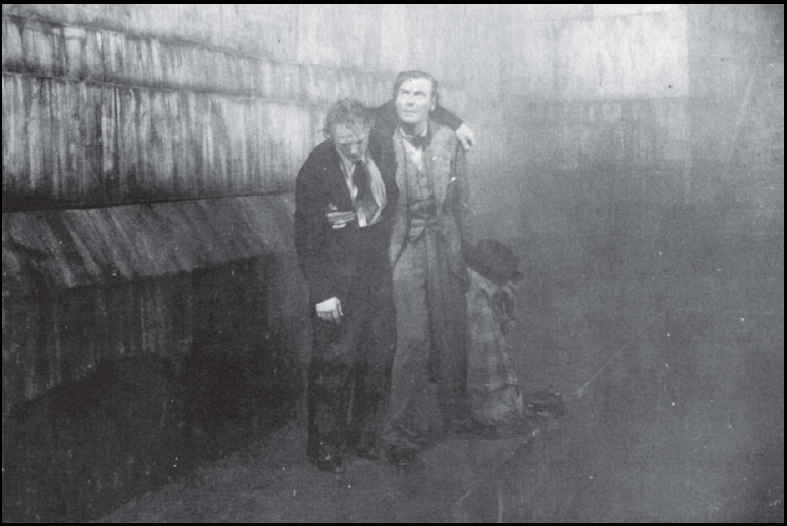
The Marvellous Misadventures of Flapping Man
By now, the Professor has regained consciousness and has been listening to Makryat. He can tell the investigators his side of the story. It's a short one: Mehmet summoned a dimensional shambler which abducted him and took him here, where the Brotherhood treated him as an anonymous donation and have been having fun slowly taking parts off of him. His SAN has taken a beating, but he's not totally gone yet – he still has his Bon Mot 88, for example.
 In fact, he has a plan to help the investigators escape.
He knows that the Brothers are afraid of a spectre they call the Flapping Man, a vengeful spirit embodying all those who have lost their lives to the cult. They believe he appears at the top of the minaret stairs; if the investigators can fight off the guards when they make their rounds, they could steal a bunch of the skins downstairs and become the Flapping Man. Smith has spent a lifetime studying charlatans and superstitions, and he's sure this plan will work. He expects the team to leave him behind to his fate, but all things considered his situation isn't as bad as it could be. He's still sane, at least. If the investigators decide to take him back with them I'd allow it, though you will need to rewrite the next scenario a bit to accommodate that.
If the investigators want to do this or if they come up with another plan, it'll probably go off without a hitch. Only two guards come to check on the prisoners, one of them holding a knife to the neck of whoever's getting their shackles changed while the other makes sure the released prisoners stay in the corner (it's not clear what they're doing exactly that necessitates this checkup). They could be tricked into believing the Flapping Man is behind them, or they could be beaten up by the strongest investigator, or Professor Smith could even bite onto someone's ankle like an angry dog. From there it's easy to get to the lower floors of the minaret and put on a bunch of skins (after the SAN 0/1D3 and maybe a Disguise roll).
The Brothers buy it, and it will probably be deeply cathartic to chase the panicking cultists around the mosque. But soon their screams become far more terrified than they were before – if the investigator looks behind themselves, they will see an apparition that looks like a flayed man with bulging eyes, wearing a cape of skins. The real Flapping Man (0/1D6 SAN). As long as they don't attack him or they can make it clear they're enemies of the Brotherhood, the investigators have nothing to fear from him. In fact, he gives them a pitying look and a friendly warning before disappearing:
quote:
'This is how many will appear before the task is done. Look well not at the skins, which are the Brothers' to control, but at the hearts beneath, which not even gods can conquer.'
Thanks Flapping Man! That was actually pretty cool. I'm feeling pretty pumped to go kill Mehmet now, actually.
The book says that the investigators don't deserve getting any SAN for completing the scenario since they lost, but come the fuck on. In addition, destroying each Flesh Thing gets 1D6 SAN while putting down the Skin Beast is 1D8 SAN on the outside chance they pull that off. Rescuing the children is worth 1D6 SAN while rescuing or mercy-killing Smith is 1D3 SAN. In addition, if they found his kid they now have the British Deputy High Commissioner as their ally. He's willing to help fund the trip back to England if they've run out of money.
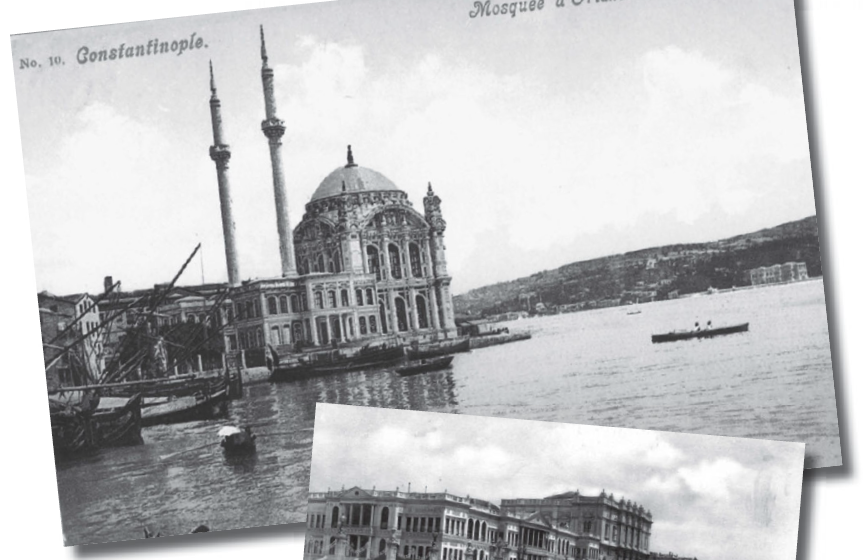
Alternatively…
Way back in the first scenario, I mentioned an alternative plot for the campaign where Mehmet doesn't replace Smith. If you don't wanna use the plot twist in the Constantinople, then the book provides an alternate climax that sees the main campaign resolved there. I think the climactic scenario Blue Train, Black Night definitely makes up for the shoddiness of By the Skin of Their Teeth but you know, it's up to you.
For the alternative ending, there really is a Ritual of Ending in the Sedefkar Scrolls that will destroy the assembled Simulacrum. Professor Smith really is recovering in hidden location in the British countryside. Selim is still Selim, but Mehmet in this version of events is not a heretic – this is probably the only thing I don't really like about this ending, since that gets rid of the main hook for Mehmet and means that his whole triple suicide thing was pointless. When the investigators get to Constantinople, everything plays out much the same up to the escape from the Skin Beast.
The climax revolves around the investigators finding a way to interrupt Selim's apotheosis – possibly by siccing the British army on them – while they quickly cast the Ritual of Ending. This takes seven rounds and requires them to make constant tests as the Simulacrum resists and they are assailed by cultists. As the casting progresses, investigators gradually suffer stronger effects related to the Baleful Influence, including actually losing control over whichever part they're connected to. If they can survive a final attack from the Skinless One himself, then the Simulacrum explodes – possibly triggering similar effects in the investigators if they roll badly. Across Constantinople and elsewhere, Brothers die where they stand as they lose the magic of skin, their stolen organs rotting in their bodies.
So it's pretty rad! Definitely a solid way to end the campaign if you prefer it that way or you wanna shave off a couple of scenarios. Or if, like me, you hate By the Skin of Their Teeth.
Next time: the long way home!
BLUE TRAIN, BLACK NIGHT – PART ONE
Original SA postBLUE TRAIN, BLACK NIGHT – PART ONE
Wherein the investigators take the west-bound Orient Express in pursuit of Mehmet Makryat, and thereby find themselves aboard the Express to Hell, sans stopovers.
Background
Now that Mehmet Makryat wears the Simulacrum, he's heading all the way back to England on the Orient Express to put his master plan in motion. The Simulacrum gives him a huge bump to POW, 10 points of permanent armour versus sources of kinetic damage, the ability to cast Call the Skinless One/Avatar of the Skinless One without any prerequisite sacrifices and – most importantly – the ability to don someone else's skin and perfectly impersonate them. This isn't like the clumsy skin grafts the rest of the Brotherhood uses; there's no visible difference between the old person and Mehmet wearing them. The only downside is having to perform the Ritual of Cleansing every 100 hours.
He intends to use this to replace the Duke of York, which is…not a good plan at all, actually. The Duke of York is fated to become King of England within the years but Mehmet has no way of knowing that. How much power and influence could he really get from stealing that particular identity? I mean, if you want temporal power in the real world, Mehmet my man, have you heard of this Ataturk guy? You could be president of a whole new country in a few months! Whatever, man. Mehmet's travelling with the Simulacrum and the Scrolls, disguised as a member of the SOE staff. The Simulacrum is actually in an iron box welded to the underside of one of the carriages – he plans to retrieve them when he gets to France, then boat over to London and get the Ritual of Cleansing, which he sent to his shop in advance.
The investigators have 100 hours to find out which person on the train is Mehmet, kill him before he can change skins and get to his shop in time to use the Ritual of Cleansing on themselves. While Mehmet is now in sync with the statue and doesn't suffer Baleful Influence (for the first 100 hours at least), the investigators suffer it much worse than before. Every morning they must roll CON or suffer mutations caused by the Simulacrum – these range from noxious odours to unsightly growths to something moving around under their skin.
This is where some tables might have problems. The whole scenario operates under the assumption that the investigators will be willing to quietly sleuth out Mehmet even under the time constraint, whereas more gung-ho players might be tempted to – for example – get their guns, seize control of the Express and start forcing people off the back of the moving train until they think they've killed Mehmet. I imagine he's the one who bounces a little when he hits the track instead of just splattering. For at least the first day or so, you want to encourage the players to take the subtle approach. After all, they don't want the train to be forced to make an emergency stop, as even an hour's delay could have disastrous consequences.
The book also acknowledges that players might be totally unwilling to go on the train at all. Having seen the 'luxuries' of the Orient Express, they might want to just fly back to England and be done with it. If they absolutely won't budge on this, the book has rough guidelines on how to accommodate flying investigators, including plot hooks and obstacles to throw at them – my personal favourite is the cockpit and cabin filling up with black feathers as they fly over Belgrade, forcing them to make an emergency stop near the woods. Flying part or all of the journey gives the team a lead of a day or more over Mehmet.
The pace of this scenario is frantic, the trip from Constantinople to Calais taking three terrifying days with a rigorous timeline of events. It's possible, even expected, for smart players to figure out who Mehmet's hiding in and empty their shotguns into his face ahead of time. If they pull that off, the book says let them, even if that means missing out on some of the later set-pieces of the scenario. They earned it.
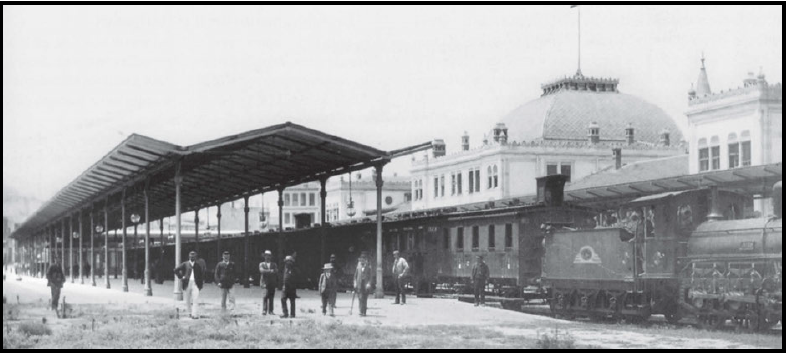
Mehmet Must Die
When the investigators get to Sirkeci station, they're informed that due to the volume of passengers on the through-coach to Calais, every berth in the first-class compartment has already got at least one passenger – the group will have to split up and share double-berths with strangers. This is a key part of the set-up for this scenario and if necessary, those are the only available berths on the entire train.
This is the most challenging part of the scenario. There are no less than 16 NPC passengers that the keeper will have to keep track of throughout the scenario, more than in any of the other mystery scenarios. It'll probably be necessary to do some work ahead of time to create markers and the like that can be placed on the train map. Also, the passengers presented assume a predominately male team of investigators; they'll need to be changed up ahead of time if that's not the case for your group. The Strangers on the Train book has a huge selection of passengers that could easily be swapped in or added if necessary.
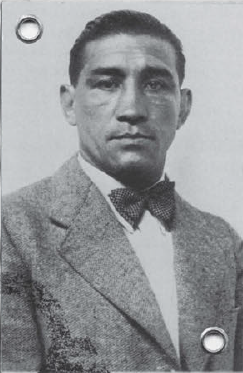
At least initially, none of the passengers presented are Mehmet. Mehmet is currently disguised as Emile Soucard, conductor for the Calais coach and someone who the investigators might have already met. Soucard is a powerfully-built Corsican who makes up for his intimidating appearance with impeccable manners, which Mehmet can't quite pull off. If the keeper wants to make things easier, they might allow a Hard Spot Hidden roll to notice that little detail. He salutes each passenger as they board and is friendly with the investigators; that's pretty admirable under the circumstances, since I would probably have a full-blown panic attack if I saw my deceased arch-nemeses amble up to me like that.
Once they're aboard, it's time for the investigators to mingle.
Next time: meet the victims!
BLUE TRAIN, BLACK NIGHT – PART TWO
Original SA postBLUE TRAIN, BLACK NIGHT – PART TWO
Perfect Strangers
There's a lot to keep track of in this scenario, but the book does a pretty good job of laying things out for the keeper. Each passenger is assigned a number and a compartment. The first half of the carriage is double-berths, while the latter half is single-berths. Each double-berth shares a bathroom with its neighbour – the doors are designed so that while one door is unlocked, the door to the other compartment can't be opened. As such, passengers are expected to keep their washroom door locked whenever it's not in use. There's also a chair down one end of the carriage for the conductor to sit on at night. The view from there lets him see the entire carriage at all times.
The full list of passengers is as follows:
1. Luigi Martinelli
A middle-aged opera basso on his way back from a season in Constantinople. He is very loud and boisterous and finds himself very amusing. He is familiar with Cavollaro and will be appalled if he finds out what's happened to her. Because of his size, he has difficulty getting into the top bunk and asks to be allowed the bottom; politeness here might save an investigator's life when assassins come knocking. He is a loud snorer and his companion must make a Hard POW roll to get a good sleep. Notable skill: Be Pompous 55
3. Jack Gatling
A high-powered American journalist who primarily writes gossipy editorials. He's here in search of his latest story, in this case evidence of an illicit affair between the Baron of Blackpool and the Dona Margarita. If the investigators attract his interest, he will not let up, especially if they're rich or famous. Gatling sends his stories via telegram and news about them can arrive before the train does. He's a nuisance and rarely sleeps, but he might be able to give the investigators valuable information about the movements of other passengers. Notable skill: Stealth 70
These pictures are arranged as scattered documents around the borders of the pages. Here's Sir Harrow's in full.
5. Sir Robert Harrow, Bart.
An extremely British gentleman in his mid-forties. He's quick to regale any investigator, particularly his compartment-mate, with stories of his adventures. He's also a boorish lout and has set his eyes on the lovely ladies in the neighbouring compartment. He stays up all night smoking and reading, occasionally hammering on the adjoining door in a disgusting attempt to seduce his neighbours. Notable skill: Make Up Amusing Story 65

7. Elena Costanza
A beautiful and mysterious Mediterranean woman who keeps to herself. She is actually a British spy who has spent the last two years working in Constantinople. A captured Brother was interrogated and let slip that there's a plan to assassinate the King of England's son, so she's on the case. If the team helped Rutherford, she's heard of them; otherwise she'll ally herself with them when she finds out they chase the same foe. Despite Sir Harrow's behaviour, she sleeps soundly through the night. The book recommends her as a replacement for an investigator who bites it early. Notable skill: Codes and Ciphers 45


9/10. The Count and Countess
Henri Mathieu and his wife Emmanuelle, the Count and Countess de Bruessy. An elegant pair of nobles who are dogged by an entirely accurate rumour that Emmanuelle is pursuing an affair with a handsome German industrialist – something she does with her husband's knowledge and consent. They do have their reputation to consider, and to that end are trying to avoid the attention of Gatling. Notable skills: Evaluate Wine 88, Take What Pleasure Comes 95
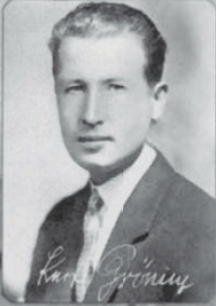
11. Kurt Groenig
The handsome German industrialist sleeping with the Countess. He is a skilled and ruthless businessman who built Groenig Fabrikat back to its former glory after its post-War collapse. He has absolutely fallen in love with the Countess, but fears that she's just manipulating him. Notable skill: Afternoon Dalliance 89
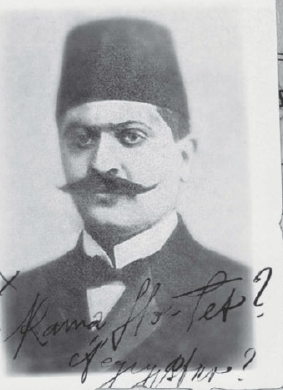
12. Rama Ho-Tet
A mysterious Egyptian antiques dealer and occultist. He prefers to avoid small-talk, but if the investigators can connect with him he'll prove to be an extremely knowledgeable ally, even familiar with the legends of the Sedefkar Simulacrum. He's another recommended replacement for a dead investigator. Notable skill: Cthulhu Mythos 6
14. Lord Margrave
The Baron of Blackpool, a snobby Englishman with a love of butterflies. Gatling is absolutely right in his suspicion that Margrave is having an affair with del Garda, but he misses the forest for the trees. Margrave has been selling bits of his estate to the del Gardas for years and is hoping to get it back through marriage. He'd rather be caught in a romantic scandal than a financial one, though he hopes to avoid both. Notable skill: Collect Stamps 48
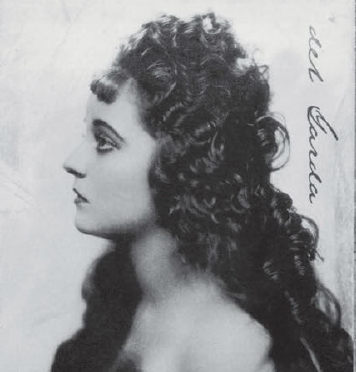
15. La Dona del Garda
That 'n' is supposed to have a little squiggle above it but I've been avoiding spelling foreign words properly this entire review and I'm not gonna stop now. The Dona has been a widow ever since she poisoned her husband three years ago, but God help her, she's actually fallen in love with the Baron. This is possibly because he's so lacking in charm she doesn't suspect an ulterior motive. Notable skill: Wear Black 67
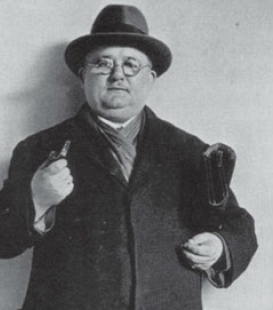
16. Danton Szorbic
A small fat man in spectacles. Contrary to his appearance, he is – barring Makryat and the investigators – the most dangerous individual on the train. A skilled assassin, he has been hired by one of Groenig's competitors to take him out. The plan at the moment is to do him in at Trieste and try to frame the de Bruessys, but as things get weird on the train he'll adapt his plan to take advantage of that. Notable skill: Smuggle Weapons 90
Next time: bon voyage!
BLUE TRAIN, BLACK NIGHT – PART THREE
Original SA postBLUE TRAIN, BLACK NIGHT – PART THREE
Day One
The first leg of the trip is pretty chill. The investigators will have the opportunity to start playing Spot-The-Mehmet and getting to know their fellow travellers. If they broach the subject, no-one is willing to swap compartments with anyone. The Express offers a variety of newspapers including London publications from no more than three days ago; investigators who read these will find out about a mysterious disappearance in Islington. More on that when we finally get home.
Night One
Mehmet tries to poison the investigators. This is actually a shit idea, since it arouses the team's suspicions and might give them a hint as to where to look, but the poor bastard's probably freaking out a little here. He arranges – with great difficulty - for a carafe of water poisoned with antimony (colourless and odourless) to be delivered to their table at dinner. I'd give the investigators a Know roll here if they forget that water prior to this point has always been delivered to them in sealed bottles. Anyone who drinks the water suffers nausea and cramps within the hour, eventually taking 1D10 damage if they don't managed to regurgitate the poison. Science (Chemistry) on either the jug or the vomitus detects the poison.
If someone dies here, the train is delayed two hours at the Turkish border while cops come aboard and question everyone.
11:25PM
Makryat-as-Soucard sneaks off the train near the border and sends a telegram to the Brothers in Svilengrad, calling for assistance. Anyone watching the windows sees him do that; they can bribe the clerk to find out what he sent, but Mehmet has an 85% chance to see them do that. If he reckons he's been caught, he makes plans to take a new skin.
12:01AM
The train continues to Sinekli. Investigators who accuse Soucard of the poisoning are going to need to back that up with significant evidence. False accusations turn the Chef de Brigade against the team, and he will be on the lookout for an excuse to throw them off the train.
12:40AM
If Mehmet thinks the Soucard identity has been compromised, he goes for one of the single travellers – the book recommends del Garda – killing them and stealing their skin. He then sneaks into an investigator's compartment and places Soucard's skin in there. The book makes a big deal out of how the investigators might catch Mehmet dumping the Dona's body out the window but confusingly doubles back on that, pointing out that the scenario could be ruined by a thorough police investigation at the stop so it might be better to not let them witness that. Why bring it up in the first place then?
If the investigators have gotten in the Chef de Brigade's good books, he'll be willing to open up forbidden areas of the train to the team when Soucard goes missing. Since no body is discovered, the train goes on normally, with another conductor taking Soucard's place. Of course, this assumes that the team's first response to finding the skin is to dump it out the window. If they hold onto it, it's evidence, police come on board, yada yada yada, skip this bit.
3:20AM
Anyone who's up and about around this time notices Countess de Bruessy leaving Groenig's compartment. If they tell Gatling about this he side-eyes the Countess at breakfast; thereafter she totally ignores the whole team.
If someone's watching the platform, they'll see a group of Turks board in second-class; Mehmet's Brothers. Fortunately, the Bulgarian police are on the lookout for Turkish nationalists riling up people on the border. If the investigators dob the Brothers in and succeed on a Luck roll they're detained and miss the train. Otherwise, Mehmet makes contact with them and sets them on the investigators. They take out anyone who's stupid enough to go for a solo pre-dawn stroll. Seems unlikely, but if someone in the group does that they probably deserve to die.
Day Two
The train arrives in Sofia. Wolves reminiscent of Fenalik's Children pace the sides of the train. If the investigators have been attacked in some way, Costanza makes contact with them and offers an alliance.
11:15AM
Gatling jumps off the train and sends a telegram, in this case about de Bruessy's affair with Kroenig. Again, the Brothers will snuff out any schmuck who leaves the train alone.
12:48PM
The book assumes that by now, someone's been attacked and possibly killed by the Brothers, but since they avoid making obvious attacks on the train I don't know how likely that is. In any case, they've got more time to look study the people on the train. If Mehmet's still wearing Soucard, Listen lets them overhear staff complaining that he's not doing his job. If he's switched to del Garda, they might overheard Margrave asking why he's getting the cold shoulder, or Spot Hidden to notice how clumsily he's put on her make-up.
2:28PM
If the Brothers fail to kill another investigator or if Mehmet feels like del Garda is compromised, he switches skins. Him and his crew kill and skin Margrave in a train station bathroom. Mehmet puts on Margrave and slaps his own face red while one of the Brothers disguises as del Garda. The fake del Garda leaves the station in a taxi while Margrave!Mehmet loudly complains about lovers quarrels. This takes Gatling by the balls – Margrave invites the journalist to take a private interview with him later tonight.
Gatling brags about the interview with his compartment-mate. He ignores any warnings they might give him.
Next time: Baba Yaga! And more skin!
BLACK TRAIN, BLUE NIGHT – PART FOUR
Original SA postBLACK TRAIN, BLUE NIGHT – PART FOUR
Night Two
6:43PM
The train is approaching Belgrade. Anyone looking out the window sees the train pass a little white cottage sitting incongruously in an old ruin (SAN 0/1). As soon as any investigator steps off the train they find themselves attacked by a horde of black chickens, just like they did the first time the team was in Belgrade. They disappear after 1D6 rounds. Natural World reveals that the chickens didn't appear until they were near the Calais coach.
At dinner, an elderly woman is ushered in by the waiters and sat at a nearby table. She straightens up and glares at the investigators – the Baba Yaga. Aboard the train her power is limited, and she can do little more than stare at the team. Her baleful glower ruins their meal, turning everything cold and tasteless. Should they complain to the Maitre d'Hotel, he assures them that 'the Duchess' is meant to be there. If they leave the dining car, they'll find her waiting outside one of their compartments. If they enter another compartment, they'll see her face pressed against the window outside. Her image stays fused into the glass after they shut the curtain (SAN 0/1).
Anyone who looks outside and succeeds on Spot Hidden spies the Walker in the Woods (assuming they didn't destroy it), keeping steady pace with the train (SAN 0/1D3).
00:00AM
Preoccupied with the Baba Yaga's witch antics, the investigators might miss Gatling visiting Margrave's compartment. Mehmet knocks out Gatling, ties him up and seals his mouth shut with Control Skin. He cuts six Flesh Creepers from Gatling's belly and sends them after the investigators. These creepy little things only have 2HP but attack by jumping onto their victim's face and sealing it shut. They can be cut off, but any damage is split between them and their victim. They cost 1/1D4 SAN to see in action, with whoever lost an eye in Sofia losing 2/1D4+1 due to trauma.
While they're dealing with that, Mehmet frees Gatling and sends him back to his compartment. Gatling has gone temporarily insane from his ordeal, rolling about in his bed and moaning, 'They came from me, they came from me!' Anyone who examines him finds the neat star-shaped scars where Mehmet cut flesh for his Creepers. Walk it off, pussy; we got someone on the team lost a motherfucking eye!
3:17AM
If she hasn't already, Costanza approaches the team with what she knows. Meanwhile, Mehmet kills Sir Harrow at the next stop and takes his skin. If the investigators have been making a fuss, they're also approached by Szorbic as the train enters Italy, who naturally tries to set them on Groenig. Groenig is bemused by any outlandish claims made against him, but if the investigators push him too far he calls for the Chef de Brigade.
As the train gets close to Trieste, any sleeping investigators receive nightmares from the lloigor and lose 1D6 MAG as before.
Day Three
8:30AM
The newspapers from London report a brutal murder, again in Islington. Did the investigators hand the medallion over to the lloigor? If not, Lloigorites take compartments in the Trieste-Paris coach and try to search the Calais coach later. This is great if you want to have another cult fight. Aside from that, Mehmet is biding his time and makes no move. Five more Brothers of the Skin board in Milan.
Night Three
The Brothers make their move. As the train slowly climbs the mountain grades, they get onto the roof of the train and make their way to the engine. They kill the crew; Spot Hidden notices a dead fireman pitched out by the track. As the track curves, investigators can see that the engine has taken on a blue-white nimbus as the Brothers cast Turn to Skin on the train. As they complete their spell, the train abruptly picks up speed.
Investigators can get to the engine the same way the cultists did, where they'll have the drop on the group. If they bring guns, the coal tender gives them cover. However the fight rolls out, as soon as things really get started the train enters the Simplon Tunnel, which is nearly 20 kilometers long and feels like it goes forever. At this point, anyone who stands up on a carriage roof or otherwise sticks their body out too far must roll Luck or be grated to a paste against the tunnel walls (well, 5D6 damage, but that's probably death for the average investigator or cultist).
After dispatching the cultists (Mehmet isn't present), the investigators will find they cannot take control of the train. The engine has been turned into a living thing and possessed by an avatar of the Skinless One, turning it into the Locomotive Beast. All of its iron and brass is now flesh, covered in thick rubbery hide. The various gauges are now glinting eyes that stare at the investigators above a ravening maw – SAN 1D3/1D20. It is not totally immune to harm and it takes wounds like any living creature, but tough enough that the investigators probably won't be able to put it down that easy. Even if they blow it up, killing it means derailing a train that's now chugging along at nearly 60 miles per hour.
Ahead of the train, switches are magically thrown and freights cleared aside to make way for the Express. It makes no stops, much to the discomfort of the passengers and staff. Nothing can stop the Locomotive Beast.
'Can it get worse?' the book asks. 'Yes, it can.'
Next time: the Cathedral Car!
BLACK TRAIN, BLUE NIGHT – PART FIVE
Original SA postBLACK TRAIN, BLUE NIGHT – PART FIVE
This Fucking Guy!
The Express passes through Lausanne in a flash but there's a disconcerting moment of hesitation – as if the train stops for just a second before it roars on. When the train rounds the next bend, the investigators can see that a new carriage has been added to the train. This one looks like nothing less than a tiny gothic cathedral on wheels. If the investigators don't immediately check it out, a page in medieval garb approaches them with invitations from the Jigsaw Prince – he brings cordial greetings and wants to parley with the team.
The cathedral car has its own map among the handouts, which is a nice touch.
Entering the Prince's carriage, the investigators find a sumptuous banquet with the impossible luxury of dreams. There's enough suckling pigs, beef haunches, sweetmeats and wine on the tables here to make them sag. Lounging on a jewelled throne behind all this is the Jigsaw Prince, wearing nothing more than a red loincloth. He is a horrific sight to take in. The Prince's bulk is due to the spells Enchant Flesh and Graft Flesh, which let the caster preserve pieces of harvested flesh and skin then add it to their own body. The Prince's obesity is due to all of the enchanted meat he's added to himself over the decades; his body is, yes, a jigsaw mess of stitches and keloid scars. It's SAN 2/1D6 to witness him in his glory.
He greets the investigators warmly and bids them to join the feast. That whole thing where they defied him in his own realm, deceived him and humiliatingly stole from him? Water under the bridge. After all, how can he stay mad when they've presented a fantastic opportunity: the complete Simulacrum, right here on the Express! So, he wants the statue. Presumably, the investigators want to live. If they can bring him the Simulacrum, he just so happens to have the perfect thing for killing Mehmet. Have they got a deal?
If they agree (regardless of whether they plan to follow through), the Prince is willing to teach them the new spell Detransference. This extremely nasty spell was a coveted secret of Selim's, one he used to maintain control over his cultists. Casting it takes a few seconds, costs 10 POW and 10 MAG and totally undoes the effect of any Transfer Body Part spells the target has used on themselves. For the average Brother, that means a short, painful death. Any investigator who makes an Intelligence roll learns the spell.

Get Fucked!
Mehmet is aware of the Prince's arrival and is playing things cautiously, probably well-aware that he's not to be fucked with. When the investigators come back, he tries to change skins again, either harvesting one of their number or Costanza. He plans to accuse the Chef de Brigade and work from there. Failing that, he has little recourse but to run and try to hide. Finally cornered, he surrenders: he will offer the investigators anything they want if they let him live. He even offers the Simulacrum, knowing that there's no way for them to get to it while the train is moving.
I doubt even the most gullible player will listen to his pleas. When Detransference is cast, the caster suddenly finds themselves holding a bunch of Mehmet's stolen limbs and organs, now rotting into mush in their hands – 1D10 SAN for anyone who isn't in the medical professions. Mehmet squeezes apart like putty and the train slowly comes to a halt as the avatar he summoned disappears. The train halts somewhere near Paris, and authorities soon arrive.
Oh yes, the Prince. If the investigators are stupid enough to go back to the cathedral car and tell him to get fucked, he leaps off his throne and lunges at them, the investigators suddenly finding themselves moving in slow motion like a nightmare as he gets closer. They get out just in time to slam the door in his face. But even if they don't do that, the Prince is now on the train and he wants the Simulacrum.
The advice on how to handle this is vague. I would play this as a much more straight-forward encounter than their previous clash with the Prince: he wants the Simulacrum and he's not fucking around any more. I would also have him low on Magic and unable to cast his nastier spells as a result of whatever dream fuckery let him teleport onto the train. Detransference doesn't work on him – he favours Enchant/Graft Flesh over Transfer Body Part for this very reason. Even without spells, he's very strong and immune to most damage. However, he's fat and slow and probably not playing things super smart, so the investigators should be able to outplay him.
As the book notes, the best bet is a cold one – push him off the train while it's still moving.

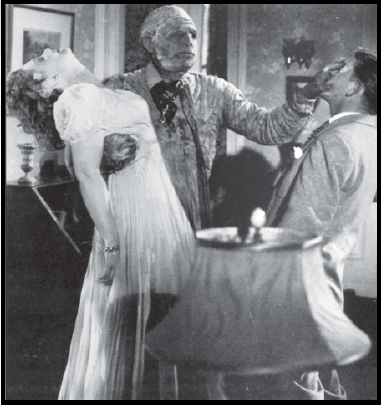
Home Stretch
Emergency services soon arrive at the train. It's probably best to let the investigators skim past them and try to find the Simulacrum. The train is opened up to them by the Chef de Brigade, who – if he survived – has by now seen some shit. The book doesn't call for any rolls, so I guess it's just a gimme that they find the case underneath the Calais carriage. Inside is the Simulacrum, the Sedefkar Scrolls (sans the Scroll of the Left Hand), a set of passports and an oilskin envelope containing materials related to the Duke of York. If Costanza's survived the trip, she makes a full report to British Intelligence.
The investigators receive 1D8+2 SAN for killing Mehmet, 1D6 SAN for killing the Jigsaw Prince and 1D3 SAN for recovering the Simulacrum. Excluding Szorbic, a total of ten passengers were in danger of being murdered and skinned by Mehmet; the investigators 1 SAN for each one who steps off the train at Gare de Lyon.
Next time: OR IS IT?
THE FOG LIFTS
Original SA postTHE FOG LIFTS
Wherein our heroes seek their salvation, confront a card played from beyond the grave, and end their journey as do all, where first they began.
Home
When the investigators get back to London, they have barely hours to spare before they are in danger of being totally destroyed by the Simulacrum's corruption. As they leave the station, they can spot a scruffy cab driver holding a sign that says 'MacRat'. His name is Bill and he was booked ahead of time by Mehmet to take him back to his Islington shop. Along the way, he can summarise the major headlines for the investigators if they haven't been reading the papers; in particular, there's been a murder and two disappearances in the area. The latest is a middle-aged schoolmaster named Arthur Bowman. There's a bunch of clues outlined if the team decides to investigate the disappearances, but considering their impending demise I don't see why they would be interested.
Before Mehmet left London, he killed Beddows and turned his corpse into a little monster called a Skin Devil. It has been obediently keeping watch in the Crescent Treasury but has recently ventured out to make the final preparations for Mehmet's return. It's responsible for all of the disappearances and is currently keeping Bowman trapped in a wardrobe upstairs. When the investigators get to the shop, they'll have to fight the thing. It's not particularly tough but it's a sneaky little bastard and will probably ambush the investigators by flinging its bowel at them like a flail; this then explodes and burns them with acid. SAN 1/1D10 to see the Skin Devil, made worse by the fact that it still has Beddows' face.
The Scroll of the Left Hand is in the upstairs office of the shop, along with Bowman. The carpet has been rolled back and the hardwood floor has been carved with an intricate and disturbing pattern. If the investigators check the wardrobe, they'll find the catatonic and insane Bowman, a pattern scratched into his forehead that Cthulhu Mythos or Occult identifies as being related to the one on the floor. Investigators might want to take him to the authorities, but the book encourages you to remind them that this means getting involved in a police investigation that they just don't have time for.
The scroll is on the office desk, along with a translation and a note written in English apparently from one of Mehmet's cronies, reminding him that the Simulacrum must be present for the ritual. The scroll is definitely the real deal and is written in the same confusing Arabic-Turkish mix as the other scrolls; if the investigators want to cast the Ritual of Cleansing they'll need to use the prepared translation or try to get their own.
THIS FUCKING GUY!
The translated ritual is a trap. This whole set-up was Mehmet's contingency plan should he be killed before he got to London. The ritual in the transcript is actually a reincarnation spell that will summon Mehmet's soul into the body of whoever's closest to the centre of the circle carved into the floor. Whoever rolls worst on a Luck roll feels the acid drip of insanity as Mehmet screams inside their own head; they must make a contested POW roll versus Mehmet's POW 115. If they succeed, Mehmet's soul is bounced over to Bowman. If they fail, their consciousness is extinguished and Mehmet takes control of their body. Thanks for playing!
Of course, it might be anticlimactic to have an investigator who's survived the whole adventure thus far suddenly bite it because of one unlucky roll. If you don't want to do that, or if the investigator makes the roll, Mehmet immediately possesses Bowman instead. Either way, the result is visceral: Mehmet Makryat is reborn into his host but sans any skin. His organs and muscles writhe across the ground like snakes as he tries to coalesce his body. A third eye blazes in his head, remaining in a fixed position in the protean mass – SAN 1/1D10. He attacks the investigators with clawed hands, and every attack steals some of their skin for himself.
The book suggests now's a great time to ask Mehmet questions and wrap up any loose ends, but is it really?
Mehmet shouts his triumph and summons the Skinless One. The floor quakes as he emerges from the centre of the circle, surrounded by a swirling vortex of orange smoke. True to his name, he looks like a flayed cadaver, but the investigators know they stand in the presence of a living god and lose 1D10/1D100 SAN as a result. Mehmet commands the Skinless One to attack the investigators.

OH SHIT OH FUCK
…
…
...
The Skinless One does nothing. Mehmet grows more hysterical, shrieking that as the owner of the Sedefkar Simulacrum the Skinless One must obey him. The god looks at him, then looks down at the scattered pieces of the statue.
quote:
NONE WEARS THE SIMULACRUM.
Mehmet rushes to absorb the pieces into his bulk and reassemble the Simulacrum. The Skinless One stands impassive, arms open as if waiting for something. The investigators don't have much time here; they can try and steal a piece and run with it but Mehmet summons a dimensional shambler to pursue them. If they're stupid they'll try and attack the Skinless One, who will point at them and make all their skin unspool from their body at once. If they're smart, they will grab a piece and toss it to the Skinless One – he deftly catches it and crushes it to dust in his hand.
quote:
THE USURPER IS UNWORTHY. MY GIFT IS SUNDERED.
Mehmet screams and dies, collapsing into a puddle. The investigators can throw the rest of the pieces to the Skinless One, who crushes each one in turn. When he gets the Head, the investigators see the faces of everyone who has ever owned the Simulacrum flicker across its surface – Sedefkar, Fenalik, Selim, Mehmet and their own – before it collapses in on itself like a rotting fungus.
quote:
THE GIFT OF SKIN IS REVOKED.
The Skinless One departs, descending back into whatever hell he usually inhabits. Mehmet's corpse follows. He takes any present Sedefkar Scrolls with him unless they're grabbed and held tightly. If the investigators kept the Mims Sahis, that gets sucked away too. Anyone who's still standing in the circle when this happens needs to make a DEX or Luck roll to avoid getting dragged down with him, but you could just as easily skip that if you want.
With the Simulacrum destroyed, so too is its Baleful Influence. Alive or dead, the investigators have won. They receive 1D10 SAN for defeating Mehmet, 1D10 SAN if the Simulacrum was destroyed, 1D4 SAN if Bowman survived (fat chance), 1D4 SAN for knowing they defeated their enemies from Constantinople and 4D6 SAN for beating Horror on the Orient Express. If they held onto any scrolls, they decompose within a week, granting a further 1D6 SAN. In addition, the powers that be have noticed their efforts; for the rest of their lives, they are VIPs, always receiving deferential treatment in their movements in the British Empire.
Alternatively…
The investigators might be paranoid enough to get a separate translation of the Scroll of the Left Hand. If they do, they get in just in the nick of time, before the 100 hours are up. They cast the Ritual of Cleansing and are safe – for the next 100 hours, that is. They have won, but they are now the guardians of the Sedefkar Simulacrum for the rest of their lives.
So that's the main campaign of Horrient! Next, we'll start looking at the new alternate era scenarios.
Next time: Cthulhu by Gaslight!
THE BLOOD RED FEZ – PART ONE
Original SA postTHE BLOOD RED FEZ – PART ONE
Thirty years before the search for the Sedefkar Simulacrum, an earlier group of investigators take the Orient Express to Constantinople to stop a cosmic evil born from a cursed fez.
Background
The legend of the Blood Red Fez has been haunting the Ottoman Empire since the sixteenth century, a garment of great and powerful evil. A cult has risen around it, the Children of the Blood Red Fez, led by a sorcerer who goes by Hieronymous Menkaph (formerly an English accountant named Mortimer Leeds). Menkaph learned sorcery from none other than Selim Makryat and his Brotherhood of the Skin, but even though Menkaph has decided to form his own kooky-ass hat religion the two are still bros. Menkaph believes that the Blood Red Fez offers a quicker path to power than the ways of skin.
According to the Children's research, there exists a tome called The Whispering Fez that holds the secrets to unlocking the true power of the Blood Red Fez. Having already acquired the Fez (or 'a' Fez, more on that later), Menkaph discovered that a copy of the tome had come into the hands of – of all the goddamn people – a fez collector in London, and went there immediately to steal it. He found opposition from a young student named Matthew Pook, who had been warned of Menkaph's activities by Turkish academic Professor Demir. However, Pook made a mistake when he tried to actually steal the Fez, and for his trouble has now become an experiment in its powers. In his last moments of lucidity before the Fez consumed him, he called for help from his friend Professor Julius Smith.
With the Blood Red Fez and the Whispering Fez in his possession, Menkaph plans to return to Constantinople. His student, former harem girl Nisra, the Daughter of Fate has put together a fiendish plan. The Whispering Fez outlines a ritual by which the true power of the Fez is unlocked when soaked with the blood of a prince. Nisra is the Chief Concubine to Prince Ramazan, an exile who is now totally in her thrall. He will make an excellent sacrifice for the Fez.
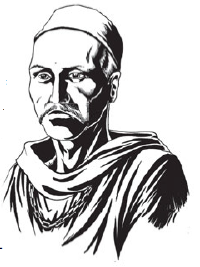

Left: Hieronymous Menkaph. Right: The young Professor Julius Smith.
So here's the first problem with the scenario, which you may have already noticed: there is nothing at all you can do to make a fez scary. Nothing at all. Spooky fez is a bargain bin SCP Foundation entry, not something that can sustain a whole CoC scenario.
The book really tries to sell you on the cultural significance of the fez, but I'm sorry, you just can't make the maguffin of your story an evil hat and expect me to take it seriously. Honestly, the more the book tries to sell the Blood Red Fez as a Mythos artefact the funnier it gets, up to forcing Sanity loss for being in its vicinity for too long. Also, the Fez is supposedly connected to Yog-Sothoth somehow which is a frankly bizarre choice of Old One for this kind of story. If you're unfamiliar, Yog-Sothoth is essentially uh, God, both outside the universe and the fabric of the universe, coterminous with all reality at once. Nyarlathotep's the jerk who would stoop to making a magic hat, doesn't Yog-fucking-Sothoth have something better to do?
Also, while this is a neat scenario (I know I just spent a paragraph trashing it, bear with me), it's a pretty big one. It's a mini-Horrient, kind of a combo of the Blue Train, Black Night and By the Skin of Their Teeth scenarios from the main campaign, and it will probably take at least a few sessions to get through. By comparison, Dancers in an Evening Fog (the first Horrient scenario) should take one, one and a half sessions tops. Blood Red Fez is supposed to be triggered partway through that scenario when the investigators discover Professor Smith's journal; if you do that, then the investigators will have spent more time playing around in this optional scenario than the main campaign! If you don't want to go with that, one thing you can do is run it as a prequel to the main campaign, maybe giving investigators who survive the option of getting carried over into Horrient. This fits well with the scenario as it already includes several characters who play major rolls in the main campaign.
Also, like most of the alternate era scenarios, this one comes with a stack of premade investigators to save your group the trouble of making a whole new set of characters just for one scenario. Unfortunately, these are printed in statblocks in the same double-column format the rest of the book uses, so you'll have to go to the trouble of printing out and filling in your own character sheets if you want to use them. The premades include:
- Professor Harold 'Harry' Worth, a well-travelled archaeologist whose research has led him to belief in the supernatural. He's a member of the Oriental Club and has worked with Professor Smith before.
- Captain Roderick Barrington, Bart., a dashing and chivalric military officer who brushed with the occult during a tour in Afghanistan. He knows Smith through the Oriental Club.
- George Banks, a working class criminal who specialises as a 'snakes-man', getting into hard-to-reach places. He once robbed Smith, but Smith let him off on the condition he try to better himself.
- Amelia Meadowcroft, daughter of a famed explorer and a bold adventuress who has already turned down two marriage proposals. She helped Smith out of a bind in Bulgaria when he was accused of being a British spy.
- Dr. Kasim Polat, a Turkish historian who is writing on the history of the early Ottoman Empire. He is in London attending a conference and is looking forward to returning home to his family. He has worked with Smith in Turkey.
- Dr. Jean-Louis Laroche, a French physician who has spent many years abroad and now practices at St. Bartholomew's teaching hospital. As well as being a member of the Oriental Club, he once treated Smith when he came down with an exotic eastern malady.
The adventure begins when the investigators are summoned by Professor Smith to an urgent meeting in Whitechapel, long past the hours decent folk are awake.
Next time: hat zombie!
THE BLOOD RED FEZ – PART TWO
Original SA postRE: hat discourse, I readily acknowledge that you could make a story about an evil hat that's actually scary, but you'd have to do it in a very different way to how this scenario does it.
THE BLOOD RED FEZ – PART TWO
You Can Keep Your Hat On
When investigators get to the Whitechapel address they find Professor Smith outside, pacing nervously. He's relieved to see the team and quickly ushers them inside without explaining anything. Spot Hidden reveals a fez-wearing figure at the end of the street who disappears around a corner as soon as he's noticed.
Smith tells the team what he knows. Four days ago, a well-dressed gentleman approached landlady Mrs. Grim and offered her a generous amount for a room. He was joined by a group of men in fezzes dragging another man, semi-conscious. He claimed that the man was his brother and a drug-addict that he was attempting to treat. Over the next couple of days, tenants complained of strange whispering noises throughout the building and mysterious shadows seen on the landing. When the screaming started on the third day, the gentleman tried to pay Grim more money. When they got worse the day after, Grim sent for the police; the group beat a hasty retreat before they could arrive. They found a diseased and malnourished man in the room, tied to the bed. He whispered the name of Professor Smith to the police doctor before passing out. Smith was summoned, and he recognised the man as Matthew Pook.
The cops immediately lost interest in the case, since there was no-one to arrest – just some sick dude on a bed. Smith called the investigators because he needs help removing Pook. He's not sure if whatever he's got is contagious and even if it's not, he's worried that he might come under attack. He's familiar with the men in fezzes and knows they represent a sinister organisation, but he doesn't have time to give the investigators the full run-down right now.
The tiny room where Pook is being kept reeks. Two candles provide the only light in the room; the surroundings are strewn with discarded papers and remains of past meals. Pook lies on the bed, withered and emaciated and still wearing the leather strips that once bound him. He wears nothing but stained smallclothes and most unusually, a fez. Another man in a cloak is examining him; he introduces himself as Dr. Niels Hobbs the police doctor.
Hobbs admits that he cannot tell what's wrong with Pook, who seems to be suffering some wasting illness but is stable at the moment. Anyone who touches the fez suffers intense nausea and fleeting visions and immediately loses 1D6 MAG. It can't be removed at all; close examination reveals that flesh is growing into the rim of the fez, fusing it to Pook's head. What's more, curious investigators will notice that it constantly emits a low hum, in fact a sibilant whispering coming from inside the fez – SAN 1/1D4 to hear that.
Around the time the investigators start getting really curious about the hat, Pook suddenly wakes up and screams. His body heaves one last time before he dies. As soon as he's dead, the fez falls off his head, leaving behind a visible ring of bare flesh where it was joined. Dr. Hobbs leans down to examine the corpse, but as soon as he does that the candles go out and the now undead Pook bites his face off. Pook is now an Undead Servitor of the Blood Red Fez. The flesh around his heads wells and stretched until it looks like a fez, pulling the face back tight. The tongue becomes as long as a neck tie and splits into sharp tendrils at the end, almost like the tassels on a fez. And of course, he will kill everyone in the room if the investigators don't put him down first.
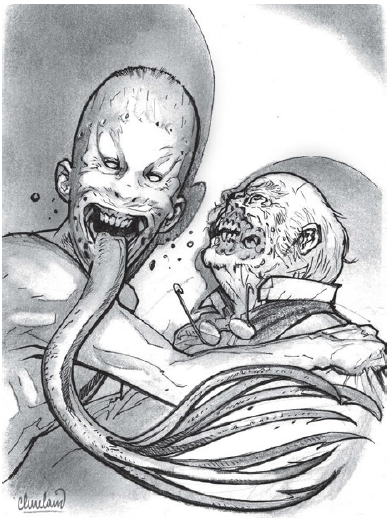
Ah shit I wasted the best hat joke right away
The investigators are now in the possession of the Blood Red Fez. The redness of the fez is that of dried blood, and considering the funky smell of the thing investigators might guess that's what it is. Strange symbols like hieroglyphics seem to lie under the fabric, occasionally catching the light. Being near the Fez for more than half an hour calls for SAN 1/1D4 (this is still stupid) while handling the Fez at all requires a CON roll to get past the sensation of nausea. It constantly whispers and even seems to vibrate slightly. Putting on the Fez at this point is just about the stupidest thing you could do.
don't put on the fucking fez i swear to god
Professor Smith immediately calls for it to be destroyed, but nothing works; fires go out as soon as they touch the Fez and the freaky thing knits itself back together as the blade of a knife passes through it. The team has little choice but hold onto it for now. If anyone is afraid of taking it, Smith is willing to hold onto it and will be glad to let any wary investigators stay at his home in St. John's Wood. Anyone sleeping in the same building as the Fez can enjoy a night of bad dreams and visions of fez-wearing figures stalking around.
Smith suggests reconvening at the Orient Club the next day; if any of the investigators are women, they will not be allowed in, but Smith will take the discussion to a nearby cafe instead. He explains that he's been in contact with Professor Demir, a colleague in Constantinople who warned him about the occultist Menkaph and the dangers of the Blood Red Fez. The Fez needs to be brought to him, as only he knows the way to destroy it. However, Smith cannot make the journey, since he made enemies of Selim Makryat last time he was there and would be killed as soon as he got to Turkey.
At this point in history, the Orient Express is the fastest way to get to Constantinople from London, but is also extremely expensive. Luckily, a more benevolent occultist by the name of Baron von Hofler has agreed to sponsor the trip and will meet the team at Vienna.
Next time: researching the Fez!
THE BLOOD RED FEZ – PART THREE
Original SA postTHE BLOOD RED FEZ – PART THREE
Lil Wayne – Fix My Hat
The investigators have a couple days – maybe longer, if they choose to delay their trip – to investigate the Fez before they set off. As well as finding out more about the Children of the Fez, this gives them the opportunity to start putting together their very own tome, Apocrypha of the Fez. This is a collection of writings sourced from old manuscripts that describe the Blood Red Fez and its uses. I'm a big fan of the concept of the investigators getting to make their own contribution to the Mythos. In addition, creating the Apocrypha gives them access to the spell Arrest Fez Decline, which will surely prove invaluable if someone actually puts it on. This simple spell costs 5 POW to cast but keeps the target at the same level of Fez degeneration for 24 hours.
But before they hit the books, they'll probably want to check out the room where Pook breathed his last. The gentleman who paid for it went by Mister Leeds. Of note among the detritus in the room are a couple of attempts to translate the glyphs on the Fez (which includes the phrases 'rising from the past' and 'dominion over all'), Turkish ferry ticket stubs from Constantinople to the nearby Princes' Islands and a notepad with an impression of writing on it. It's possible to use that to make a rubbing, revealing an address in Shoreditch. It belongs to Bentley Burnham, one of Menkaph's cronies.
Burnham is a criminal, a blackmailer who works as an enquiry agent for London's underworld. He's a real piece of work, a petty sadist who enjoys terrifying young women but avoids anything like a real fight unless he's got hefty backup. He also has a set of fake press credentials to justify being in weird places. He's been hired by Menkaph to clean up after the cult and keep an eye on any investigators who come snooping around. He's packing heat, but if the investigators confront him as a group he'll tell them everything he knows about Menkaph – sadly, not much. In addition, he'll be sure to inform Menkaph about the investigators as soon as he can. Well, assuming they don't kill him.
Alternatively, they might run into him while they're checking out Pook's apartment. If they do catch him here and they're not already familiar with him, he'll try and flash his press card to get out. Otherwise, Spot Hidden in the apartment finds his journal, which details his pursuit of Menkaph. This is where they can find mention of the fez collector, including his address in Rotherhithe. Menkaph's goons killed the dude and it's being investigated as a burglary/murder, so investigators will have to get past the cops to check the place out. In the wreckage of the collector's cottage they can find a ledger mentioning The Whispering Fez and a letter from Menkaph offering 100 pounds for the tome.
That's pretty much it for London. One way or another, Burnham follows them out of London, also planning to board the Orient Express so he can report them to Menkaph. If they catch him, he claims to be on his way to Stuttgart to cover a story. It seems unlikely to me that most players would be willing to let him walk away from this encounter alive, if they can possibly manage it.
back on the fucking train again
The Orient Express! You should know how this shit works by now. This is a similar set-up to Blue Train, Black Night but with a few crucial differences. For starters, the investigators don't have their imminent death hanging over them, so that's nice. In addition, there's no insane fuckery that can happen on the train on the level of the cathedral car or the Living Engine, though shit will definitely pop off if the investigators haven't sorted out this mess by the time they get to Constantinople. In addition, Menkaph isn't hiding – he's right there, acting in the open, confidently eating meals in the dining carriage within spitting distance of the team.
The list of passengers going to Constantinople is as follows:
Aileen Macgregor: A Scottish suffragette reporter for The Woman's Herald. She's concerned about the treatment of Armenian Christians in the Ottoman Empire, as well as the treatment of women there. Things are about to get a lot worse for the Armenians, but until then, Macgregor feels like she has a chance to find out some answers and make a difference. She's a potential ally for the investigators.
Karla Minkoff: Companion to the Countess Razumosky and utterly loyal to her. Proficient in hand-to-hand combat and first aid. Unsurprisingly, she has no sympathy for anarchists or other political revolutionaries. She may be willing to help the team out if they get injured, assuming that it doesn't bring danger to the Countess.
Egorov: A quiet and polite man, servant to Count Razumosky. In actuality, he is a Czarist spy and is currently on a mission to Constantinople. He is on his way to assassinate Vizier Sedhi Bey, an advisor to the Sultan with anti-Russian tendencies. He is an expert at quiet murder. He's a potential ally if the Count is in danger. The book suggests that if the investigators find out his true plans they might find it despicable enough that they'll make an enemy of Egorov. I contest that they probably won't give two shits.
Kapok: Menkaph's servant and bodyguard, totally loyal to his master. He's been given instructions on how to proceed with the Blood Red Fez should something happen to Menkaph.
Scott Myers: An English dilettante with an interest in the occult. He quickly fell under Menkaph's influence and was persuaded to don the Fez. Now he's going through all the stages of Fez degeneration and is on his way to becoming another zombie.
Elizabeth Myers: The newly wed wife of Scott. Her Paris honeymoon has rapidly turned into a nightmare. Every day she sees her husband's health worsen and every night the Fez whispers to her. She spends the entire trip weeping and being shepherded by Menkaph, who plans to either sell her in Constantinople or put a Fez on her should something happen to Scott. He's tried to persuade her that Scott's merely ill and that she's being hysterical but she knows something fucked up is going on.
Hieronymous Menkaph: The man himself, posing as a spiritualist complete with opera cape and twirly moustache. He hopes that looking like he's about to tie a little girl to some train tracks will allay suspicion. More interestingly, he's very clearly and visibly wearing another Blood Red Fez, yet seems to be acting just fine. No mention of SAN loss for everyone in the dining carriage though.
Count Rudolph Razumosky: A Russian autocrat who is travelling with his wife in an attempt to win back what he believes are her waning affections. He is a snobby noble who does everything in his power to justify the Russian Revolution. If he finds out about Egorov's true nature, he will be extremely angry not because he disagrees with the Czar but because he does not think his servants should be allowed to keep secrets from him.
Countess Irina Raumosky: The Count's wife at half his age. She is just generally bored of her (wealthy, luxurious) station in life; even sleeping with the Count's cousin is losing its appeal. She does actually care about her husband and doesn't want to hurt him if she can avoid it. She's hoping the trip east will give her some perspective.
Pytor Trubosky: The Count's cousin and the Countess' secret lover. He's fond of both, but as an impoverished gentleman used to gambling and women, he's happy to use either of them to sustain his lifestyle. He's a social gadfly but the Count finds that amusing.
Henri Peeters: Our buddy is back!
Henri, alive and well, is the conductor for the Constantinople car. What he lacks in Dreamland demigod powers he makes up for in impeccable service. He has the same catchphrase that he uses in the Dreamlands. He immediately took a dislike to Menkaph for his untoward manner with Mrs. Myers. He will be very friendly towards the investigators and, with the right tip, will perform services beyond the call of duty.Next time: bon voyage! Again!
THE BLOOD RED FEZ – PART FOUR
Original SA postTHE BLOOD RED FEZ – PART FOUR
Bob Dylan – Leopard-Skin Pill-Box Hat
The book assumes Menkaph already knows about the investigators and their Fez, though there's no mention of how he might discover that if they get the drop on Burnham early. Having the investigators on the train is perfect for him; if he can somehow find a way to get rid of them, he'll have several Fezzes and The Whispering Fez. All he has to do is get to Constantinople in one piece. However, he's also kind of a dope; he's operating under the assumption that the team won't be willing to go ham on him but if they do he's not even remotely as strong as Mehmet. The team might tear him a new asshole long before Constantinople but that's fine, really. He's just a miniboss.
The book provides a comprehensive timetable of events for the trip.
Day One
The book assumes that the investigators take the next Orient Express departure on the Wednesday. They board the Paris-Strasbourg train at about 10:30PM. If they swing by the salon car before going to sleep, they can meet the other passengers. They'll also find Menkaph holding a furtive discussion with Burnham while Kapok glowers menacingly nearby.
At midnight, Scott Myers slips into the second stage of Fez degeneration and unconsciously summons Shadow Spawn of the Blood Red Fez. These look like vaguely humanoid shadows with distended limps, ragged wings and toothy maws. They stalk the length of the train and attack if provoked (SAN 1D3/1D8). They're immune to regular weapons but shining a lantern at them hurts them. Any injured Shadow Spawn can be followed back to the Myers' compartment.
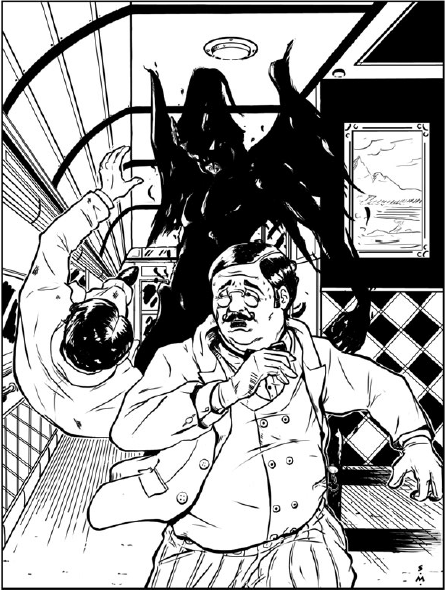
Day Two
If he's still alive, Burnham fucks off when the train stops at Stuttgart. At breakfast this morning, the investigators will see Menkaph wearing a Blood Red Fez but suffering none of the ill-effects they would expect. Him and Kapok sit with Mrs. Myers, who weeps the entire time. Menkaph will get quite defensive and protective if anyone tries to interfere with Myers, but he'll try not to make a scene. Myers flees back to her compartment before breakfast ends; anyone who follows her will see a couple more of Menkaph's thugs, one of them wearing yet another Fez and looking fine.
At lunch, Macgregor corners the investigators and asks for their thoughts on the Armenian Question. If they seem sympathetic she'll mention that she's concerned about Mrs. Myers and plans to check up on her; she'll be happy if they want to offer their support. They'll get a chance to speak to Mrs. Myers that afternoon in the salon car, who will tearfully explain her whole miserable experience and beg the team to help her husband. Kapok watches this all play out from the door to the salon car; smart investigators will switch to speaking French or communicate through writing to throw him off.
The best time to check Mr. Myers is during dinner that night, when Menkaph will be busy watching Mrs. Myers. Investigators will find the poor bastard laid up in bed and guarded by a Shadow Spawn, well on his way to the next stage of Fez degeneration. Casting Arrest Fez Decline is the only thing that can help him. If they think to look, investigators will find The Whispering Fez hidden under his pillow because as mentioned, Menkaph is a dope. Losing the tome at this point is disastrous for Menkaph and he will try to arrange negotiations for its return, probably using either of the Myers' as a hostage. The Whispering Fez is written in Persian and hieroglyphics and takes only 24 hours to study. It teaches a bevy of cool hat-based spells, letting the sorcerer use the Fez to control other Fez-wearers, tap them for magic or spawn entirely new Fezzes. It also teaches the ritual to destroy the Fez permanently, but more on that later.
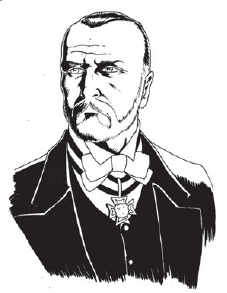
Just before 6:00PM, the train arrives in Vienna and the crew are to meet their contact, Baron von Hofler. They can see a young woman begging him not to get on the train, only to storm off when the Baron refuses. The Baron is a gaunt and serious man and an occultist of no small reputation. Regrettably, and unknown to almost everyone else, he's also going crazy. It's true that he wants to combat evil but thinks that studying the Mythos is the way to do it. To that end, he wants to understand the Fez and even experiment with its powers. He really does want to help the team, but sooner or later he's going to try and make someone wear the Fez.
Complicating this is his daughter Ilsa von Hofler, the woman who was arguing with him at the station. She knows that her father's starting to lose it and thinks that his research into the occult is to blame – which it kind of is, I guess. She disguises herself as an Oriental woman and immediately boards the train. She truly wants to save her father's life and to that end plans to knock him out with chloroform, drag him off the train and send him to get treated by Dr. Freud himself. She's not an ally of the team, at least initially; she suspects them to be yet more degenerate occultists and will not approach them unless they can prove otherwise.
There's about 12 hours between Vienna and Belgrade for all this shit to play out. If the investigators have given von Hofler The Whispering Fez, he'll try to get off here and make a break for Vienna. If he succeeds, it will be almost impossible to get it back. Alternatively, if Ilsa can knock him out before then, she slips away with him as soon as possible. Helping her is probably the best route for the investigators to get rid of the Baron, but she will not suffer any serious threats to her father's wellbeing.
At midnight, unless the investigators cast Arrest Fez Decline on him earlier, Mr. Myers slips into the third stage of Fez degeneration. The Shadow Spawn rise again and are more aggressive in their behaviour. As a Servant of the Fez, Mr. Myers is being controlled by Menkaph, who stops him from attacking Mrs. Myers but will happily turn him against the investigators. If he's killed, Menkaph will try to get a Fez on Mrs. Myers post-haste.
Next time: finally being done with trains for at least two scenarios!
THE BLOOD RED FEZ – PART FIVE
Original SA postTHE BLOOD RED FEZ – PART FIVE
Day Three
The Orient Express reaches Belgrade at 5:40AM. If Ilsa hasn't made her move yet she does now. It's best to remind the investigators that this is their last day on the train.
Sometime in the morning, the Countess and Minkoff approach the investigators. She confesses her affair with Trubosky and has finally decided to break it off with him. However, when she tried to tell him that he became sullen and threatening. She wants to try and talk to him again and would like the investigators to act as intermediaries. Persuade or Intimidate will put Trubosky in his place.
If Menkaph is still alive and has the tome, he pulls out all the stops that evening to get the investigators (assuming he knows it's them – there's an outside chance that they've totally avoided raising his suspicions this entire trip). He accelerates the degeneration of Myers and any Fez-wearing cultists to the Servant stage and throws them at the team. He's hoping to allay any suspicion of his actions and hopefully get the team in trouble. Fighting off the Servants might be tricky but if the team gets their hands on Menkaph he's fucked.
There's enough time in the morning before Constantinople for the team to enjoy a hearty celebratory breakfast.
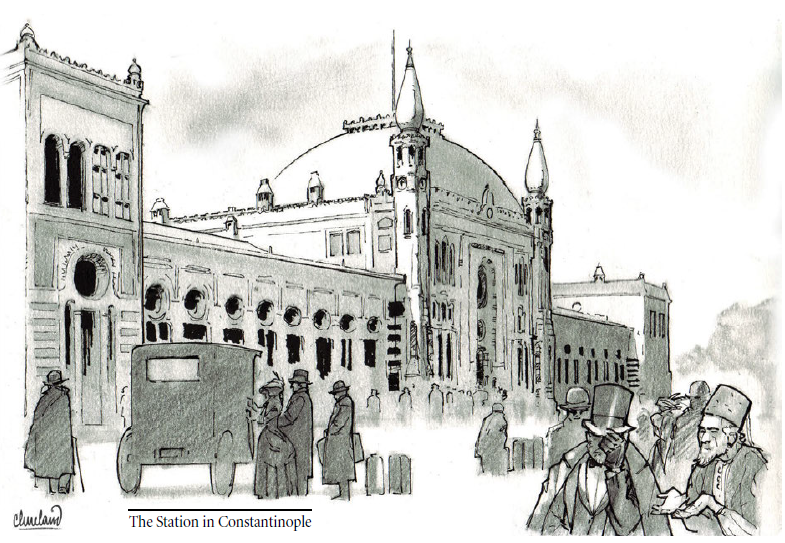
TLC – Hat 2 da Back
The investigators arrive in Constantinople, possibly needing medical attention. If Menkaph survived he disembarks here and gets back to his cult as soon as possible. If he died, it's assumed him or someone else managed to shoot a telegraph ahead at some point. The investigators are met at the station by two of Professor Demir's children, Toprak and Rana, who speak excellent English but are clearly distressed about something. If asked, they will explain that the Demir house was attacked last night; the attackers stabbed Demir and kidnapped their brother Barlas. Demir survived and is recovering, but insists on seeing the investigators right away.
The Demirs are very kind and hospitable hosts – if there's four or less investigators, Professor Demir insists that they stay in his house as his guests. If the team is still taking care of the Myers', they can put them up too. Both Demir and his wife Selin are friendly people and good conversationalists, but they're understandably keen to figure out how to get their son back.
Barlas has been kidnapped by the Children of the Fez. After the attack, Demir received a ransom note from the cult. The details vary depending on how well the investigators did on the train. If they got the tome, the cult wants it. If they got all of the Fezzes and the cult now has none, they want those too. If they got neither, they want the investigators out of Constantinople in the next 24 hours. The exchange is to be held at the docks, midnight on Sunday (it's assumed the investigators arrived Saturday morning). Demir knows there's no chance of the cult actually honouring their side of the deal, so there's only two ways to save his son: ambush them at the meeting or find out where he's being kept and rescue him.
If the team has The Whispering Fez, Demir can get right to work on translating the hieroglyphic portion and will be done in 12 hours. In addition, he's very familiar with the local cult scene and can fill in the investigators. He knows that Menkaph is/was a dope, and that the real power behind the cult is Nisra, the Daughter of Fate. He knows of Menkaph's prior alliance with Selim Makryat and knows that Makryat is a scary motherfucker who probably has nothing to do with this. He also knows that Nisra used to be the pupil of an occultist known only as the Frenchman – the man can be seen in his mansion in Stamboul, but he's got a bad reputation and Demir is unsure of how helpful he will be.
When Demir finishes his translation, he is shaken by what he discovers. The Fez is a component in a spell called Favourite of Yog-Sothoth (referred to in the text as 'Father of Sorcerers') that essentially works as a more efficient version of Call/Dismiss Yog-Sothoth – the more common version of the spell requires the construction of a stone tower to make it pop off. Calling an Outer God into Constantinople is probably not going to end well. He also discovers the spell Destroy the Fez – this requires putting on the Fez and challenging another Fez Controller, but would allow the investigators to destroy it permanently. If they have all the Fezzes in their possession right now, I guess the scenario could end here, if they don't feel like helping Demir.
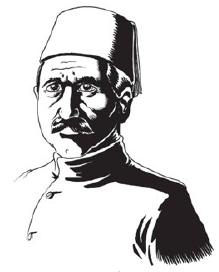
The Frenchman
There's a lot of potential avenues of research here, but visiting the Frenchman is the best. He is in fact none other than the Duc de Esseintes, prior to assuming his role as the Jigsaw Prince. At the moment he's enjoying being an occult bigshot and kicking it back in the luxury of Ottoman Constantinople. He's not interested enough in the investigators to cause them serious harm, and if they're sufficiently courteous and flattering to his ego he'll be willing to give them a meeting. If they fuck it up here he'll slip them some Dream Drug and give them a bad trip, but honestly, he's quite nice in this scenario. He helps the investigators mainly because he lives for drama and he sees Menkaph and Nisra as upstarts that could give him trouble.
He explains that Nisra was once his student, but abandoned him when the charlatan Menkaph presented the Blood Red Fez as a shortcut to power – she will soon discover that there are no shortcuts to any power worth having. He knows that Menkaph is/was a poser and that any power he possessed was stolen from Nisra. The Daughter of Fate has bewitched Prince Ramazan, a distant cousin to the Sultan who was exiled both for his ambition and degeneracy. He's also apparently syphilitic now, which the Frenchman thinks is hilarious. The Children of the Fez are set up on the Island of Doomed Princes, the 10th and most distant of the Princes' Islands. He also knows that as well as being a sorceress, she has a fearsome bodyguard in the form of a fierce Black Eunuch, the colour of the skin being an important distinction where eunuchs are concerned.
Oh, and because he's That Bitch, des Esseintes sends messengers out to Nisra and Makryat after the meeting, informing them of everything. Canny investigators who stick around outside his mansion can see this happening. This also lets investigators track down Selim Makryat and the Brotherhood of Skin to their current base in Scutari. This is before the cult has really come into power and as such they're a lot more subtle. Getting a meeting with Selim will be difficult.
If they pull it off, Selim will not venture any help or information unless they make it clear they oppose Nisra; as well as her being a rival, Selim doesn't like the idea of a woman possessing occult power. In this case, he can tell them about her base on the Island of Doomed Princes and give details about her cult, which numbers fifty strong. A young boy is present at the meeting, silently listening to every word. If anyone tries to study him he looks directly at them until they turn away. This is Mehmet.
If the investigators are tempted to try and nip the Brotherhood of the Skin in the bud here, they will probably die.
Next time: the Island of Domed Hats!
THE BLOOD RED FEZ – PART SIX
Original SA postTHE BLOOD RED FEZ – PART SIX
Robin Thicke – Ain't No Hat 4 That (ugh)
There's a few other avenues of inquiry for the investigators to pursue, but honestly none of them are that helpful and by the time they've spoken to Makryat they've learned just about everything they can. Also, this scenario write-up has been going on long enough and I'm keen to bring it to a close. It's kind of a shame; the book puts a lot of effort into describing Ottoman Constantinople and making it an interesting place to go on adventures, but ultimately there's no reason for the investigators to see most of it. Anyway.
A neat thing about the climax of this scenario is that unlike pretty much every other Horrient scenario this one is uh, designed well. Instead of giving you a script and a railroad, the book tells you what everyone's plans are and how the investigators might find out about them. The rest is up to you. This is apparently very similar to the structuring of Masks of Nyarlathotep (this scenario was written by Geoff Gillan, who worked on that) which makes me very excited for the remake that's supposed to come out this year.
The first thing that needs to be handled is saving Barlas. The exchange is to take place at the Kasim Pasha docks. Ten cultists escort Barlas, including Menkaph or Kapok if either of them survived the train. They're carrying pistols and yatagans and two of them will be Fez Servants, assuming the cult kept at least one Fez. They take a steamer to the docks from the Island of Doomed Princes. The exchange takes place in a seedy shipyard; the cultists demand whatever they wanted in the note they blow Barlas' brains out and attack the investigators. There's an irritating absence of a map for the shipyard, so the keeper will have to whip something up.
The team should have a rough idea by now of where they're coming in from, so one option is to try to intercept the cultists on their way to Kasim Pasha. Demir knows a brave and cunning fisherman named Nine-Fingered Abdullah; Demir once saved his life and Abdullah and his crew are down to mix it up with the cultists. Whether the fight happens at the shipyard or on the water, there'll be a few rounds of combat before the navy sends out marines to investigate.
Oh shit I only just remembered Men Without Hats
A bigger concern for the team might be Nisra. If she gets her hands on a Fez and the tome, she will work as fast as she can to uncover its secrets and cast Favourite of Yog-Sothoth. The investigators will probably have to launch an attack on the island to stop the ritual. Abdullah is willing to drop them off.
The Island of Doomed Princes is small and practically deserted. There's no real dock and the only proper structure is a crumbling stone tower in the middle of the island, the remains of what might have once been a sentry tower. The first level of the tower is living quarters for the cultists and there's usually around 10 of them here at any time, armed with yatagans and a few rifles. If a big ritual is going to be cast, the number swells to 25.
Nisra, Prince Ramazan, Barlas and the eunuch Ulug can be found on the second floor of the tower. Ulug sleeps downstairs, but spends most of his time on the top floor, guarding the Prince. Nisra spends most of her time here in the opulent boudoir, studying her formidable occult library. She still dresses like a harem girl and has a playful and teasing manner that hides her shrewd intellect and total lack of empathy. She wants to summon Yog-Sothoth, become a sorceress supreme and take over the Eastern Mediterranean. She lacks much combat ability and primarily relies on Ulug and her cultists to protect her; if cornered, she'll try to confuse and manipulate the investigators until she can stab one of them and get away.
Prince Ramazan can be found in an elaborate gilded cage in a corner of the boudoir. He is covered in excrement and syphilis sores, but has been enchanted by Nisra to believe that he is enjoying the manifold pleasures of her harem. If someone slaps some sense into him, he will go insane when he understands the reality of his situation. Barlas is chained to a wall nearby and fares much better, having only been drugged with hashish to render him docile.
If Nisra has what she needs to cast the ritual, she waits until nightfall. She will have her two dozen armed cultists guarding her while she cuts Ramazan's throat and makes the call to Yog-Sothoth. Killing Ramazan doesn't prevent the spell – the actual wording of Favourite of Yog-Sothoth allows for any human sacrifice, not just a prince, but it might be cooler to ignore that. Going in guns blazing and killing Nisra is certainly one way to stop the cult, at least temporarily.
Naturally, the best thing to do is cast Destroy the Fez. If the investigators try this, Nisra may even force her cultists to hold back, looking forward to an opportunity to crush her opponent through will alone. Casting the spell requires the caster to be wearing a Fez and to make eye contact with a Fez Controller. It then costs 15 POW along with three rounds of concentration as the caster makes an opposed POW roll against the Controller. If successful, they become the new Fez Controller and can elect to destroy every Fez – anyone wearing a Fez at this time must make a Hard POW roll to tear it off their heads before it explodes, costing the caster 1D10 SAN. The Controller's Fez deflates and melts into a red paste that permanently scars them.
It's possible to cast Destroy the Fez even up to the point that Nisra starts her ritual. However, fumbling the roll means Yog-Sothoth immediately appears in this world, with the attendant 1D10/1D100 SAN cost for everyone who witnesses this. All Fezzes will be destroyed as a result of this intrusion and anyone wearing a Fez will be driven totally insane. The Controller at this point can opt to sacrifice all of their POW to dismiss Yog-Sothoth – the gate closes and they slump lifelessly to the ground.
The Thin Line Between Love And Hat
Investigators receive 1D4 SAN for saving the Myers and 1D4 SAN for saving Barlas. Thwarting the Children of the Fez nets 1D6 SAN, destroying the Blood Red Fez itself is worth 1D10 SAN. Survivors can return to London and enjoy the endless gratitude of Professor Smith.
As a result of the team's actions, the Children of the Fez fall apart. The Brotherhood of the Skin grows in power and Selim soon claims the Red Mosque. The Duc de Esseintes withdraws to Lausanne to continue his studies. If he survived the trip, Henri Peeters finally meets his end a few years from now while saving passengers from a train fire – but of course, his story is only just beginning.
Next time: Dark Ages!
THE DARK CRUSADER – PART ONE
Original SA postTHE DARK CRUSADER – PART ONE
In which Frankish knights on the Fourth Crusade at the Sack of Constantinople hunt down and put an end to the madman Sedefkar and his infernal simulacrum, only to unleash a new evil upon the ages to come.
Background
A little mood music.
The Fourth Crusade! It's going swell. Negotiations have collapsed and the resistance of Constantinople has been crushed. Hordes of Latin invaders now roam the city, looting and pillaging to their hearts' desires. Unbeknownst to them, they are being affected by the baleful influence of a dark god, the Skinless One. Concealed in his tower, the mad sorcerer Sedefkar prepares the way for his unholy deity to enter this world, hoping to earn his favour and become an eternal avatar of the Skin.
At the same time, a Venetian cult called the Unburdened Flesh are working among the would-be crusaders. They too worship the Skinless One and covet the legendary artefacts that they know to be in Sedefkar's possession. Nor are they the only ones to covet the Simulacrum…
This is a really kick-ass brutal adventure that caters to what could laughably be called my aesthetic sensibilities. It's very distinctly un-Call of Cthulhu in that rather than being about a series of careful investigations, it's mostly about kicking ass and taking names. Admittedly, some of the fights are quite brutal and bring a high chance of PC fatality, but this might also be the only CoC scenario where the PCs get to fight a real-ass no-shit dragon. This scenario is unlocked by finding The Devil's Simulare manuscript in Venice and if you want to run it, your players might enjoy the opportunity to really hack and slash as badass knights for a while instead of futzing around as investigators.
One problem: the premades for this scenario have been built using the Cthulhu: Dark Ages book but details for the new skills listed haven't been printed in this book. I mean, I can kinda figure out what they do, but it would have been nice if they'd taken the time to include proper descriptions of Other Kingdoms and Status.
For this scenario, the 'investigators' are knights and other servants of the Frankish lord Count Baldwin of Flanders. They include:
- Gilles de la Grave, a Frankish knight and a member of the Cathar heresy. His father Hubert declared that the Catharists would need relics to protect themselves in the future and swore to acquire them, but died only two years later. Gilles hopes to fulfil his oath to the church.
- Brother David, a monk of the Cistercian order that accompanied the Fourth Crusade. Like many Cistercians, David's seen his fair share of action and is no slouch in a fight. He's a pious man, but believes that the end justifies the means and thinks the occult should be studied and understood to combat it.
- Andre of Troyes, a Frankish knight and the son of a crusader. He absolutely believes in the church and the high ideals of knighthood. As such, the past couple of days have been rough for him. He is totally loyal to Count Baldwin but watching his fellow knights burn churches understandably disturbs him.
- Renaud of Flanders, a Frankish knight and the oldest of the knights. He has served Count Baldwin his entire life and is a veteran of many battles. He's a cynical bastard who's mostly here for the loot, but he's also a skilled warrior and will do whatever it takes to get his fellows through the storm.
- Martinus de L'Isles, the youngest of the Frankish knights. At 19 years of age, this is his first campaign and most of his expertise surrounds the skills needed in a small rural holding. He is simple and naive but strongly distrusts the Venetians, who he blames for his uncle's death in the siege of Zara.
- Eloise of Flanders, handmaiden to Count Baldwin's wife Marie de Champagne. As well as being a trusted handmaiden she is a skilled spy, using her social status to gather information. Constantinople is a dangerous place and Eloise is trying to find out everything she can to keep her mistress safe.
MY DESCENT IS THE STORY OF EVERYMAN
There's some advice offered if you want to run a little prologue with the knights among those breaking the siege – just something to awe the players and introduce them to the scenario. Otherwise, the scenario begins on the second day of the Sack of Constantinople, with the party summoned to Blachernae Palace for a private audience with Count Baldwin. The streets are still utter chaos, with the majority of soldiers still rioting uncontrolled.
Baldwin greets them warmly but gets straight to the point. He has heard that a cult of Venetian infernalists have wrought foul magics to bring down the evil that plagues the city. The Count believes that at the end of the day, what happens in the Crusade stays in the Crusade, but the fact that even his own men have given themselves to debauchery and slaughter suggests truth to the rumour. The knights are to venture out into the city, uncover the truth, destroy any practitioners of dark magic and bring any relics back for safekeeping. Baldwin's occult consultant is a leper monk named Brother Merovac; he will study anything mysterious and can be consulted by the knights for guidance.
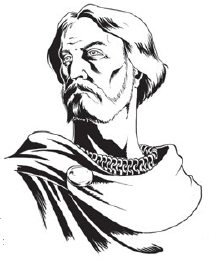
Their first lead is a Venetian priest who is currently being held in the Northern Basilica at the Forum of Theodosius. He was rescued by a pack of masked heretics and was the first to speak of the cult. The knights must try to keep their mission secret, as Frankish-Venetian relations are currently on a knife-edge. If the heretics prove to be a problem, they should be put down but ideally off the main streets. It would also be good if the knights could find out what role the Doge plays in all this, if any.
In addition, he's heard scattered reports of a monster that the Byzantines have let loose to hunt the Franks. If the knights see anything like that, killing it would be appreciated.
Next time: More eye shenanigans!
THE DARK CRUSADER – PART TWO
Original SA postTHE DARK CRUSADER – PART TWO
A Funny Thing Happened On The Way To The Forum
The knights mount up and head off to the basilica. Along the way, they can witness any number of wild war crimes; the crusaders have been ordered to pass loot along to the common purse and not to harm the local women, two orders they are studiously ignoring. The crusaders seemed to be whipped into a frenzy, far beyond anything the knights saw at the breaking of Zara. Seeing the men of God at work calls for SAN 0/1.
Along the way, they pass the entrance to one of Constantinople's many underground cisterns. As they do, they see what appears to be another Frankish knight dragged away down the cistern stairs. Anyone who follows will see him getting stabbed – but if they go down in the cistern proper, they will realise too late that it was a trap. Warriors of the dreaded Varangian Guard leap out from their hiding places and attack the knights! This encounter is designed to introduce the players to fighting with their new characters and to foreshadow the cisterns. If the Varangians find themselves over-matched, they soon flee deeper into the cistern system.
Just south of the cistern, the knights run into a pack of drunken Frankish men-at-arms. They're raving about a monster that allegedly attacked them, destroying the house they had claimed and eating three of their fellows. Afterwards, it either flew away or just totally vanished. None of them can agree on what it looked like.

What An Eyesore
The priest Padre Agostino is being kept in a cage in the basilica's crypt, guarded by four knights. None of them are particularly enjoying this job, since they believe that the priest is cursed. If asked, they describe the rescue of the priest from the heretics; one of them was killed and was found to have a tattoo on his left bicep depicting a whip with five tails and quirts.
Agostino isn't in a good way. He's wearing an eye patch and ragged ceremonial garb. He's clutching his head and rocking back and forth in the corner, chanting that he 'must keep them back'. He appears to be in quite a lot of pain. Fortunately, he's lucid enough that he can tell the party what happened to him. He knows that the men who attacked him are cultists of the Unburdened Flesh, and that they may have influenced the Doge's decision to attack Constantinople. They are seeking the Devil's Simulare, an ancient satanic artefact that allows its owner to wear the skins of others as disguises, as well as summon a powerful devil from Hell.
Agostino had heard of the cult but was shocked to find them at work here. A Venetian knight by the name of Ramardi had the priests scouring the city in search of an artefact supposedly resembling a suit of armour made of ceramic. He was also looking for a Latin ritual that he believed the Byzantines owned, as ancient enemies of the cult's forebears. Agostino did find a copy of the ritual in a hidden chest in the Church of St. Mokius, but knowing that the cult would have him searched, he hid it in a recess beneath a statue of the Virgin – surely no Christian would be able to bring themselves to destroy such a thing. Unfortunately, the cult found out, torturing him and taking one of his eyes before the Franks drove them off. Not knowing who to trust, he's sided with Baldwin. He believes the cult is probably still hanging around the church waiting for someone to come for the ritual.
After he's finished his speech, he announces that he is done and has no more energy to hold them back. He commends them on their holy mission and begs them to destroy this terrible evil. Suddenly, he tears off his eyepatch, revealing a swollen red eye bulging out of the socket. He gibbers, 'I see you' before howling with laughter. The eye explodes and takes much of his head with it, showing everything nearby with yellow slime (SAN 0/1D4).
This is, of course, The Accursed Eye from the Repossession scenario. This means that yes, the High Priest of the Unburdened Flesh now knows the faces of the knights, though the spell does not allow the caster to eavesdrop conversations. In addition, anyone who was close enough to get slimed gets a Hard CON roll in secret – failing means that their eye becomes itchy and inflamed, 24 short hours before it explodes out of their head. Even worse, anyone who fails an opposed POW roll against the sorcerer will find the effects of the spell to be contagious. Better find him quick!
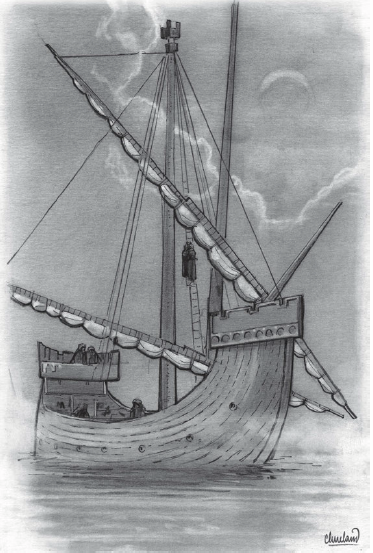
Something About This Guy Seems So Familiar
If the knights go back to Baldwin, he tells them to pass their findings along to Brother Merovac to see what he makes of it. Merovac is a leper, AKA a sufferer of Hansen's disease in modern parlance, and like others who suffer the disease is more or less totally outcast from society. He can be found aboard the cargo ship Pestis, crewed entirely by lepers and slaves. No free sailors are willing to go anywhere near it, and the whole thing has a menacing aura as it sits alone in the water – it is not allowed to dock and the knights will have to take a rowboat out to it if they're feeling brave.
Merovac is a member of the Order of Saint Bartholomew, who was skinned in Turkey. Despite his appearance, he is unfalteringly courteous towards the knights and is eager to assist them however he can. He is familiar with the Unburdened Flesh, who worship the pagan deity called the Skinless One, but he insists that they're small potatoes compared to the real threat, Sedefkar. Sedefkar is a mad Seljuk Turk who is the current owner of the Simulare and who is hiding out somewhere in the city. Dealing with the Venetian cult is one thing, but Sedefkar must be found and killed to save the city. Merovac also gives advice on fighting someone who wears the Simulare: in a certain light and at a certain angle, the surface of the armour can be seen on the wearer. If struck with sufficient force, it will fall off and render that part of the wearer vulnerable.
Merovac is happy to translate any documents the knights bring him and just in general be a really useful guy.
Next time: slaying a fucking dragon!
THE DARK CRUSADER – PART THREE
Original SA postTHE DARK CRUSADER – PART THREE
You're On The Brute Squad
Before heading to the church, the knights have the opportunity to put a team together. They have enough clout that they can make Status rolls to try and round up some of Baldwin's men to help them – no easy feat, considering the general state of discipline among the crusaders at this point. 1D6 knights and 2D6 men-at-arms will tag along if preparations are made before sunset. After sunset, well, everyone's had a rich full day of looting and no-one's really in the mood for more fighting; a paltry 1D6 men-at-arms are all the knights can get.
The Church of St. Mokius is on the western side of the city by the outer wall, a part of town that's just been totally fucked by successive fires over the course of the siege. As they climb the Seventh Hill, the knights run into a pair of wild-eyed Frankish priests and a drunken prostitute. They're guarding an Orthodox priest who's hanging upside-down from the balcony of a burnt ruin by his heel. Several bodies, crusaders and Greeks, are strewn around the street. The priests explain that the man is actually a Byzantine sorcerer who has summoned a monster into the city that lusts for Latin blood. The crusaders were about to torture him when they were ambushed by his Greek allies; would the knights please protect the priests until reinforcements arrive?
The Orthodox priest is totally mad. He screams in Greek about 'the dragon' he summoned, which will rise from the water and devour the crusaders. The Frankish priests cite the fact that his beard hasn't fallen down as evidence that he's a sorcerer, but it's just matted with dried blood from the beating he got. The prostitute says that she did see the dragon, which looked like a giant snake crossed with a pony, but she is very drunk. The priests claim that they've never met her before, honest. The knights can do what they want, but no reinforcements are on the way.
As the knights approach the church, Listen detects someone sobbing nearby. A couple of Greek families are cowering in a nearby pile of rubble. The crying is coming from a little girl, who is injured. If the knights help them, her mother speaks a little Frankish and warns them that she's seen a large group of men swathed in black prowling around the church.
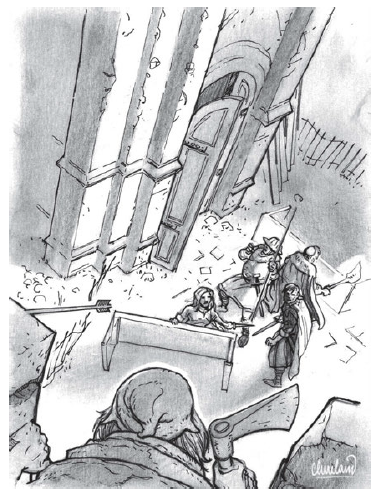
You Are The Brute Squad
Hiding in the ruins of a collapsed building next to the church are ten cultists of the Unburdened Flesh, led by High Priest Zorzi. He can be identified by the metal eyepatch he wears, behind which is Agostino's rotting eye. The cultists are looking for the ritual when the knights roll up; Zorzi recognises them from his visions and promises them a lifetime in Hell if they don't surrender. He casts Skinless Stigmata on one of the knights, a particularly blasphemous spell that tears a strip of flesh off the target at one of the sites of the Stigmata before sending the cultists to attack. He plans to take one knight prisoner and kill the rest. The cultists open up with a volley of crossbow fire before charging, but if the knights brought backup they'll try and hang back and stick to crossbows.
The best place to go is straight into the church; though it's been damaged, the heavy doors can still be sealed and the only other entrance is a narrow gap in the wall that their attackers can only trickle through. After a few cultists have been killed, they stop attacking, instead looking for a way to collapse the weakened wall. The knights now have five minutes before Ramardi turns up with reinforcements and ten before they collapse the wall and shit hits the fan.
Regrettably, there are no less than ten statues of the Virgin Mary in the church and moving them all takes at least three minutes. Spot Hidden detects the statue they're actually looking for, a tiny one that's part of a frieze of saints recessed in a wall. Underneath that one is the package left by Agostino. The package is wrapped in waxy paper which has a cryptic quarto written on it: He will come by the bloody tower at the behest of his favorite son and supplicant. And the city will run red with fire and blood. Then there's three folio pages on which, when studied, teaches the spell Detect Skinless One. There's also a small wax-sealed clay case which has very strong warnings against opening it written all over it. Inside the case is a sliver of rice paper-looking material about the size of a human head. This is a product of the spell Skin of the Skinless One and will immediately try to stick onto someone; unless cut from the body, this will turn the poor idiot into a thrall of the Skinless One in 12 hours.
As mentioned, Ramardi rolls up after five minutes with 20 more cultists. He's a violent and sadistic bully but tries to negotiate a surrender out of the knights. They're not so different, you know. They both want to find Sedefkar and end the madness. Why not work together? Ramardi makes some spectacular promises for anyone who sides with him which are of course all bullshit. More cultists (up to 50) are turning up every minute, so fighting them is certain death. Instead, there's a flight of stairs in the knave that lead down to the crypt. There's a hole in one of the walls here that opens into a long tunnel. The feel of airflow and the sound of lapping water in the distance suggest a much better escape route than fighting through an army of cultists.
Before they head underground, knights might notice the other significant frieze in the church, one that depicts St. George slaying the dragon.
Oh shit!
That crazy priest from before? Really was a sorcerer, really did help summon a dragon. It is the Anatolian Dragon, brought back into this world through dark magic, and it's set up shop in the cisterns. It was summoned to fight the crusaders but it's totally out of control; aside from that one dude, everyone else who summoned it has been eaten. Stat-wise, it's about as scary as you would expect a dragon to be, flying and well-armoured and fire-breathing and capable of killing two knights per round. In fact, it's probably a little too hardcore, especially if your players fuck around and don't make a concerted effort to kill it. But anyway.
The dragon is currently chilling in the cistern, hiding under the water like a crocodile. It will probably hear the knights coming down the tunnel or smell the blood on them, if they've been injured. If it does, it will immediately go on the attack when they get out of the tunnel. It prefers to keep a distance from the knights and fight partially in the water. Its physical attacks have a relatively low chance to hit, but it gets two per round and they come with a nasty +3D6DB. Its fire breath also does 3D6 damage, but knights can halve that by hiding behind a shield.
There's a shore along the outside edge of the cistern and if the knights make a break for it, they can get to a boat. There's a flight of stairs leading out of the cistern right across the other side from the tunnel entrance. The knights can flee, but the dragon will come for them later if it got a taste of their blood – not to mention running away from this fight just isn't very knightly, is it? Goading the dragon into fighting out of the water is the best approach, and it has a soft underbelly that makes it vulnerable to attacks from below. In fact, if it comes down on a knight from above and they make a stab with a sword, it turns the dragon's damage bonus back on itself.
The dragon flees when reduced to half-HP. If killed, it quickly turns disintegrates into a scorched mess but knights who roll Luck can swipe a dragon bone before that happens, a very suitable and potent relic.
Next time: the big man Sedefkar himself!
THE DARK CRUSADER – PART FOUR
Original SA postPurpleXVI posted:
Oh, yeah, the dragon bone as a "suitable and potent relic" sounds awesome. But what can it actually do?Can you use it as a mace to beat heads in?
Relics have all kinds of magical powers!
According to the Christians. So yeah, the real practical uses for it are 'gain clout with the church' or 'bonk someone on the head'. I guess it would make a good conversation piece?
THE DARK CRUSADER – PART FOUR
Big Red
On the way back to home base, the knights are confronted by a band of drunken Franks (men of Boniface rather than Baldwin) who claim that the Greeks have been picking off their men one-by-one thanks to some sorcerer in their employ – they've recovered the partial skin of one of them. A mad young knight claims he saw Devils fly out of the air and haul them away.
Now that they have the ritual, the knights have to decide who's gonna cast it. They can study the folio pages and learn it themselves if they feel like losing 1/1D6 SAN, but a safer bet is giving it to Merovac, who rolls Occult 80 to cast the spell. On a critical success, the caster receives a vision of Sedefkar's Blood Red Tower, which can be recognised by anyone who knows Constantinople or does some basic legwork. A regular success nets the same result, but Sedefkar senses the casting of the spell and sends his pack of Skin Devils to attack the party. These are much like the Beddows-Devil from The Fog Lifts, except Sedefkar's made them scarier by giving them little goat legs and horns. He has 12 of these on hand; whichever ones he doesn't send out now stay at the tower to guard him.
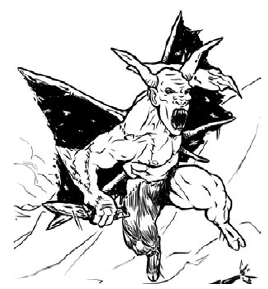
Sedefkar makes his first in-person appearance as the knights approach the tower. He's disguised as the Frankish knight Sir Gautmaris; if you ran the optional introduction that puts the party in the breaking of the siege, they know Gautmaris from there. He's accompanied by enough men-at-arms to make equal numbers with the party. Physically, the disguise is perfect, but knights may notice that there's something oddly Eastern in his mannerisms, as well as a certain vicious change in his demeanour unbecoming in a knight. If they've talked to Merovac about the Simulare, Hard Spot Hidden will notice the glint of ceramic under his skin. In any event, Gautmaris soon accuses the party of being traitors and sends his men to attack while he retreats to the Red Tower. If the knights can't think of a way to talk them down, they flee when half their number are slain.
The Blood Red Tower has seven floors and is almost entirely deserted, aside from whatever Skin Devils Sedefkar still has around. In his arrogance, Sedefkar has totally abandoned the idea of maintaining any kind of cult, since he believes that he has been chosen by the Skinless One. Every floor of the tower is full of macabre horrors and climbing it costs 2/1D6+2 SAN as a result.
FIRST FLOOR
The floor here is covered with fly-blown remains of Sedefkar and his Devils' victims. Their bones crunch underfoot.
SECOND FLOOR
Newer corpses litter this floor. Their blood and guts have been used to paint exhortations to the Skinless One on the walls.
THIRD FLOOR
Torsos hang from the ceiling on hooked chains. Their organs have been unspooled and arranged to create an elaborate pattern on the floor. Disturbing it summons a new Skin Devil.
FOURTH FLOOR
Skinned bodies and body parts have been stitched together to make abominations. These are very fresh, some of the parts still twitching and writhing.
FIFTH FLOOR
A feast hall for the Skin Devils. The table here is laid out with platters bearing body parts bound in skin like crude pies. They moan horribly.
SIXTH FLOOR
Flayed victims in various states of dismemberment dangle from the ceiling, bound in coarse rope. They are all still alive. A Skin Devil is here chewing on one of their legs.
On the seventh floor is Sedefkar and his altar to the Skinless One. The altar is basically a big floating trampoline, the skin of several still-living victims stitched together and stretched out across a metal hoop. The gibbering faces of the donors can be seen at the centre of the altar. The whole thing glows with an eerie blue-green light. Viewing this is worth SAN 1D3/1D8.
Sedefkar's up here and he's ready to rumble. He is absolutely not fucking around. Protected by the Simulare, he goes right for the knights with the Mims Sahis. He is a master with the knife and each successful attack can inflict the Screaming Cut: the victim must succeed on a Hard CON roll or immediately collapse on the ground, screaming in pain (success grants immunity for the rest of the fight). Fortunately, the light in the room just so happens to perfectly illuminate the Simulare pieces, the joins of which can be detected with Spot Hidden. A successful attack at Hard difficulty dislodges a piece of armour, with a followup attack at Regular difficulty knocking it clean off Sedefkar. Considering that the team also has numbers on him, it might be better to just try and wrestle him to the ground rather than trying to fence with him.
When he dies, Sedefkar's body melts into goo, leaving behind the Simulare and the Mims Sahis. His last words are a curse on the Crusade. His altar and his Skin Devils vanish. A search of the top floor turns up the Sedefkar Scrolls as well. As the party leaves the tower, whatever spell that possessed the crusaders before has dissipated, and many of them now weep in horror as they realise what they've done.
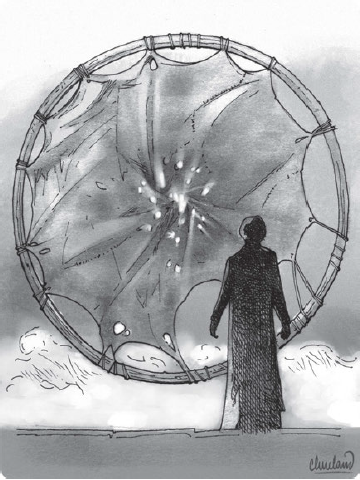
Oh, It's THIS Fucking Guy!
Count Baldwin is warm and congratulating at the party's return and listens in amazement to their tale. He gives each knight the kingly sum of 50 golden marks and can guarantee them one holy relic, should they so desire it. He sends the various Sedefkar artefacts to Merovac to be studied, but he finds himself quite taken with the Mims Sahis. He dubs it the Serpent's Claw and decides to keep it for himself; he hands it to a Croatian knight named Miho of Dubrovnik for safe-keeping back at Zara.
In the morning, a furious Baldwin summons the knights again. The Pestis has vanished and the knights that were guarding it have been drained of all blood. Merovac has betrayed him and stolen the Simulare! He gives the party a new quest: take a ship and scour the globe, never resting until they find and slay the creature they will soon know as Fenalik.
What happens to them next is between you and your players. Clearly, the knights are unsuccessful, since Fenalik does survive into the modern day. However, that doesn't necessarily mean they all perish at his hands. They may abandon what proves to be a fruitless search and return home. Some of them are drawn by their experience fighting evil to seek out Sir Miho, eventually joining him in forming the Order of the Noble Shield. If they do, their names appear in the annals of Order discovered in Bread And Stone.
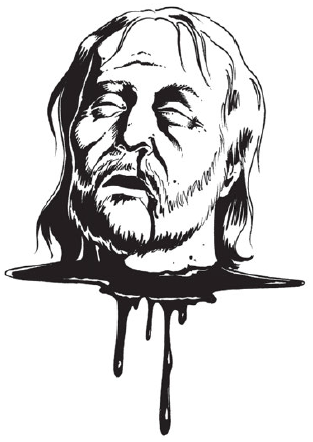
The rest is history. Count Baldwin is crowned Emperor of the Latin Empire of Byzantium, only to be captured and tortured to death by the Bulgars a year later. The Doge of Venice, an old man at the start of the campaign, dies in Constantinople and is buried under the Hagia Sophia. Marquis Boniface is killed in a Bulgarian ambush and his head made a gift to the Tsar. The Latin Empire collapses in less than sixty years.
Next time: Cthulhu Invictus!

SANGUIS OMNIA VINCET – PART ONE
Original SA postSANGUIS OMNIA VINCET – PART ONE
A detachment of Constantine’s veterans undertake one last mission to investigate a terrible plague in the province of Lydia, and experience betrayal that reaches beyond death itself.
Background
The year is 330 AD. Three years ago the Gothic barbarian, slave and absolute madman Unwen made his escape by murdering his owner's children and fleeing into the mountains. Already a few sandwiches short of a picnic, he followed a voice in his head that eventually lead him to a Voorish temple, abandoned and forgotten for millenia. The magic of that place infected Unwen and gave him the ability to read Voor, letting him decipher the inscriptions on the walls and teaching him dark eldritch rituals. At the feet of a statue of the Skinless One he found a beautiful knife, a holy weapon, and named it the Mims Sahis.
In a month-long ritual Unwen mutilated himself for the glory of the Skinless One, who answered his prayers and made him something no longer human. When he emerged from the cave he was Unwen Ga-Walith, the Chosen, a demigod on a mission. He returned to civilisation to free his fellow Goths and bring them to the temple, converting them to worship of the new god. They became the first human cult of the Skinless One, the Flayed.
In addition, Unwen used his powers to enchant the flayed skin of his lower jaw, transforming it into a bat-like undead creature. Named Mustrigg, it became the first of the Un-Rinna Dauthi, the Risen Dead. It flew back to civilisation and bit people in their sleep, infecting them with a deadly supernatural virus that the terrified villagers are calling the Valerian Plague. As Unwen continues his diabolical machinations, word of the plague has reached the new city of Constantinople, soon to become the capital of a new Rome. Constantine's best, the elite scouts of the Fortes Falcones Auxiliary Unit, are sent out to the provinces to investigate.
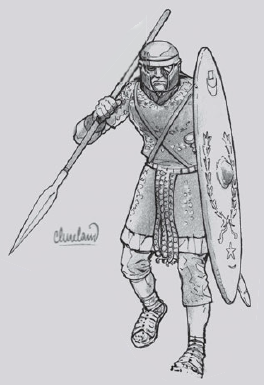
So this is another pretty rad scenario, thematically very similar to The Dark Crusader. Much like that scenario, there's comparatively little actual investigation in the modern CoC sense but a whole lot of fighting. The premade characters this time around are all old soldiers, a few short weeks away from retirement. They are:
- Asinius Savila, Roman citizen from the province of Hispania, who initially joined the Fortes Falcones as a Medicus and is an expert on disease. He hopes to use his commission to buy a house in the new capital and become a doctor, but he fears that the money will not be enough.
- Belasir of Tihama, formerly an Arabian pickpocket who enlisted to avoid jail time. Twenty years in the Fortes Falcones has made him a scout par excellence and a crackshot with the manuballista. He wasn't looking forward to retirement until he met the local butcher's daughter.
- Damanais of Savaria, a Thracian who lied to join the military at 14. He is a model soldier. He wants to stay on in the military as logistics personnel, but such positions are in high demand and the son of a former slave might not have the breeding or the clout to get the job.
- Emeric of the Suevi, the son of a Germanic barbarian who pushed him into joining the army to get Roman citizenship. Emeric loves being a soldier almost as much as he loves God. He idolises Constantine and has a Chi-Rho painted on his shield. He plans to go home to preach to the Suevi.
- Milonius of Kanmi, born in Carthage to a family of fishmongers. He has had a decorated military career and loves his fellow soldiers as brothers, but he looks forward to retirement. His soul has grown weary of bloodshed. He wants to marry and become a fisherman in the new capital, but lacks the funds.
- Galerius Evodis, an older soldier who was drill instructor for most of the scouts, earning him the nickname Senilis. He is the second in command of the Fortes Falcones and has been dodging retirement for years. He would love to buy a tavern in the new capital, but again, he lacks the funds to do so.
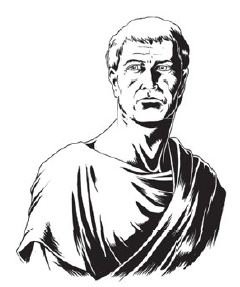
They are led by Tribuni Comites Tilius Corvus, a heroic soldier and a father to his men. He has always treated the scouts well and fought alongside them through thick and thin. He's been spending time with the wealthy Lady Eudocia lately, and plans to marry her as soon as his commission comes through. He is also, in case you forgot, fated to become Fenalik, that vampire that we all love and cherish. That's right, Sanguis Omnia Vincet is really Comte Fenalik's origin story. So a happy ending is distinctly unlikely for the characters this time around – how tragically ironic, when they were so close to retirement! That said, though Corvus plays a pivotal role in the story, it's never in an annoying way and there's plenty of opportunity for the players here to kick ass and take names.
Sanguis Omnia Vincet is activated by finding the documents from the Crusader's Tomb in Vinkovci. If you don't run that scenario, you're probably not running this one either – but since Bread And Stone is so good, why would you skip it? If you do play through this, your players will have some very useful knowledge on their side when the time comes to throw down with Fenalik.
Next time: what have the Romans ever done for us?